1. ترتیب کول
1.1 Unpacking the Camcorder
په احتیاط سره د بسته بندۍ څخه ټولې برخې لرې کړئ. ډاډ ترلاسه کړئ چې لاندې توکي شتون لري:
- JVC GR-25U VHS-C VideoMovie Camcorder (main unit)
- د AC بریښنا اډاپټر / چارجر
- Rechargeable Battery Pack (BN-V60U)
- RF Unit and A/V Cables
- Carrying Case (optional, may vary by package)
- د لارښود لارښود (دا سند)
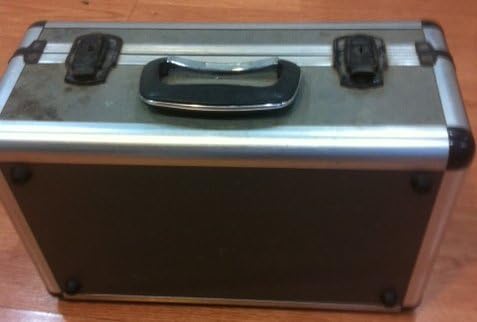
Image: A silver and black carrying case, designed to protect the camcorder and its accessories during transport and storage.

Image: Various camcorder accessories including the JVC RF unit, a rechargeable battery pack (BN-V60U), and several connecting cables for audio/video output.
1.2 د بیټرۍ چارج کول
Before initial use, fully charge the battery pack. Connect the AC power adapter to the battery charger port on the battery pack, then plug the adapter into a standard electrical outlet. The charging indicator light will illuminate. Charging typically takes several hours. Refer to the battery pack for specific charging times.

Image: The JVC AC power adapter, used for charging the camcorder's battery and powering the unit directly from a wall outlet.
1.3 د بیټرۍ داخلول
Once charged, slide the battery pack onto the designated battery compartment on the rear of the camcorder until it clicks securely into place. Ensure it is firmly attached to prevent accidental disconnection during use.
1.4 Inserting a VHS-C Cassette
- Open the cassette compartment cover, usually located on the top or side of the camcorder.
- Insert a VHS-C cassette with the tape window facing outwards and the arrow on the cassette pointing towards the camcorder.
- Gently push the cassette until it seats correctly.
- د کیسټ کمپارټمینټ پوښ په کلکه وتړئ تر هغه چې تړل کیږي.
۶. د کامکارډر چلول
2.1 بریښنا کول / بندول
To power on the camcorder, slide the POWER switch to the 'ON' position. The viewfinder or LCD screen will activate. To power off, slide the switch to 'OFF'.
۶.۱ اساسي ثبت کول
- Ensure a charged battery or AC adapter is connected and a VHS-C cassette is inserted.
- Open the LCD screen or extend the viewموندونکی.
- Point the camcorder at your subject.
- فشار ورکړئ ریکارډ button (usually red) to begin recording. The recording indicator will appear in the display.
- فشار ورکړئ ریکارډ د ثبت کولو بندولو لپاره بیا تڼۍ.
2.3 پلې بیک
بیا بیاview your recordings:
- Switch the camcorder to PLAY/VCR mode (if available, otherwise use the menu).
- د کارولو لوبه وکړئ, REWIND، او ګړندی مخکی د ټیپ د نیویګیټ کولو لپاره تڼۍ.
- مطبوعاتي ودروئ د لوبو پای ته رسولو لپاره.
۵.۱ د تلویزیون سره نښلول
تاسو کولی شئ view your recordings on a television using the supplied RF unit or A/V cables.
- Using the RF Unit: Connect the RF unit to the camcorder's A/V output and then to your TV's antenna/cable input. Tune your TV to the appropriate channel (usually channel 3 or 4).
- Using A/V Cables: Connect the yellow (video) and white/red (audio) cables from the camcorder's A/V output directly to the corresponding input jacks on your television. Select the correct A/V input on your TV.
2.5 د زوم فعالیت
د کارولو W (پراخ) او T (Tele) buttons or lever, typically located near the top of the camcorder, to zoom out or zoom in, respectively. The GR-25U features a 6x optical zoom.
2.6 د تمرکز تنظیم کول
The camcorder may feature an autofocus system. For manual focus, switch to لاسي تمرکز mode and rotate the focus ring on the lens until the image appears sharp in the viewfinder or on the LCD screen.
3. ساتنه
۵.۱ د کامکارډر پاکول
- د کامکارډر بهرنۍ برخه د نرم او وچ ټوکر سره پاک کړئ. د سختې خاورې لپاره، لږ څهampد اوبو سره ټوکر.
- Use a soft brush or air blower to remove dust from the lens. For smudges, use a lens cleaning cloth and solution specifically designed for optical lenses.
- Never use strong solvents like benzene or thinner, as they can damage the camcorder's finish.
3.2 د بیټرۍ پاملرنه
- د بیټرۍ د ژوند اوږدولو لپاره، د بیټرۍ په مکرر ډول د بشپړ چارج کولو څخه ډډه وکړئ.
- بیټرۍ په یخ او وچ ځای کې ذخیره کړئ کله چې نه کارول کیږي.
- If the camcorder will not be used for an extended period, remove the battery.
3.3 Tape Head Cleaning
Over time, tape heads can accumulate dirt, leading to poor picture or sound quality. Use a commercially available VHS-C head cleaning cassette periodically to maintain optimal performance. Follow the instructions provided with the cleaning cassette.
3.4 ذخیره کول
When storing the camcorder, ensure it is powered off and the battery is removed. Store it in its carrying case in a dry, dust-free environment away from extreme temperatures and direct sunlight.
4. ستونزه حل کول
This section addresses common issues you might encounter with your JVC GR-25U camcorder.
- ځواک نشته:
Ensure the battery is charged and correctly inserted, or the AC adapter is properly connected to a working power outlet. Check the power switch position. - نه ثبتول:
Verify that a VHS-C cassette is inserted and that the write-protect tab on the cassette is not set to 'SAVE' (red tab visible). Ensure the camcorder is in recording mode. - Poor Picture Quality (Playback):
This could indicate dirty video heads. Try using a head cleaning cassette. Also, check the condition of the VHS-C tape itself. - د ټیپ جام کول:
Do not force the tape. Power off the camcorder and try to gently remove the cassette. If it remains jammed, seek professional service. Avoid using damaged tapes. - د پلې بیک پرمهال هیڅ غږ نشته:
Check the volume settings on the camcorder and your television. Ensure audio cables are correctly connected if playing back through a TV. - Camcorder Does Not Respond:
Remove the battery and/or disconnect the AC adapter, wait a few minutes, then reconnect and try again. This can reset the internal system.
5. مشخصات
The following are key technical specifications for the JVC GR-25U VHS-C VideoMovie Camcorder:
| برانډ | JVC |
| د ماډل شمیره | GR-25U |
| د ویډیو نیول حل | 480p |
| د سکرین اندازه | ۷۸۷ انچه |
| ځانګړی ځانګړنه | د رڼا وزن |
| UPC | 012886409938 |
| د تولید کونکي برخې شمیره | GR-25U VHS-C |
| د بریښنا سرچینه | DC 9V (AC Adapter), DC 6V (Battery) |
| وزن | نږدې 800 ګرامه (1.8 پونډه) |
| د کیسټ ډول | VHS-C |
| لینس | f/1.2, 6x Zoom |
| لږترلږه روښانه کول | 3 لوکس |
| د عملیاتي حرارت درجه | له 0°C څخه تر 40°C (32°F څخه تر 104°F) |
Image: A plastic-covered sheet detailing the technical specifications of the JVC GR-25U camcorder, including video, audio, and general characteristics.
6. تضمین او ملاتړ
6.1 د تضمین معلومات
Warranty terms and conditions for the JVC GR-25U VHS-C VideoMovie Camcorder are typically provided at the time of purchase. Please refer to any warranty cards or documentation included with your original product packaging. For detailed information regarding warranty coverage, duration, and claims, please contact JVC customer service or visit their official webسایټ
6.2 د پیرودونکي ملاتړ
Should you require further assistance, technical support, or service for your camcorder, please contact JVC customer support. Contact information can usually be found on the manufacturer's website or in the original product documentation. When contacting support, please have your camcorder's model number (GR-25U) and serial number ready.