1. پیژندنه
This manual provides detailed instructions for the setup, operation, and maintenance of your QANBA Q2 PRO LED Arcade Joystick. Designed for an authentic arcade experience, this fightstick is compatible with PlayStation 3 (PS3) and PC platforms. Please read this manual thoroughly before use to ensure optimal performance and longevity of your device.
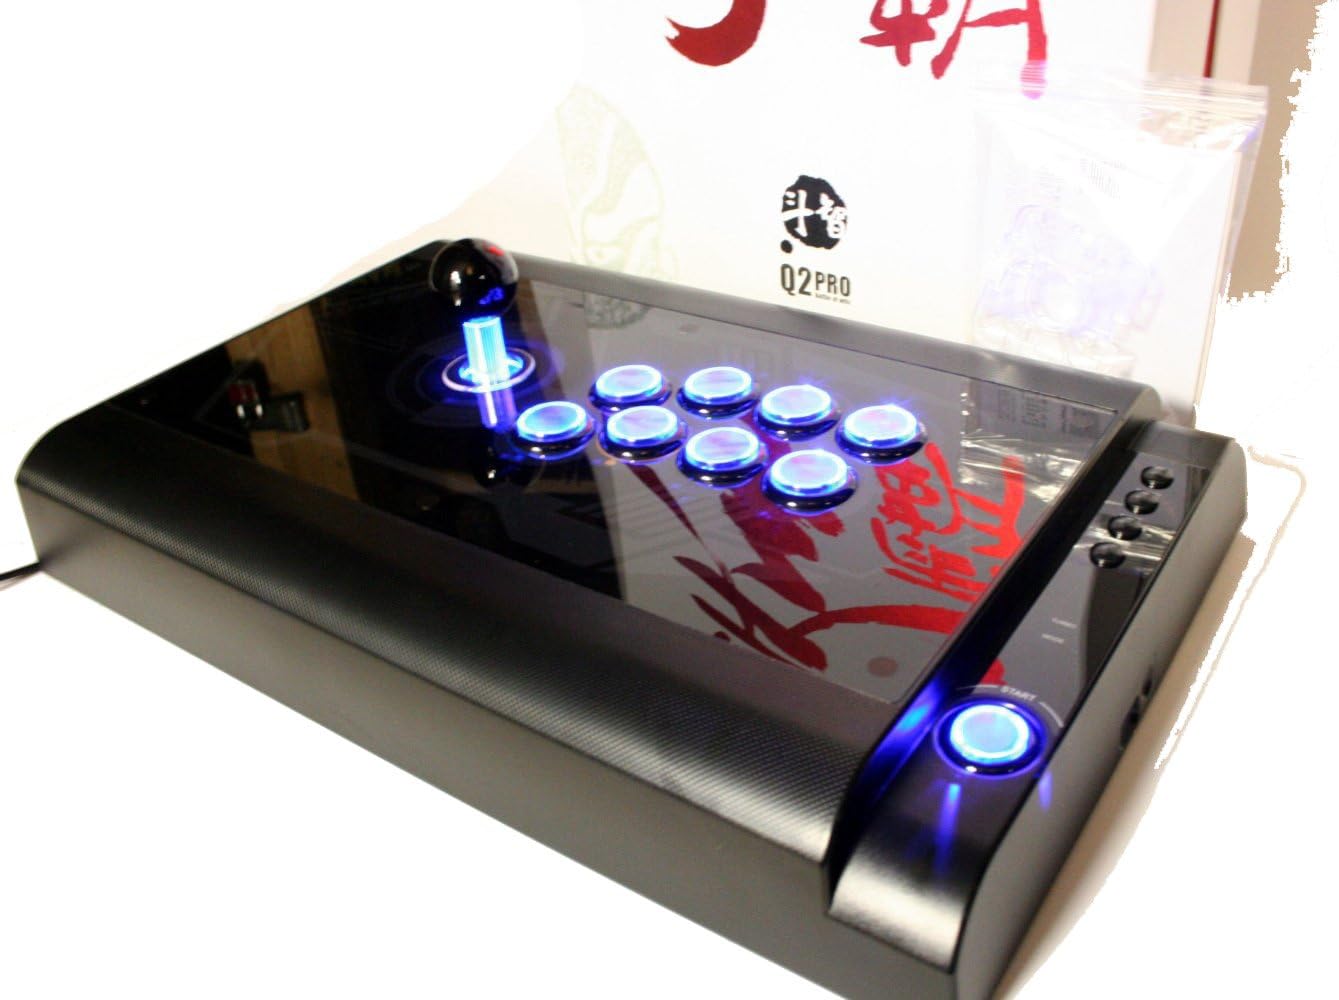
Image 1.1: The QANBA Q2 PRO LED Arcade Joystick with its signature blue LED lighting activated.
2. د بسته محتويات
ډاډ ترلاسه کړئ چې لاندې ټول لیست شوي توکي ستاسو په کڅوړه کې شتون لري:
- QANBA Q2 PRO LED Arcade Joystick
- USB Connection Cable (integrated or separate)
- د لارښود لارښود (دا سند)
- Spare parts (e.g., button caps, joystick restrictor gate - may vary by region/package)

Image 2.1: The QANBA Q2 PRO LED Arcade Joystick alongside its product box.
3. ځانګړتیاوې
The QANBA Q2 PRO LED Arcade Joystick offers several features designed to enhance your gaming experience:
- د LED روښانتیا: Buttons and joystick feature vibrant blue LED lighting for visual appeal.
- د څو پلیټ فارم مطابقت: Seamlessly switch between PlayStation 3 and PC.
- د لوړ کیفیت اجزا: Equipped with durable arcade-grade joystick and buttons for precise input.
- ارګونومیک ډیزاین: Comfortable layout for extended gaming sessions.
- قوي ساختمان: Built to withstand intense gameplay.

Image 3.1: The QANBA Q2 PRO LED Arcade Joystick demonstrating its illuminated buttons and joystick.
4. ترتیب کول
۴.۲ د پلې سټیشن ۴ (PS3) سره نښلول
- Ensure your PS3 console is powered off or in standby mode.
- Locate an available USB port on your PS3 console.
- Connect the USB cable from the QANBA Q2 PRO LED Arcade Joystick to the USB port on your PS3.
- Power on your PS3. The console should automatically detect the joystick.
- The joystick's LEDs will illuminate, indicating a successful connection.
4.2 د کمپیوټر سره نښلول
- ډاډ ترلاسه کړئ چې ستاسو کمپیوټر فعال دی.
- په خپل کمپیوټر کې یو موجود USB پورټ ومومئ.
- Connect the USB cable from the QANBA Q2 PRO LED Arcade Joystick to the USB port on your PC.
- Your operating system (e.g., Windows) will typically detect and install the necessary drivers automatically. This may take a few moments.
- Once drivers are installed, the joystick's LEDs will illuminate.
- You may need to configure the joystick within your game's control settings or through your operating system's game controller settings.
5. عملیاتي لارښوونې
The QANBA Q2 PRO LED Arcade Joystick features a standard arcade button layout and a responsive joystick for precise control.
5.1 بنسټیز کنټرولونه
- جوسټک: Used for directional input (Up, Down, Left, Right, and diagonals).
- د عمل تڼۍ: Typically arranged in an 8-button layout, corresponding to game actions (e.g., punch, kick, jump).
- د پیل/ټاکنې تڼۍ: Located on the side or top panel, used for pausing games, navigating menus, etc.
- PS Button (for PS3): Functions as the PlayStation button on a standard controller.
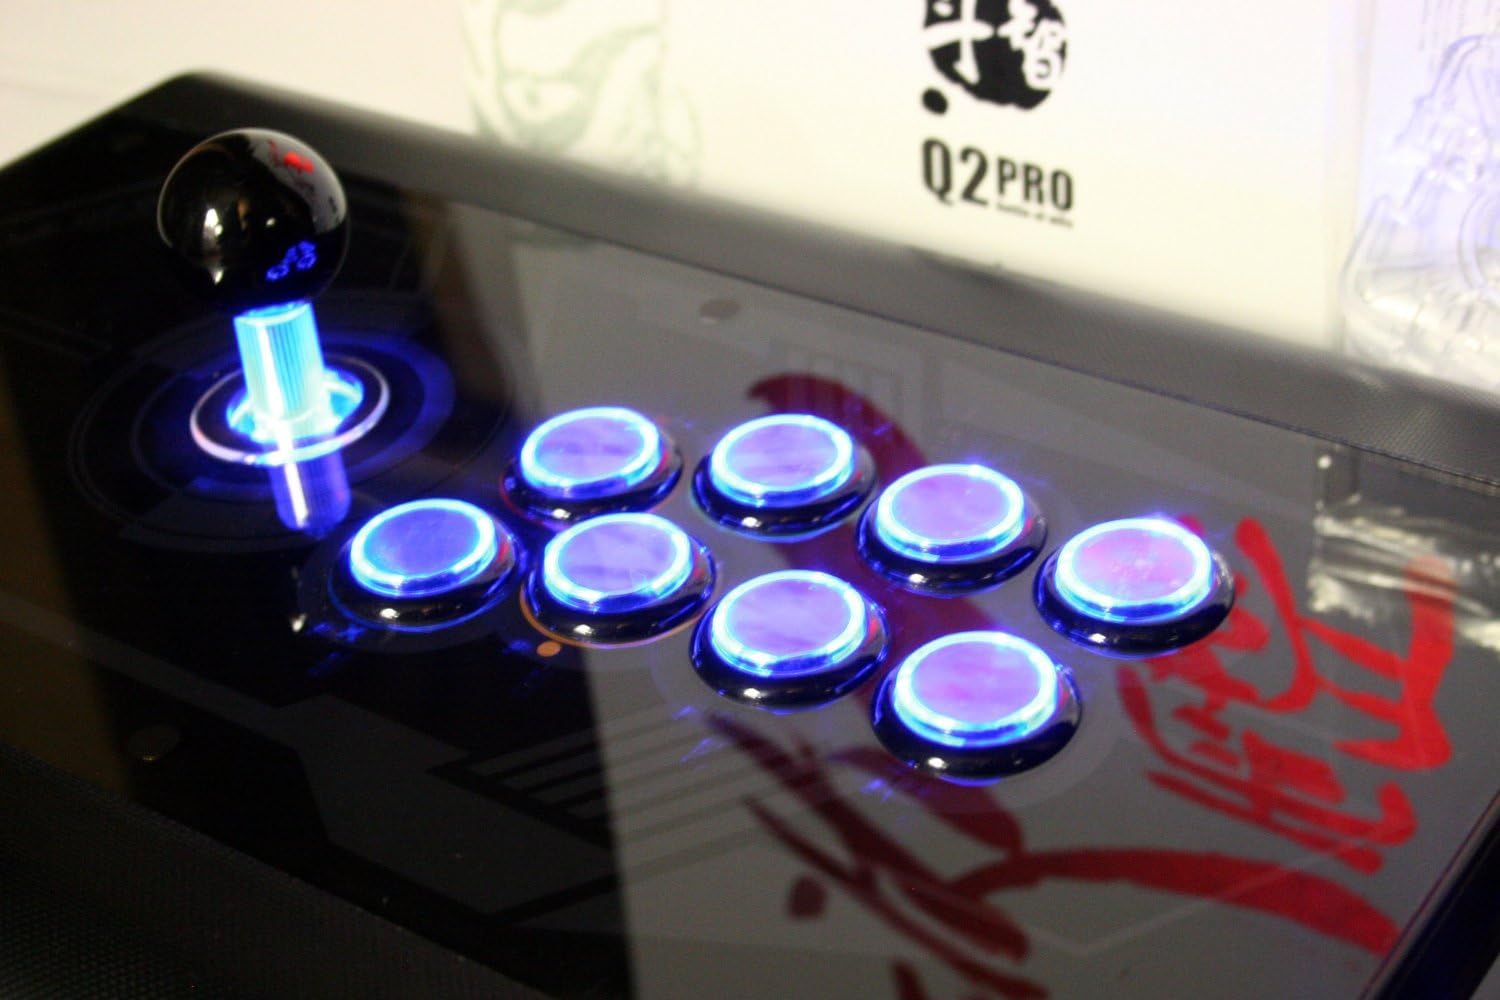
انځور ۸: یو مفصل view of the joystick and action buttons with their blue LED illumination.
5.2 LED Functionality
The blue LEDs on the joystick and buttons will automatically illuminate when the device is powered on and connected to a compatible system (PS3 or PC). There are no user-configurable settings for the LED lighting on this model.
5.3 Mode Switching (PS3/PC)
The QANBA Q2 PRO LED Arcade Joystick automatically detects the connected platform (PS3 or PC). No manual mode switching is required. Ensure the joystick is connected to the correct platform's USB port.
6. ساتنه
Proper maintenance ensures the longevity and performance of your arcade joystick.
- پاکول: Use a soft, dry cloth to wipe down the surface of the joystick. For stubborn marks, a slightly damp د نرم صابون سره ټوکر کارول کیدی شي، او بیا سمدلاسه وچ شي. د کثافاتو پاکوونکو یا محلولونو څخه ډډه وکړئ.
- ذخیره کول: Store the joystick in a cool, dry place away from direct sunlight and extreme temperatures. Protect it from dust when not in use.
- د کیبل پاملرنه: په USB کیبل کې له تیزو کږوالیو یا کنکونو څخه ډډه وکړئ. د منقطع کولو پر مهال کیبل په زور سره مه کشوئ.
7. ستونزه حل کول
If you encounter issues with your QANBA Q2 PRO LED Arcade Joystick, refer to the following common solutions:
| ستونزه | احتمالي حل |
|---|---|
| Joystick not recognized by PS3/PC. |
|
| Buttons or joystick not responding. |
|
| LEDs روښانه نه کوي. |
|
8. مشخصات
- ماډل: Q2 PRO LED
- مطابقت: PlayStation 3 (PS3), PC
- ارتباط: USB
- داخلول: 8-way joystick, 8 action buttons, Start/Select/PS buttons
- روښنايي: Blue LED illumination for joystick and buttons
- ابعاد او وزن: Refer to product packaging for specific measurements.
9. تضمین او ملاتړ
QANBA products are manufactured to high-quality standards. For information regarding warranty coverage, technical support, or replacement parts, please refer to the warranty card included with your product or visit the official QANBA webسایټ. د تضمین ادعاوو لپاره د پیرود ثبوت وساتئ.
Official QANBA Webسایټ: www.qanba.com (یادونه: دا یو ځای ساتونکی دی URL، مهرباني وکړئ د سم ملاتړ لینکونو لپاره د محصول اصلي اسنادو ته مراجعه وکړئ.)