پیژندنه
The Gator Frameworks GFW-UTL-MEDIATRAY2 is a heavy-duty adjustable media tray stand designed to provide a stable platform for various equipment. This includes laptops, projectors, production samplers, drum pad controllers, and small to medium keyboard controllers. Constructed with robust 1 3/8” steel tubing and a tripod design, it supports up to 45 lbs (20.4 kg) of equipment. The stand features a reversible 1.5mm steel tray with adjustable tilt and angle, and its height can be fine-tuned from 36” to 48” (91.4 cm to 121.9 cm). Adhesive EVA rubber pads are included to secure devices and prevent sliding. For added safety, a built-in safety pin and removable red rings on the rubber grip feet enhance stability and visibility. The stand's compact, collapsible design allows for easy transport and minimal storage space when not in use.
د بسته محتويات
- Heavy-Duty Adjustable Media Tray Stand (GFW-UTL-MEDIATRAY2)
- Reversible 1.5mm Steel Tray
- Adhesive EVA Rubber Pads
- VESA 100x100 Mounting Brackets and Hardware
- د خوندیتوب پن
تنظیم او مجلس
Follow these steps to assemble and set up your Gator Frameworks Media Tray Stand:
- د ټریپډ اساس خلاص کړئ: Carefully extend the legs of the tripod base until they are fully spread and stable. Ensure the red trim on the rubber feet is visible for added safety.
- لوړوالی تنظیم کړئ: Loosen the height adjustment knob on the main pole. Extend the pole to your desired height, between 36” and 48” (91.4 cm – 121.9 cm). Insert the safety pin through the designated hole to secure the height, then tighten the adjustment knob.
- ټری ضمیمه کړئ:
- For Flat Surface Use: Place the tray with the raised edges facing upwards onto the top of the stand pole. Secure it using the provided attachment mechanism.
- For VESA Mount Use: If mounting a monitor, flip the tray over so the flat side is up. Attach the VESA 100x100 mounting brackets to the monitor using the included hardware. Then, attach the monitor (with brackets) to the stand pole.
- Apply Rubber Pads: Peel the adhesive backing from the EVA rubber pads and strategically place them on the tray surface where your equipment will rest. This prevents slippage and protects your devices.
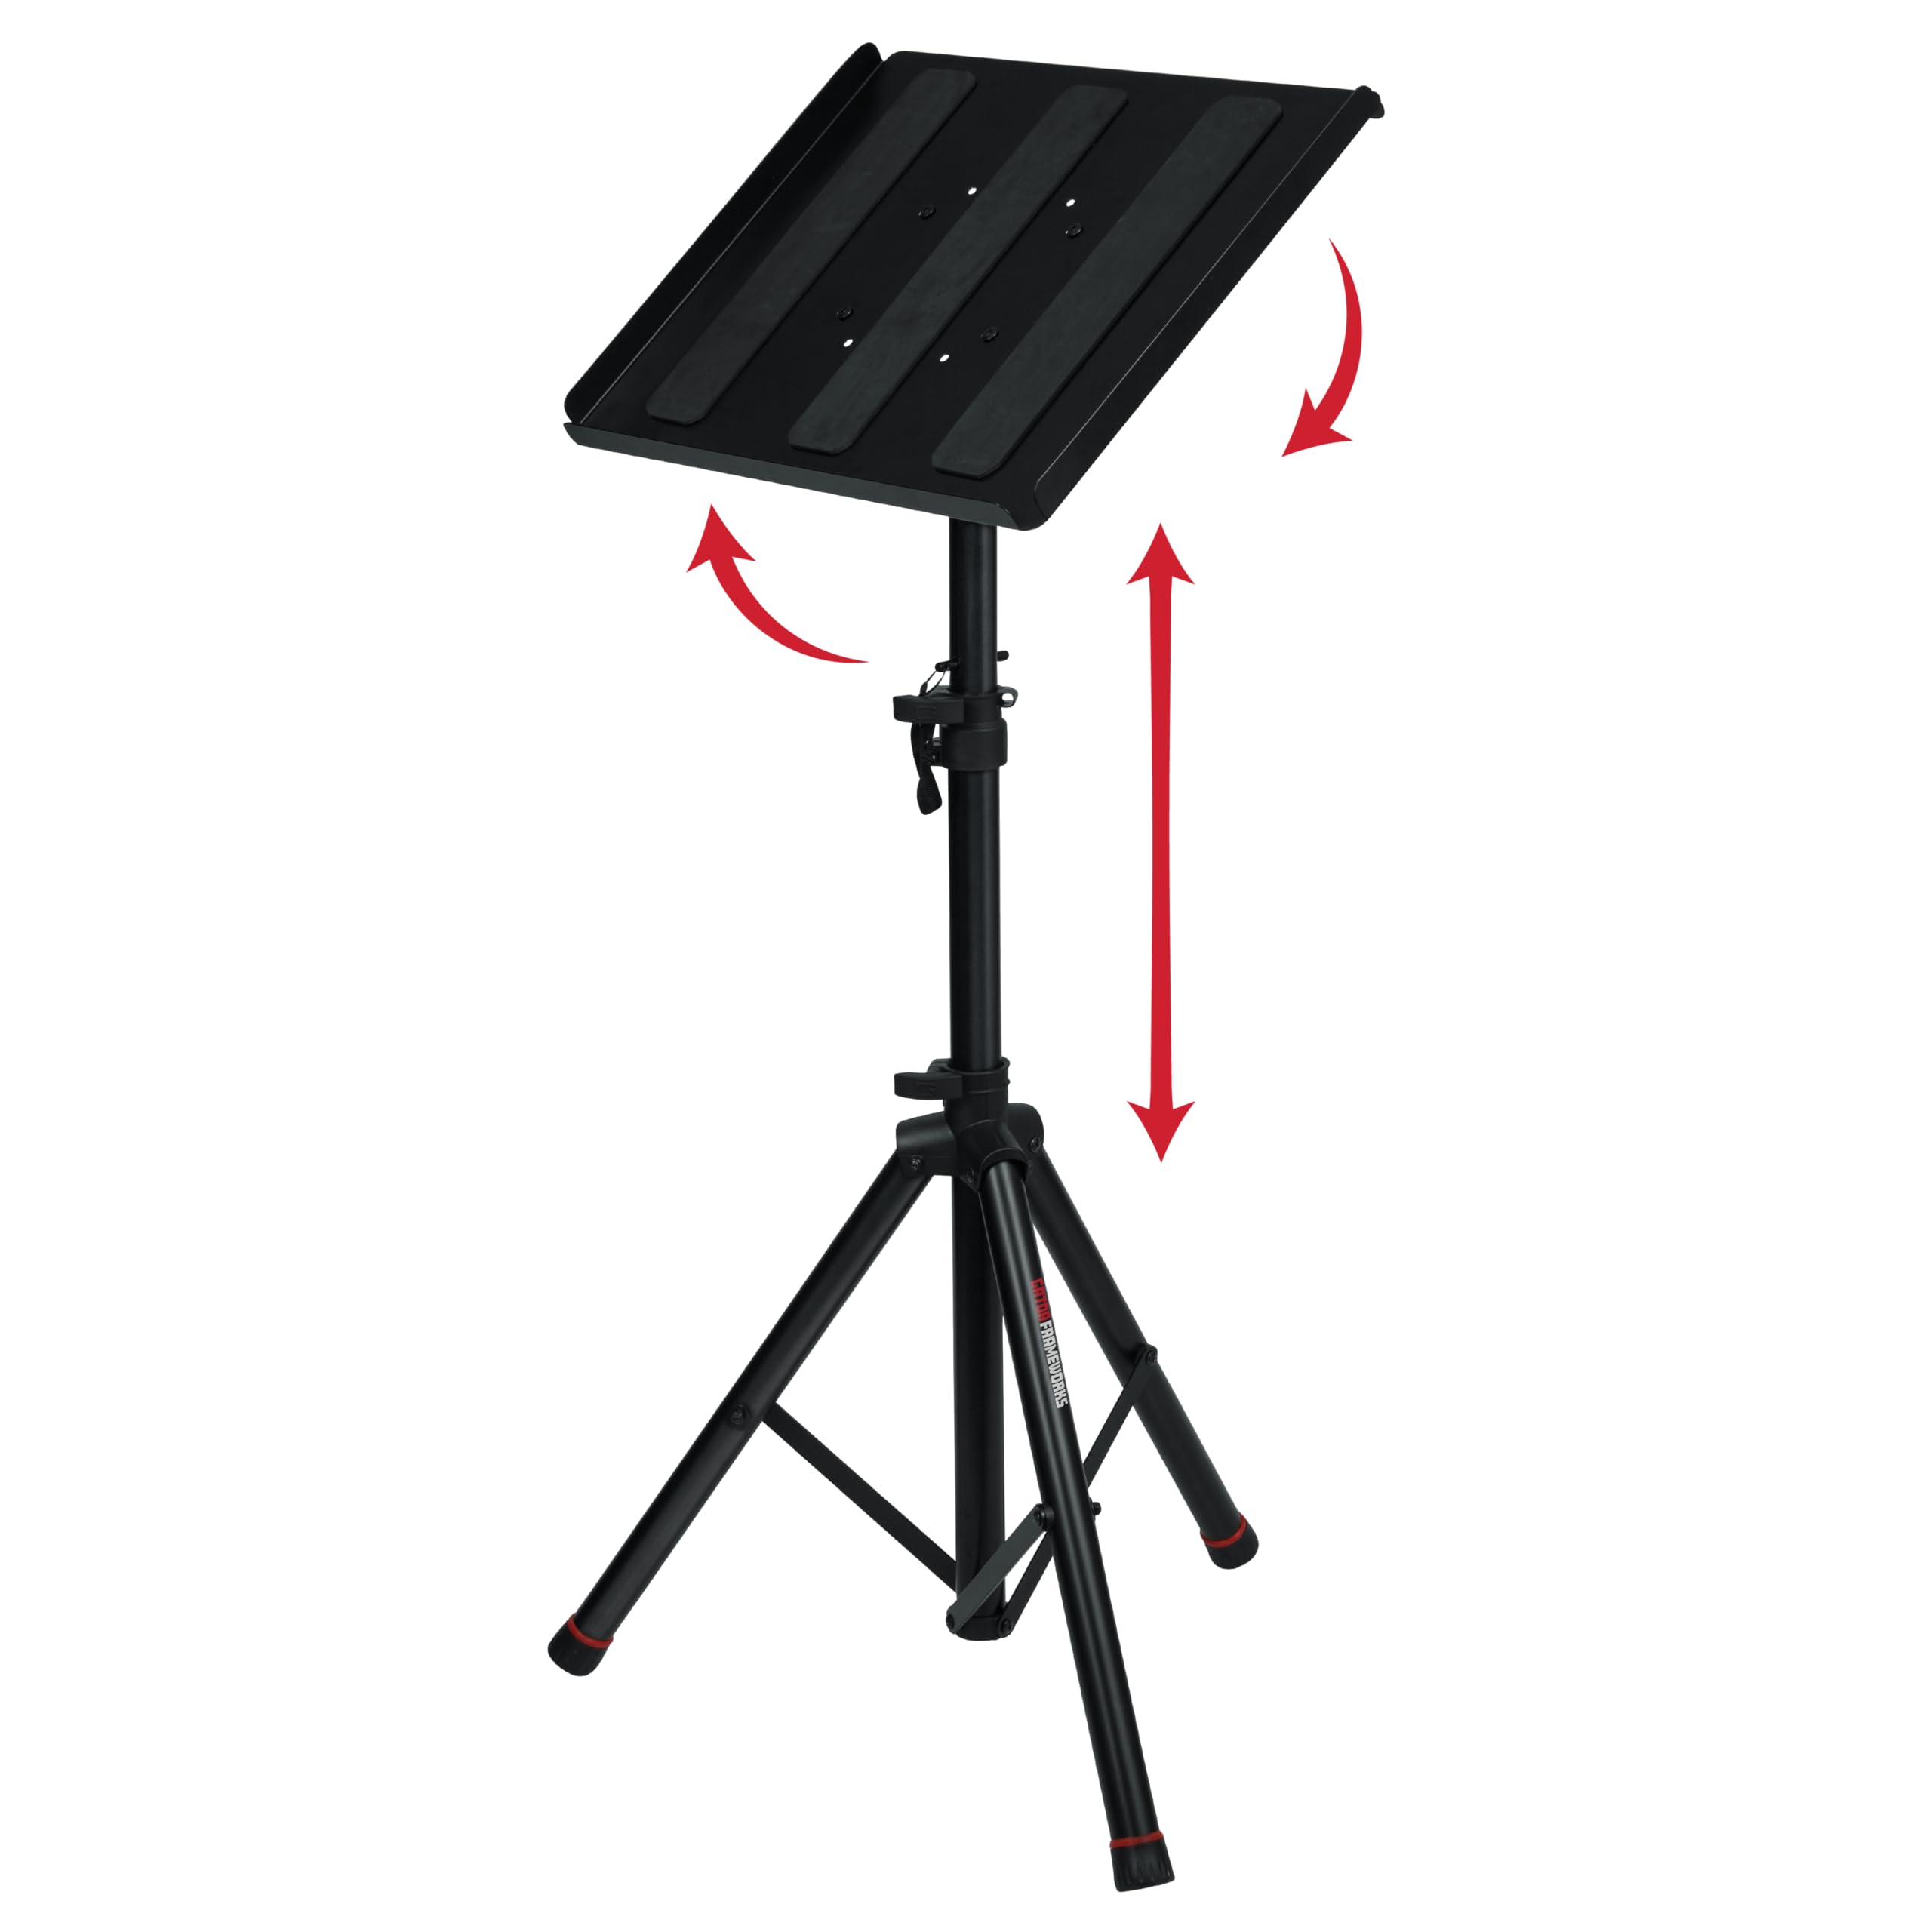
Image: The fully assembled Gator Frameworks GFW-UTL-MEDIATRAY2 stand with a laptop placed on its tray, demonstrating its primary use as a stable workstation.

Image: A diagram illustrating the dimensions of the media tray (19.25" x 15.75") and the adjustable height range (36-48"), along with its 45 lb weight capacity.
Video: An official product video demonstrating the assembly, features, and various applications of the Gator Frameworks Media Tray Stand, including its adjustability and versatility for different equipment.
عملیاتي لارښوونې
Using the Reversible Tray
The 1.5mm steel tray is reversible, offering two distinct configurations:
- Standard Use (Raised Edges Up): This configuration is ideal for securely holding items like laptops, projectors, or small instruments that do not require mounting. The 1-inch flanged edges prevent items from sliding off.
- VESA Mount Use (Flat Side Up): For attaching small monitors or screens, flip the tray so the flat side faces upwards. Use the included VESA 100x100 mounting brackets and hardware to secure your display.

Image: A laptop resting on the media tray, showcasing the raised edges that help secure non-mounted items and prevent them from sliding.

Image: A monitor attached to the stand using the VESA 100x100 mounting brackets, demonstrating the stand's capability for display purposes.
Adjusting Tilt and Angle
The tray's tilt and angle can be adjusted to optimize viewing or working positions. Loosen the tilt adjustment knob located beneath the tray, set the desired angle, and then firmly tighten the knob to secure the position.
د کیبل مدیریت
The tray includes a small opening designed for cable routing. This allows you to neatly run power cords, audio cables, or data cables, keeping your workspace organized and free from clutter.

انځور: نږدې انځور view of a laptop on the tray, highlighting the small opening through which cables can be routed for organized cable management.
Collapsing the Stand for Transport and Storage
To collapse the stand, first remove any equipment from the tray. Then, remove the safety pin and loosen the height adjustment knob to lower the pole. Finally, fold the tripod legs inwards. The compact design facilitates easy transport and storage.

Image: The media tray stand in its collapsed state, illustrating its compact design for convenient transport and storage.
ساتنه
Proper maintenance ensures the longevity and optimal performance of your media tray stand:
- پاکول: Wipe down the steel surfaces with a soft, damp ټوکر. د کثافاتو پاکوونکو یا محلولونو څخه ډډه وکړئ کوم چې پای ته زیان رسولی شي.
- معاینه: Regularly check all knobs, pins, and connections to ensure they are secure. Tighten any loose components.
- ذخیره کول: When not in use, store the stand in a dry environment to prevent rust or corrosion. Utilize its collapsible design for compact storage.
- د وزن ظرفیت: Do not exceed the maximum load capacity of 45 lbs (20.4 kg) to prevent damage to the stand or equipment.
د ستونزو حل کول
| ستونزه | احتمالي لامل | د حل لاره |
|---|---|---|
| ولاړ بې ثباته یا په ټپه ولاړ دی. | Tripod legs not fully extended or locked. Height adjustment knob loose. Safety pin not inserted. Uneven surface. | Ensure tripod legs are fully extended and stable. Tighten the height adjustment knob firmly. Insert the safety pin. Place the stand on a flat, level surface. |
| Equipment slides on the tray. | Rubber pads not applied or worn out. Tray not level. | Ensure adhesive EVA rubber pads are correctly applied to the tray surface. Replace worn pads if necessary. Adjust tray tilt to a level position if required. |
| د لوړوالي یا خښتې تنظیمولو کې ستونزه. | د تنظیم کولو نوبونه ډیر تنګ دي یا میکانیزم سخت دی. | Loosen adjustment knobs sufficiently before attempting to adjust. Apply a small amount of silicone lubricant to moving parts if stiffness persists. |
| Stand makes creaking sounds. | Loose connections or joints. Excessive load. | Check and tighten all bolts and connections. Ensure the stand is not overloaded beyond its 45 lb capacity. |
مشخصات
| فیچر | تفصیل |
|---|---|
| د ماډل شمیره | GFW-UTL-MEDIATRAY2 |
| برانډ | Gator Frameworks |
| مواد | د الماس فولاد |
| رنګ | تور |
| د ټرې ابعاد (L x W) | ۱۵.۷" x ۳۹.۳۷" (۴۰۰ ملي متره x ۱۰۰۰ ملي متره) |
| د تنظیم وړ لوړوالی | 36" to 48" (914.4mm – 1219.2mm) |
| د وزن ظرفیت | ۱۱.۵۷ پونډه (۵.۲۵ کیلو ګرامه) |
| د نل نلونه | ۱ ۱/۴» |
| د VESA مطابقت | 100x100 (brackets included) |
| د توکي وزن | 16.78 پونډه (7.61 kg) |
| اړین مجلس | نه (لږترلږه تنظیم ته اړتیا ده) |
تضمین او ملاتړ
د تضمین معلومات
Gator Frameworks provides a 3-year warranty covering manufacturing defects in material and workmanship. This warranty is valid for the original owner and requires proof of purchase. Under this warranty, Gator Frameworks will, at its discretion, repair or replace the product, or provide a comparable product of similar value and condition.
محدودیتونه: This warranty is limited to Gator Frameworks products only. It does not cover loss of personal property, loss of use, accidental damage, misuse, normal wear and tear, or transport damage. Damage resulting from neglect, abrasion, exposure to extreme temperatures, solvents, acids, or water is also not covered.
د پیرودونکي ملاتړ
For any questions, technical assistance, or warranty claims, please contact Gator Frameworks customer support. Refer to the official Gator Frameworks webد اړیکو د تازه معلوماتو لپاره سایټ.