1. پیژندنه
This manual provides detailed instructions for the proper installation, operation, and maintenance of your KICKER CompR Subwoofer Enclosure system. Please read this manual thoroughly before use to ensure optimal performance and longevity of your product.
۳. څه پکې شامل دي
په بسته کې لاندې برخې شاملې دي:
- Pair (QTY 2) of Kicker 48VCWR122 CompR 12" 1000 Watt Peak Power 2 Ohm Black Car Audio Subwoofer Enclosures
- 50 feet 16 Gauge Speaker Wire
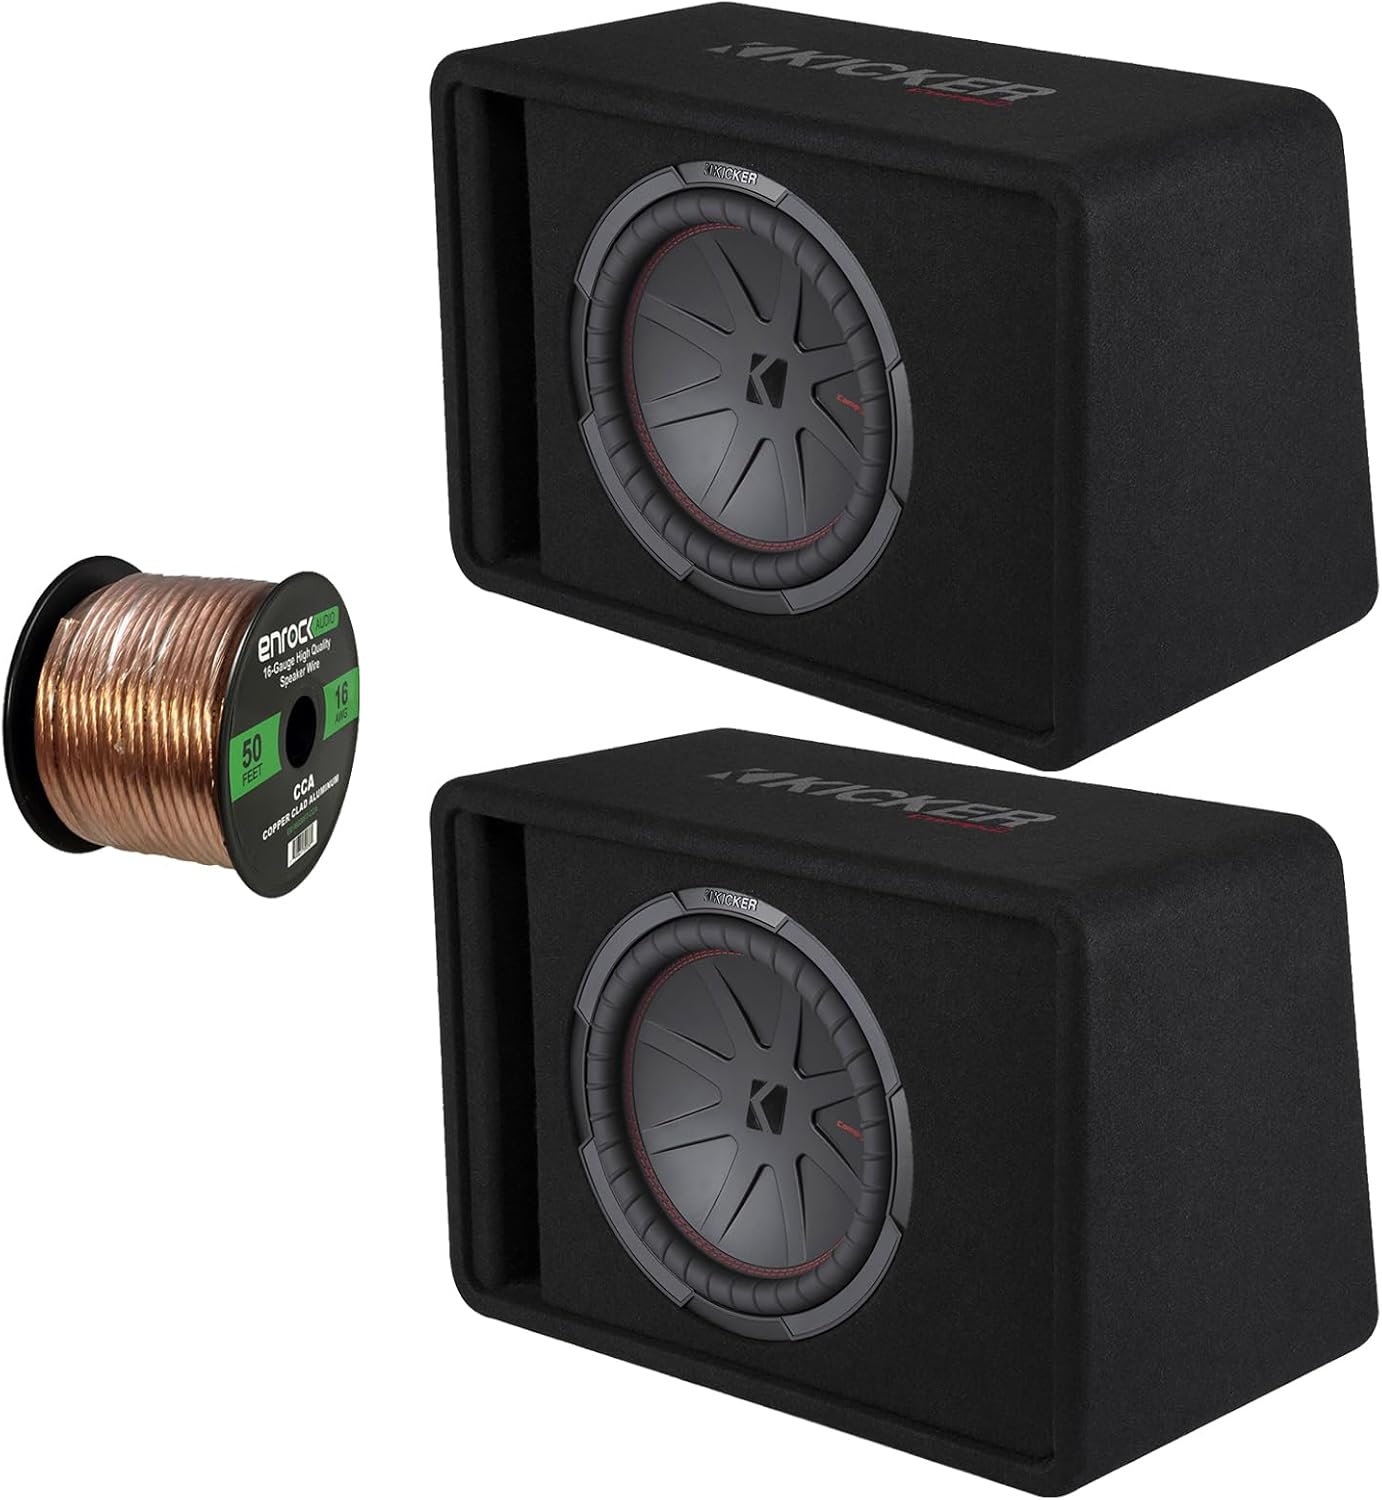
Image: Two Kicker CompR 12-inch subwoofer enclosures (black, rectangular) and a spool of 50 feet of 16-gauge copper-clad aluminum speaker wire. The subwoofers feature a black cone with a red stitched surround and a Kicker logo in the center.
3. مشخصات
| فیچر | تفصیل |
|---|---|
| د ماډل نوم | 2-CWR122 |
| د سپیکر ډول | Subwoofer |
| د سپیکر اندازه | ۷۸۷ انچه |
| د لوړ ځواک اداره کول | 1000 واټ |
| د RMS بریښنا اداره کول | 500 واټ |
| خنډ | 2 اوهم |
| د تونګ فریکونسی | 36 Hz |
| SNR | 90.8 dB |
| د ووفر مخروط مواد | پولی پروپیلین |
| شاوخوا مواد | سانتوپرین |
| د یخولو ټیکنالوژي | جبري-هوا کولنګ |
| د احاطې جوړول | MDF (د منځني کثافت فایبر بورډ) |
| د محصول ابعاد | 10"D x 10"W x 10"H (per enclosure) |
| د سپیکر تار ګیج | 16 ګیج |
| د سپیکر تار اوږدوالی | 50 پښه |
| د ارتباط ټیکنالوژي | تارونه |
| د نصب کولو ډول | د څوکۍ لاندې نصب |
4. ترتیب او نصب کول
4.1 د خوندیتوب احتیاطونه
- تل د هر ډول بریښنایی نصبولو پیل کولو دمخه د موټر بیټرۍ قطع کړئ.
- Ensure proper ventilation for the subwoofer enclosures to prevent overheating.
- د نصبولو پرمهال مناسب وسایل وکاروئ او د خوندیتوب عینکې واغوندئ.
- If unsure about any step, consult a professional car audio installer.
4.2 د نصب کولو ځای غوره کول
The KICKER CompR subwoofer enclosures are designed for compact spaces, ideal for under-seat or behind-seat mounting. Consider the following when selecting a location:
- Space Availability: Ensure there is sufficient clearance for the enclosure dimensions (10"D x 10"W x 10"H).
- خوندي نصب کول: The enclosure must be securely fastened to prevent movement during vehicle operation.
- د تار روټینګ: Plan for clean and safe routing of speaker wires to your ampلايف
- غږپوهنه: Experiment with placement if possible to find the best sound performance for your vehicle's interior.
4.3 د تار لګولو لارښوونې
The subwoofer enclosures have a 2 Ohm impedance. Ensure your amplifier is stable at this impedance. The included 16-gauge speaker wire is suitable for connecting the subwoofers to your ampلايف
- تارونه چمتو کړئ: Cut the 16-gauge speaker wire to the required lengths for each subwoofer. Strip approximately 0.5 inches of insulation from both ends of each wire.
- Connect to Subwoofer: Connect the positive (+) terminal of the speaker wire to the positive terminal on the subwoofer enclosure. Connect the negative (-) terminal of the speaker wire to the negative terminal on the subwoofer enclosure. Ensure a secure connection.
- سره نښلوي Ampژوندی: Route the speaker wires to your amplifier. Connect the positive (+) wire from each subwoofer to the corresponding positive (+) output terminal on your amplifier. Connect the negative (-) wire from each subwoofer to the corresponding negative (-) output terminal on your ampلايف
- قطبیت تایید کړئ: Double-check all connections to ensure correct polarity. Incorrect polarity can lead to reduced bass output and poor sound quality.
یادونه: For optimal performance, it is recommended to use an amplifier capable of delivering around 500 watts RMS per subwoofer at 2 Ohms.
5. عملیاتي لارښوونې
Once the KICKER CompR subwoofer enclosures are properly installed and connected to an ampد ژوندي کولو لپاره، د عملیاتو لپاره دا ګامونه تعقیب کړئ:
- پاور آن: Turn on your car audio system and the connected ampلايف
- د لومړني ګټې ترتیب: سره پیل کړئ amplifier's gain control set to its minimum (lowest) position.
- Adjust Head Unit Volume: Play a familiar piece of music with good bass content. Gradually increase the volume on your head unit (car stereo) until it reaches about 75% of its maximum level.
- سمون Ampژوندی ګټه: Slowly increase the gain control on your amplifier until you hear distortion or the bass becomes muddy. Then, back off the gain slightly until the sound is clean and clear. This sets the maximum undistorted output of your ampلايف
- Fine-Tune Bass: Use the bass boost, crossover, and phase controls on your amplifier or head unit to fine-tune the bass response to your preference.
- د تحریف لپاره واورئ: Always listen for signs of distortion (e.g., crackling, buzzing, muddy bass). If distortion is heard, reduce the volume or amplifier gain immediately to prevent damage to the subwoofers.
مهم: Avoid prolonged operation at high volumes with audible distortion, as this can cause permanent damage to the subwoofers.
6. ساتنه
The KICKER CompR subwoofer enclosures are designed for durability and require minimal maintenance. Follow these guidelines to ensure their longevity:
- پاکول: Use a soft, dry cloth to wipe down the enclosure and subwoofer cone. Avoid using harsh chemicals or abrasive cleaners.
- معاینه: Periodically inspect the speaker wire connections for any signs of corrosion or looseness. Ensure the enclosure is still securely mounted.
- د چاپیریال شرایط: While the enclosures are robust, avoid exposing them to extreme moisture or direct sunlight for extended periods.
- وینټیلیشن: Ensure that the area around the enclosures allows for proper airflow, especially for the Forced-Air Cooling system, to prevent heat buildup.
7. ستونزه حل کول
| ستونزه | احتمالي لامل | د حل لاره |
|---|---|---|
| د سب ووفرونو څخه غږ نشته |
|
|
| Distorted or Muffled Bass |
|
|
| کمزوری باس محصول |
|
|
8. تضمین او ملاتړ
KICKER products are designed and engineered to provide years of reliable performance. This product comes with a limited warranty. Please refer to the official KICKER webد ځانګړو تضمین شرایطو او مقرراتو لپاره سایټ یا ستاسو د پیرود اسناد.
For technical support, troubleshooting assistance, or warranty claims, please contact KICKER customer service or visit their official webسایټ:
د کیکر رسمي Webسایټ: www.kicker.com
KICKER Store on Amazon: Visit the KICKER Store
Please have your product model number (2-CWR122) and proof of purchase ready when contacting support.