
SUVCON M02
د SUVCON M02 4K ډش کیم کارونکي لارښود
ماډل: M02
پیژندنه
Thank you for choosing the SUVCON M02 4K Dash Cam. This manual provides detailed instructions for the installation, operation, and maintenance of your dash cam. Please read this manual thoroughly before using the product to ensure proper functionality and safety.
د خوندیتوب مهم معلومات
- د موټر چلولو پرمهال ډشبورډ مه چلوئ. ترتیبات یوازې هغه وخت تنظیم کړئ کله چې موټر په خوندي ډول ودرول شي.
- ډاډ ترلاسه کړئ چې ډشبورډ کیم په خوندي ډول نصب شوی او د موټر چلوونکي د موټر چلولو خنډ نه ګرځي view یا د ایربګ ځای پرځای کول.
- Use only the original power cable provided to prevent damage to the device or vehicle.
- Avoid exposing the dash cam to extreme temperatures, direct sunlight for prolonged periods, or excessive moisture.
- د ډشبورډ کیم د جلا کولو یا ترمیم کولو هڅه مه کوئ. د مرستې لپاره د پیرودونکو ملاتړ سره اړیکه ونیسئ.
- Format the memory card regularly to ensure optimal performance and prevent data corruption.
د بسته محتويات
مهرباني وکړئ د لاندې توکو لپاره په بسته کې وګورئ:
- SUVCON M02 4K Dash Cam (Front Camera)
- Rear Camera (if included in your package)
- Car Charger with Power Cable
- سکشن کپ ماونټ
- کیبل کلپونه
- د کارن لارښود
- 32GB MicroSD Card (if included in your package)
محصول پای ته ورسیدview
Familiarize yourself with the components of your SUVCON M02 Dash Cam.
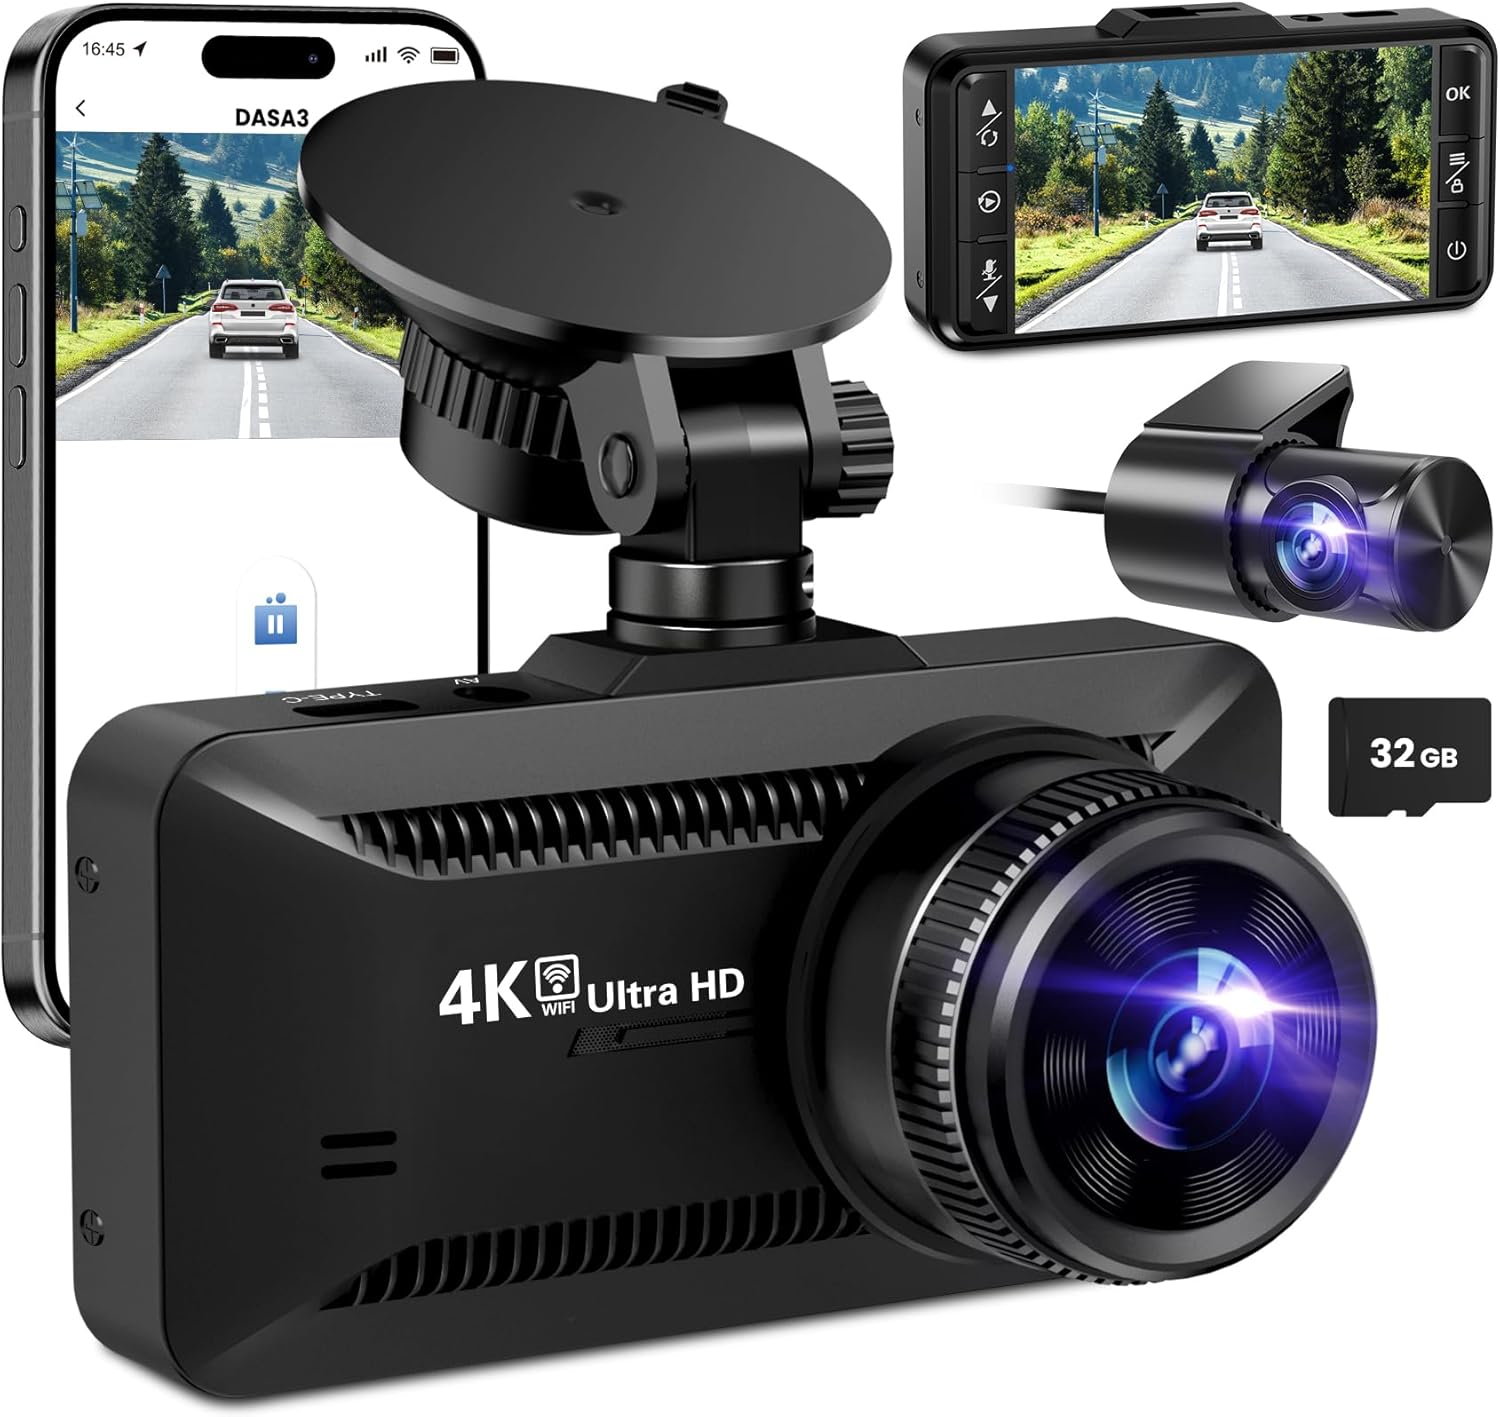
انځور: The SUVCON M02 4K Dash Cam is shown with its main front camera unit, a separate rear camera, a smartphone displaying the dash cam's app interface, and a 32GB microSD card. The main unit features a prominent lens, a display screen on the back (not fully visible in this angle), and a suction cup mount. The rear camera is compact with its own lens. The smartphone screen shows a live view from the dash cam, indicating Wi-Fi connectivity.
د مخکینۍ کیمرې واحد
- لینز: د 4K ویډیو ثبتوي.
- د ښودلو سکرین: لپاره viewپه ژوندۍ بڼهtage، پلې بیک، او مینو نیویګیشن.
- د کنټرول تڼۍ: Power, Menu, Up, Down, OK.
- د مایکرو ایس ډی کارت سلاټ: د حافظې کارت داخلولو لپاره.
- USB Power Port (Type-C): For connecting the car charger.
- د شا کیمرې پورټ: For connecting the rear camera cable.
- سپیکر/ مایکروفون: د آډیو ثبتولو او پلې بیک لپاره.
د شا کیمرې واحد
- لینز: Captures rear view ویډیو
- کابل: Connects to the main dash cam unit.
تنظیم او نصب کول
1. د مایکرو ایس ډی کارت دننه کول
- ډاډ ترلاسه کړئ چې د ډشبورډ کیم بند دی.
- د ډیش کیم په اړخ کې د مایکرو ایس ډی کارت سلاټ ومومئ.
- Insert the MicroSD card with the gold contacts facing the back of the dash cam until it clicks into place.
- د لرې کولو لپاره، کارت په نرمۍ سره دننه کړئ تر هغه چې کلیک وکړي، بیا یې خوشې کړئ.
یادونه: A Class 10 or higher MicroSD card (up to 128GB recommended) is required. Format the card in the dash cam's settings before first use.
۱. د ډش کیم نصب کول
- د وینډشیلډ ساحه پاکه کړئ چیرې چې تاسو د ډیش کیم نصبولو اراده لرئ.
- د سکشن کپ ماونټ د ډیش کیم سره وصل کړئ.
- د سکشن کپ د کړکۍ د شیشې په وړاندې په کلکه فشار ورکړئ، په غوره توګه د شا شاتهview mirror, and flip the lever to secure it.
- Adjust the angle of the dash cam lens to ensure it captures the road ahead clearly, avoiding obstruction from the hood or dashboard.
3. د نښلولو بریښنا
- Connect the small end of the car charger cable to the USB Type-C port on the dash cam.
- Plug the larger end of the car charger into your vehicle's 12V power outlet (cigarette lighter socket).
- Route the power cable neatly along the edge of the windshield and dashboard using the provided cable clips to avoid obstructing your view.
4. Installing the Rear Camera (Optional)
- Connect the rear camera cable to the dedicated rear camera port on the main dash cam unit.
- Route the cable from the front unit to the rear of the vehicle, typically along the headliner and side panels.
- Mount the rear camera on the rear windshield using its adhesive or screws, ensuring a clear view د سړک شاته.
- Connect the red wire of the rear camera cable to the vehicle's reverse light positive wire if you wish to enable parking assist lines when reversing.
عملیاتي لارښوونې
پاور آن/بند
- اتومات: The dash cam will automatically power on and begin recording when connected to power and the vehicle engine starts. It will power off automatically when the engine is turned off.
- لارښود: د ډیش کیم په لاسي ډول د فعالولو یا بندولو لپاره د بریښنا تڼۍ فشار ورکړئ او ونیسئ.
د ثبت کولو اکرونه
- لوپ ثبتول: The dash cam records video in continuous loops (e.g., 1, 3, or 5 minutes). When the memory card is full, the oldest unlocked files به بیا ولیکل شي.
- جي-سینسر (بیړني ثبت): The built-in G-sensor detects sudden impacts or collisions. When triggered, the current video segment is automatically locked and saved to prevent it from being overwritten by loop recording.
- د پارکینګ نظارت: With a hardwire kit (sold separately) or continuous power, the dash cam can monitor your vehicle while parked. If a vibration or impact is detected, it will automatically record a short video.
د مینو غورځول
Use the control buttons on the dash cam to navigate the menu:
- د مینو تڼۍ: Press to enter the settings menu. Press again to switch between video settings, system settings, and playback mode.
- پورته/ښکته تtۍ: د مینو اختیارونو له لارې حرکت وکړئ.
- د OK تtonۍ: Confirm selection or start/stop recording in recording mode.
د وای فای اتصال او د اپلیکیشن کارول
The SUVCON M02 features Wi-Fi connectivity for easy access to recordings and settings via a smartphone app.
- Download the recommended app (e.g., "DASA3" or similar, check packaging for exact app name) from your smartphone's app store.
- On the dash cam, enable Wi-Fi from the system settings. The dash cam's Wi-Fi SSID and password will be displayed on the screen.
- On your smartphone, go to Wi-Fi settings and connect to the dash cam's Wi-Fi network using the provided password.
- Open the app. You can now view ژوندی اوسیtage, download recorded videos, change settings, and format the SD card directly from your phone.
پلې بیک
- On Dash Cam: In recording mode, press the Menu button twice to enter playback mode. Use Up/Down buttons to select files and OK to play.
- د اپلیکیشن له لارې: Connect your smartphone via Wi-Fi and use the app's playback feature to view او ویډیو ډاونلوډ کړئ.
- په کمپیوټر کې: Remove the MicroSD card from the dash cam and insert it into a computer's card reader. Videos can be played using standard media players.
ساتنه
د ډش کیم پاکول
- د ډشبورډ کیم د بدن پاکولو لپاره نرم، وچ ټوکر وکاروئ.
- د لینز لپاره، د لینز پاکولو ټوکر او د لینز پاکولو ځانګړي محلول وکاروئ ترڅو د سکریچونو څخه مخنیوی وشي.
- د کثافاتو پاکوونکي یا محلول مه کاروئ.
MicroSD Card Formatting
It is recommended to format the MicroSD card every 2-4 weeks to maintain optimal recording performance and prevent data corruption. This can be done through the dash cam's menu settings or via the smartphone app.
د فرم ویئر تازه معلومات
Periodically check the SUVCON official website for available firmware updates. Firmware updates can improve performance, add new features, or fix bugs. Follow the instructions provided with the firmware file په احتیاط سره
د ستونزو حل کول
| ستونزه | احتمالي حل |
|---|---|
| ډش کیم نه چالانیږي. |
|
| ډش کیم ثبت کول ودروي یا کنګل کیږي. |
|
| ویډیو footage تیاره یا ناڅرګنده ده. |
|
| د وای فای اتصال ستونزې. |
|
مشخصات
| فیچر | تفصیل |
|---|---|
| ماډل | M02 |
| برانډ | SUVCON |
| د ویډیو نیول حل | 4K (Front), 1080P (Rear, if applicable) |
| ځانګړي ځانګړتیاوې | G-Sensor, Loop Recording, Parking Monitor, Wi-Fi Connectivity |
| د ارتباط ټیکنالوژي | وای فای |
| د نصب کولو ډول | Dashboard Mount (Suction Cup) |
| ذخیره کول | د مایکرو ایس ډی کارت (د لسم ټولګي یا لوړ، تر ۶۴ جی بی پورې سپارښتنه کیږي) |
| د بریښنا سرچینه | د موټر چارجر (۱۲ ولټه) |
| د محصول ابعاد | ۱ x ۱ x ۱ سانتي متره (تقریبا، د محصول معلوماتو سره سم) |
تضمین او د پیرودونکي ملاتړ
For warranty information, technical support, or any inquiries regarding your SUVCON M02 Dash Cam, please refer to the warranty card included in your package or visit the official SUVCON webسایټ. مهرباني وکړئ د ملاتړ سره د اړیکې نیولو پر مهال خپل ماډل نمبر (M02) او د پیرود توضیحات چمتو ولرئ.
Webسایټ: www.suvcon.com (بېلګهample URL, please refer to actual product documentation)
بریښنالیک: support@suvcon.com (بېلګهample Email, please refer to actual product documentation)
Ask a question about this manual
Ask about setup, troubleshooting, compatibility, parts, safety, or missing instructions. Manuals+ will review the question and use this page’s manual context to help answer it.