1. پیژندنه
Thank you for choosing the RATIO R-SR1400S 1400W Circular Saw. This manual provides essential information for the safe and effective operation, maintenance, and troubleshooting of your new tool. Please read these instructions carefully before use and keep them for future reference.
2. د خوندیتوب لارښوونې
د اور لګېدو، برقي شاک او شخصي ټپي کېدو خطر کمولو لپاره تل د خوندیتوب اساسي احتیاطي تدابیر په پام کې ونیسئ. د دې لارښوونو په تعقیب کې پاتې راتلل ممکن د جدي ټپي کېدو لامل شي.
عمومي خوندیتوب
- د کاري ساحې خوندیتوب: خپل کاري ساحه پاکه او ښه روښانه وساتئ. ګډوډ یا تیاره سیمې د پیښو لامل کیږي. د بریښنا وسایل په چاودیدونکو فضا کې مه کاروئ، لکه د اور اخیستونکي مایعاتو، ګازونو یا دوړو په شتون کې.
- بریښنایی خوندیتوب: د بریښنا وسایل باید د ساکټ سره سمون ولري. هیڅکله پلګ په هیڅ ډول مه بدلوئ. د خاورې یا ځمکې لاندې سطحو سره د بدن له تماس څخه ډډه وکړئ. د بریښنا وسایل باران یا لوند شرایطو ته مه ښکاره کوئ.
- شخصي خوندیتوب: Always wear eye protection, hearing protection, and a dust mask when operating the saw. Dress properly; avoid loose clothing or jewelry. Stay alert and use common sense.
د سرکلر آری ځانګړی خوندیتوب
- د کک بیک مخنیوی: Always hold the saw firmly with both hands. Ensure the blade is clear of the workpiece before starting. Avoid cutting small pieces that cannot be securely clamped.
- د تیغ ساتونکی: Ensure the lower guard operates freely and closes instantly. Never jam or tie back the lower guard.
- د تیغ انتخاب: Use only blades recommended for your saw and the material being cut. Ensure the blade is sharp and correctly installed.
- ژوروالی او بیول تنظیم کول: Securely tighten all depth and bevel adjustment levers before making a cut.
- د دوړو استخراج: Connect a dust extraction device when possible to minimize dust exposure.
3. محصول ختم شوview او اجزا
Familiarize yourself with the parts of your RATIO R-SR1400S Circular Saw before operation.
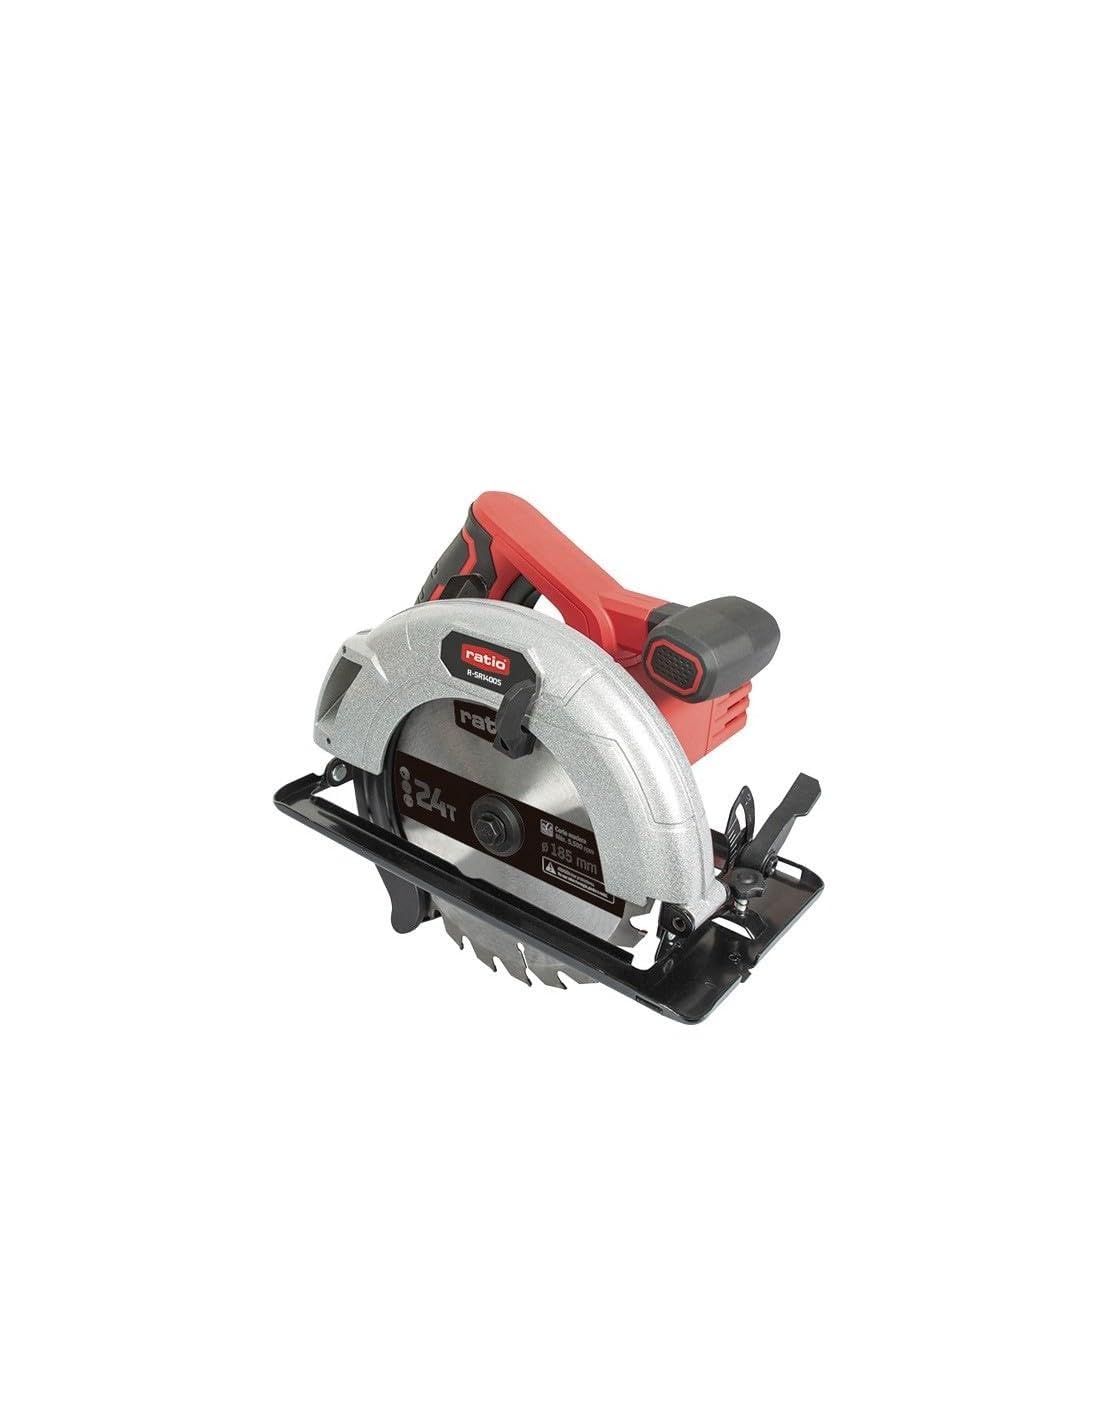
Figure 1: RATIO R-SR1400S Circular Saw. This image shows the complete circular saw with its main components, including the motor housing, handle, blade guard, and cutting blade.
- د موټرو کور: د ۱۲۰۰ واټ موټور لري.
- اصلي لاسوند: Ergonomically designed with a rubberized grip for comfort and control.
- د خوندیتوب قلف سویچ: د ناڅاپي پیل مخه نیسي.
- د محرک سویچ: آره فعالوي.
- د پورتنۍ تیغ ساتونکی: Made of aluminum for durability and protection.
- د ښکته تیغ ساتونکی: Made of steel, automatically retracts during cutting.
- بیس پلیټ: Steel construction for stability during cuts.
- د ژوروالي تنظیم کولو لیور: د پرې کولو ژوروالی تنظیمولو لپاره.
- د بیول تنظیم کولو لیور: For setting the cutting angle (0-45 degrees).
- د دوړو د ایستلو سیسټم: Allows connection to a vacuum cleaner for dust management.
- د بریښنا کیبل: 3 meters long for extended reach.

Figure 2: Included Saw Blade. This image displays the 185mm diameter, 24-tooth saw blade designed for wood cutting, with a maximum speed of 5,500 RPM.
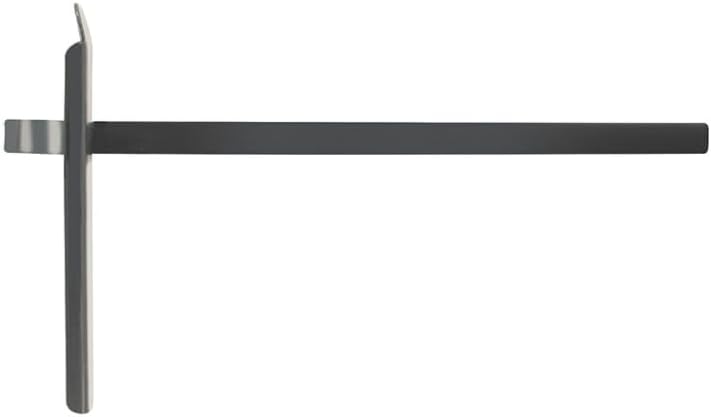
Figure 3: Rip Fence Guide. This accessory is used to guide the saw parallel to the edge of the workpiece for straight and accurate rip cuts.

Figure 4: Blade Changing Wrenches. These wrenches are provided for safely loosening and tightening the blade arbor nut during blade installation and removal.
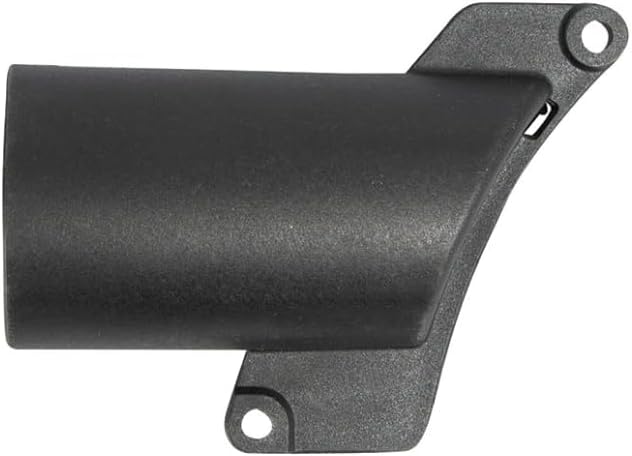
Figure 5: Dust Extraction Port. This component allows for the connection of a dust collection system to minimize sawdust in the work area.
4. ترتیب کول
د بلیډ نصب کول
- د بریښنا قطع کول: تل د هر ډول سمون یا ساتنې ترسره کولو دمخه د بریښنا سرچینې څخه آره خلاص کړئ.
- Retract Lower Guard: Lift the lower blade guard lever to retract the guard.
- د ونې مغز خلاص کړئ: د ونې د خلاصولو لپاره چمتو شوي رنچ وکاروئ.
- زوړ تیغ لرې کړئ: په احتیاط سره زوړ تیغ لرې کړئ، د گردش لوري ته پام وکړئ.
- نوی بلیډ نصب کړئ: Place the new blade onto the arbor, ensuring the teeth point in the direction of the arrow on the saw and the blade guard.
- د ونې مغز کلک کړئ: Securely tighten the arbor nut with the wrench. Do not overtighten.
- د چک ساتونکی: Ensure the lower guard moves freely and springs back to cover the blade.
د قطع کولو ژوروالی تنظیم کول
The cutting depth should be set so that the blade extends approximately 3-6 mm (1/8"-1/4") below the workpiece. This minimizes kickback and provides a cleaner cut.
- د ژور تنظیم کولو لیور خلاص کړئ.
- Raise or lower the base plate to the desired depth.
- د ژوروالي تنظیم کولو لیور په خوندي ډول ټینګ کړئ.
د بیول زاویه تنظیم کول
آره کولی شي د 0° څخه تر 45° پورې بیول پرې کړي.
- د بیول تنظیم کولو لیور خلاص کړئ.
- Tilt the base plate to the desired angle, aligning with the scale.
- د بیول تنظیم کولو لیور په خوندي ډول ټینګ کړئ.
Attaching the Rip Fence Guide
The rip fence guide (Figure 3) helps make straight cuts parallel to the edge of the workpiece.
- Slide the rip fence into the slots on the front of the base plate.
- لارښود د مطلوب پرې کولو پلنوالي سره تنظیم کړئ.
- Tighten the locking screw to secure the guide in place.
5. عملیاتي لارښوونې
د آری پیل کول او بندول
- پيلول: Press the safety lock switch, then squeeze the trigger switch.
- ودرول: Release the trigger switch. The blade will stop rotating.
د کټ جوړول
- خوندي کاري ټوټه: تل د clamp د پرې کولو پرمهال د حرکت مخنیوي لپاره کاري ټوټه په کلکه سره.
- د لیدلو ځای: Place the front of the base plate on the workpiece, ensuring the blade is clear of the material.
- د پیل اره: Start the saw and allow the blade to reach full speed before engaging the material.
- د خوراک نرخ: د اره د موادو له لارې د تغذیې لپاره ثابت او مساوي فشار واچوئ. اره مه زوروئ.
- بشپړ کټ: Continue the cut until the saw passes completely through the workpiece.
- د خوشې کولو محرک: Release the trigger and allow the blade to stop before lifting the saw from the workpiece.
6. ساتنه
منظم ساتنه ستاسو د ګردي آرې اوږد عمر او خوندي عملیات تضمینوي.
پاکول
- د بریښنا قطع کول: تل د پاکولو دمخه وسیله انپلګ کړئ.
- دوړې لرې کړئ: Use a soft brush or compressed air to clean dust and debris from the motor vents and blade guard area.
- سطحې پاک کړئ: بهرنۍ سطحې د اعلان سره پاک کړئamp ټوکر سخت کیمیاوي او محلول مه کاروئ.
د بلیډ ساتنه
- تیغ معاینه کړئ: Regularly inspect the blade for sharpness, cracks, or missing teeth. Replace damaged blades immediately.
- پاک تیغ: Remove resin and pitch buildup from the blade using a suitable blade cleaner.
عمومي تفتیش
- ټول پیچونه او فاسټینرونه د ټینګښت لپاره وګورئ.
- Inspect the power cord for damage. If damaged, have it replaced by a qualified technician.
7. ستونزه حل کول
دا برخه هغه عامې ستونزې په ګوته کوي چې تاسو ورسره مخ کیدی شئ.
| ستونزه | احتمالي لامل | د حل لاره |
|---|---|---|
| سور پیل نه کوي | بریښنا نشته د خوندیتوب قفل ښکیل نه دی د بریښنا مزی خراب شوی | د بریښنا ساکټ او سرکټ بریکر وګورئ Ensure safety lock is pressed before trigger Inspect cord; contact service if damaged |
| تیغ تړل یا سګرټ څکول | خړ یا ناپاکه تیغ Incorrect cutting depth د آری جبري کول د کار ټوټه خوندي نه ده | Replace or clean blade د قطع کولو ژوروالی تنظیم کړئ د تغذیې نرخ کم کړئ د کار ټوټه په کلکه وتړئ |
| ناسم پرې کول | Loose adjustments اغوستل شوی تیغ ناسم تخنیک | Tighten depth/bevel levers تیغ بدل کړئ Use a guide and maintain steady feed |
| ډیر وایبریشن | لوز تیغ خراب شوی تیغ کږ شوی ونې | Ensure blade is securely tightened تیغ بدل کړئ د خدمت مرکز |
8. مشخصات
| فیچر | مشخصات |
|---|---|
| ماډل | R-SR1400S |
| ځواک | 1400 W |
| د نه بارولو سرعت | 5,500 rpm |
| د تیغ قطر | 185 ملي متره |
| د تیغ بور | 20 ملي متره |
| Max. Cutting Capacity (90°) | 63 ملي متره |
| Max. Cutting Capacity (45°) | 42 ملي متره |
| Bevel Cut Range | ۰° - ۴۵° |
| وزن | 5 kg (approx. 4.34 kg product weight) |
| د کیبل اوږدوالی | 3 متر |
9. تضمین او ملاتړ
RATIO products are manufactured to high-quality standards. For warranty information, please refer to the warranty card included with your purchase or contact your local RATIO dealer. For technical support or service, please contact the retailer where the product was purchased or visit the official RATIO webد خدماتو مرکز موقعیتونو لپاره سایټ.