پیژندنه
This manual provides detailed instructions for the installation, operation, and maintenance of your Zyyini B150M V3 Computer Motherboard. Please read this manual thoroughly before proceeding with installation to ensure proper setup and to prevent damage to the components. This motherboard is designed for desktop computers, supporting LGA 1151 CPUs and DDR4 memory, offering a stable and efficient platform for various computing needs.
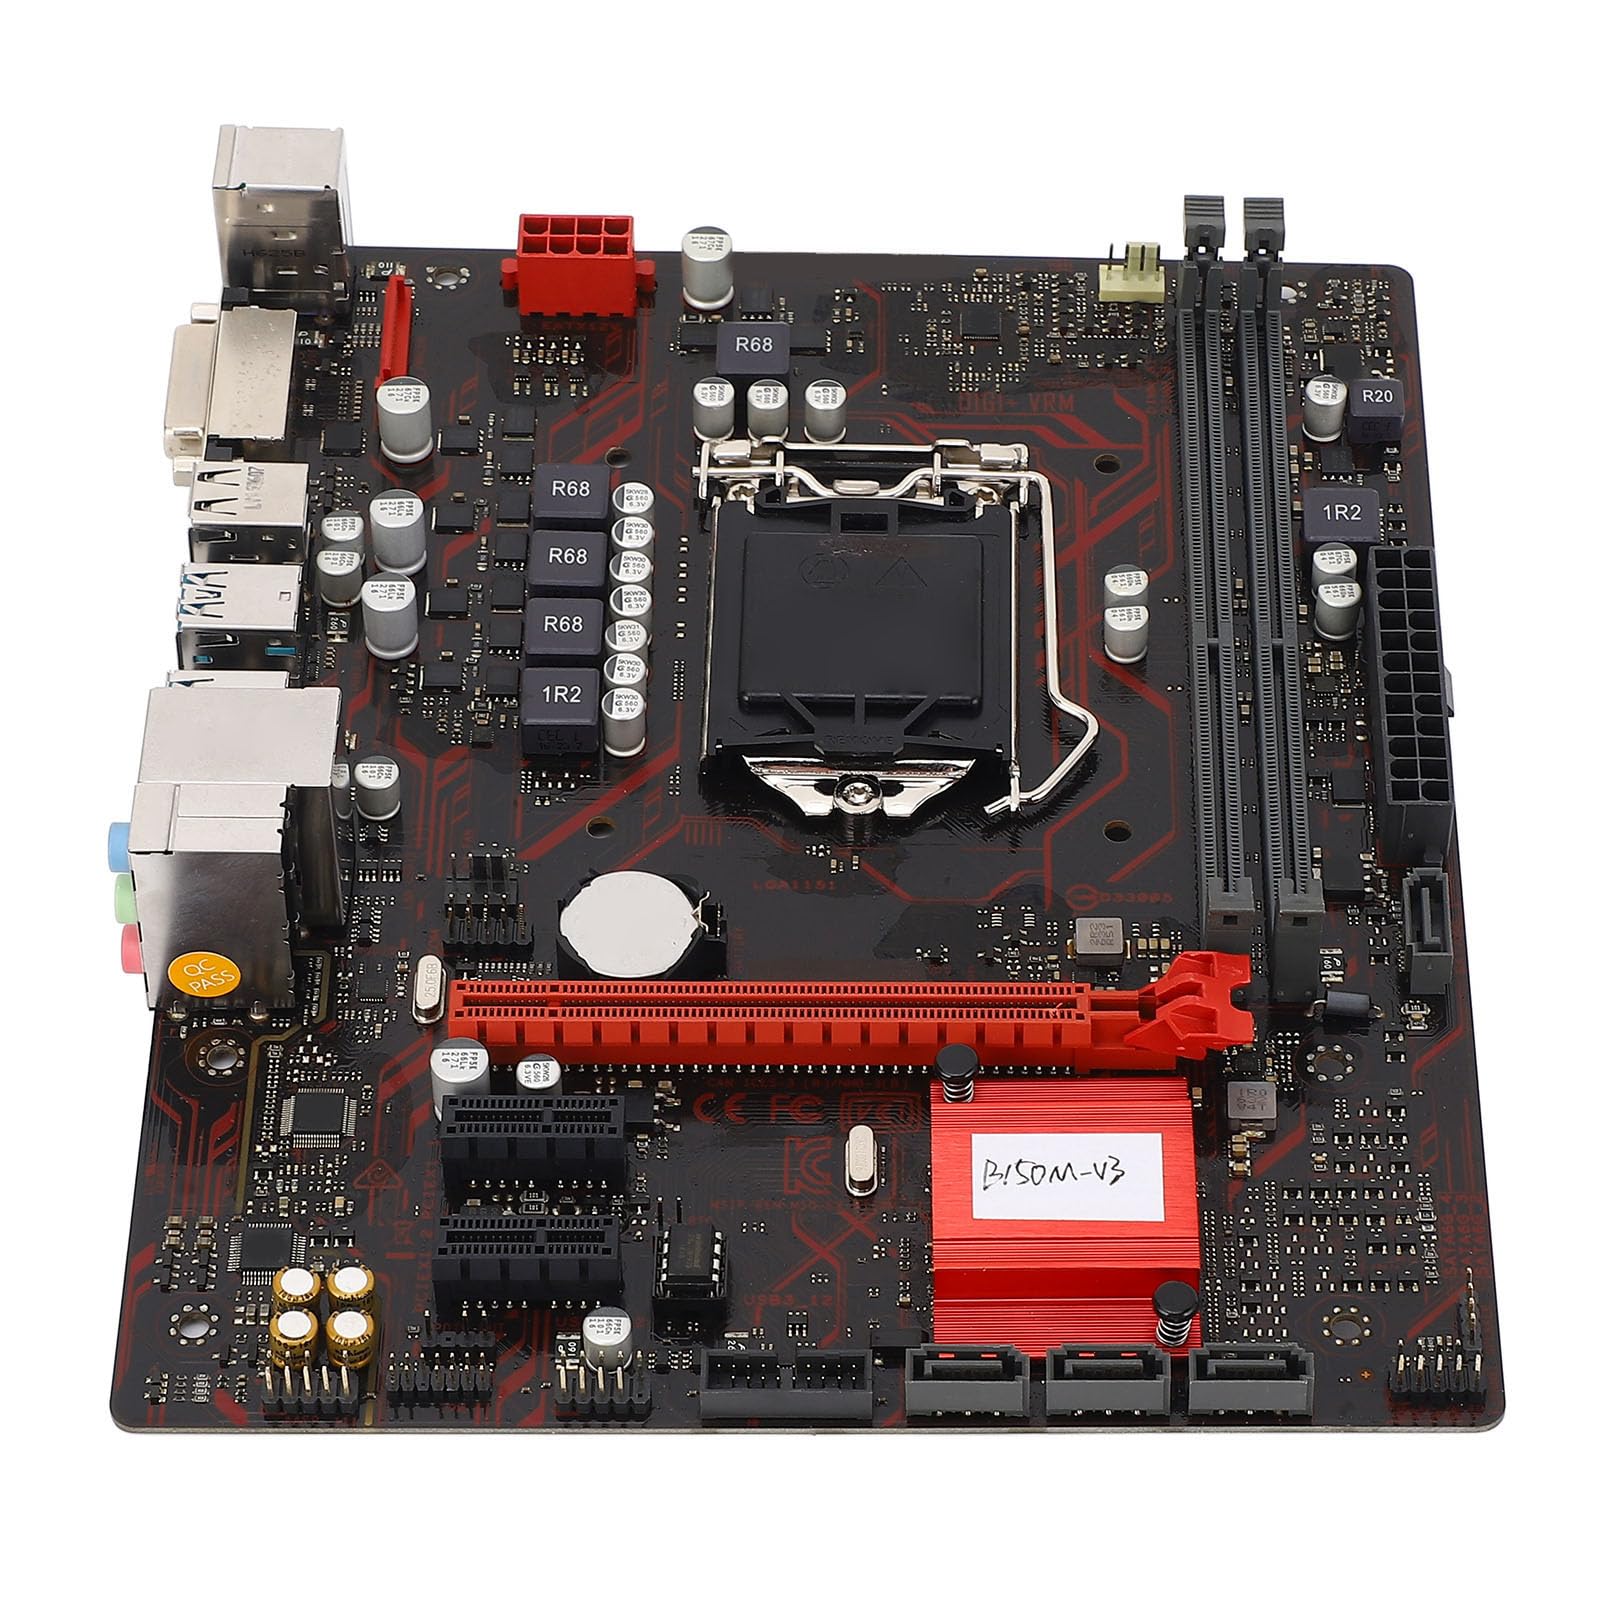
شکل 1: پایview of the Zyyini B150M V3 Motherboard.
تنظیم او نصب کول
Before beginning installation, ensure your workspace is clean and static-free. It is recommended to wear an anti-static wrist strap to prevent electrostatic discharge (ESD) damage to components.
1. د خوندیتوب احتیاطي تدابیر
- تل د هر ډول اجزاو نصبولو یا لرې کولو دمخه د دیوال له سایټ څخه د بریښنا رسولو قطع کړئ.
- Handle components by their edges to avoid touching sensitive circuits.
- Ensure proper grounding to prevent ESD.
- Refer to the CPU, memory, and other component manuals for specific installation instructions.
۱. د مور بورډ ترتیب

شکل ۱: پورته څخه ښکته view highlighting key components and connectors on the motherboard.
Familiarize yourself with the locations of the CPU socket, memory slots, PCI-E slots, SATA ports, and power connectors before installation.
۳. د CPU نصب کول (LGA ۱۷۰۰)
- په مور بورډ کې د LGA 1151 CPU ساکټ ومومئ.
- Gently push down the load lever and pull it sideways to open the CPU socket cover.
- Carefully align the notches on your Intel Core i7/i5/i3/Pentium/Celeron (14nm) processor with the corresponding keys on the socket. Ensure the gold triangle on the CPU matches the triangle on the socket.
- Place the CPU gently into the socket without forcing it.
- د بار پلیټ وتړئ او د بار لیور بیرته خپل ځای ته فشار ورکړئ تر هغه چې کلیک وکړي.

3 شکل: تړل view of the LGA 1151 CPU socket, ready for processor installation.
4. Memory Installation (DDR4 DIMM)
The motherboard features two DDR4 DIMM slots, supporting dual-channel DDR4 2133MHz memory up to a maximum of 32GB.
- د DIMM سلاټ په دواړو سرونو کې کلپونه خلاص کړئ.
- د DDR4 حافظې ماډل کې نوچ د DIMM سلاټ کې کیلي سره سم کړئ.
- د حافظې ماډل په کلکه په سلاټ کې دننه کړئ تر هغه چې کلپونه په خپل ځای کې راشي. ډاډ ترلاسه کړئ چې دواړه کلپونه تړل شوي دي.

Figure 4: The two DDR4 DIMM slots for memory installation.
5. Storage Device Installation (SATA III & M.2)
The motherboard provides 4 x Serial ATA III interfaces and 1 x M.2 slot for storage devices.
- د SATA وسایل: Connect one end of a SATA data cable to a SATA III port on the motherboard and the other end to your SATA hard drive or SSD. Connect the SATA power cable from your power supply to the drive.
- M.2 Devices: Insert your M.2 SSD into the M.2 slot, securing it with the provided screw.
6. Expansion Card Installation (PCI-E)
The motherboard includes 1 x PCI-E x16 graphics card slot and 2 x PCI-E x1 slots for expansion cards.
- Align your PCI-E expansion card (e.g., graphics card, sound card, network card) with the desired PCI-E slot.
- Press the card firmly into the slot until it is fully seated. Secure the card with a screw to the chassis.
۳.۷. د پردیو او مخکینۍ پینل سره نښلول
Connect your USB devices, DVI display, audio devices, and Ethernet cable to the rear I/O panel. Connect the front panel connectors (power button, reset button, USB ports, audio jacks) from your PC case to the corresponding headers on the motherboard.

شکل 5: مفصل view of the rear I/O panel, showing USB, DVI, Ethernet, and audio ports.
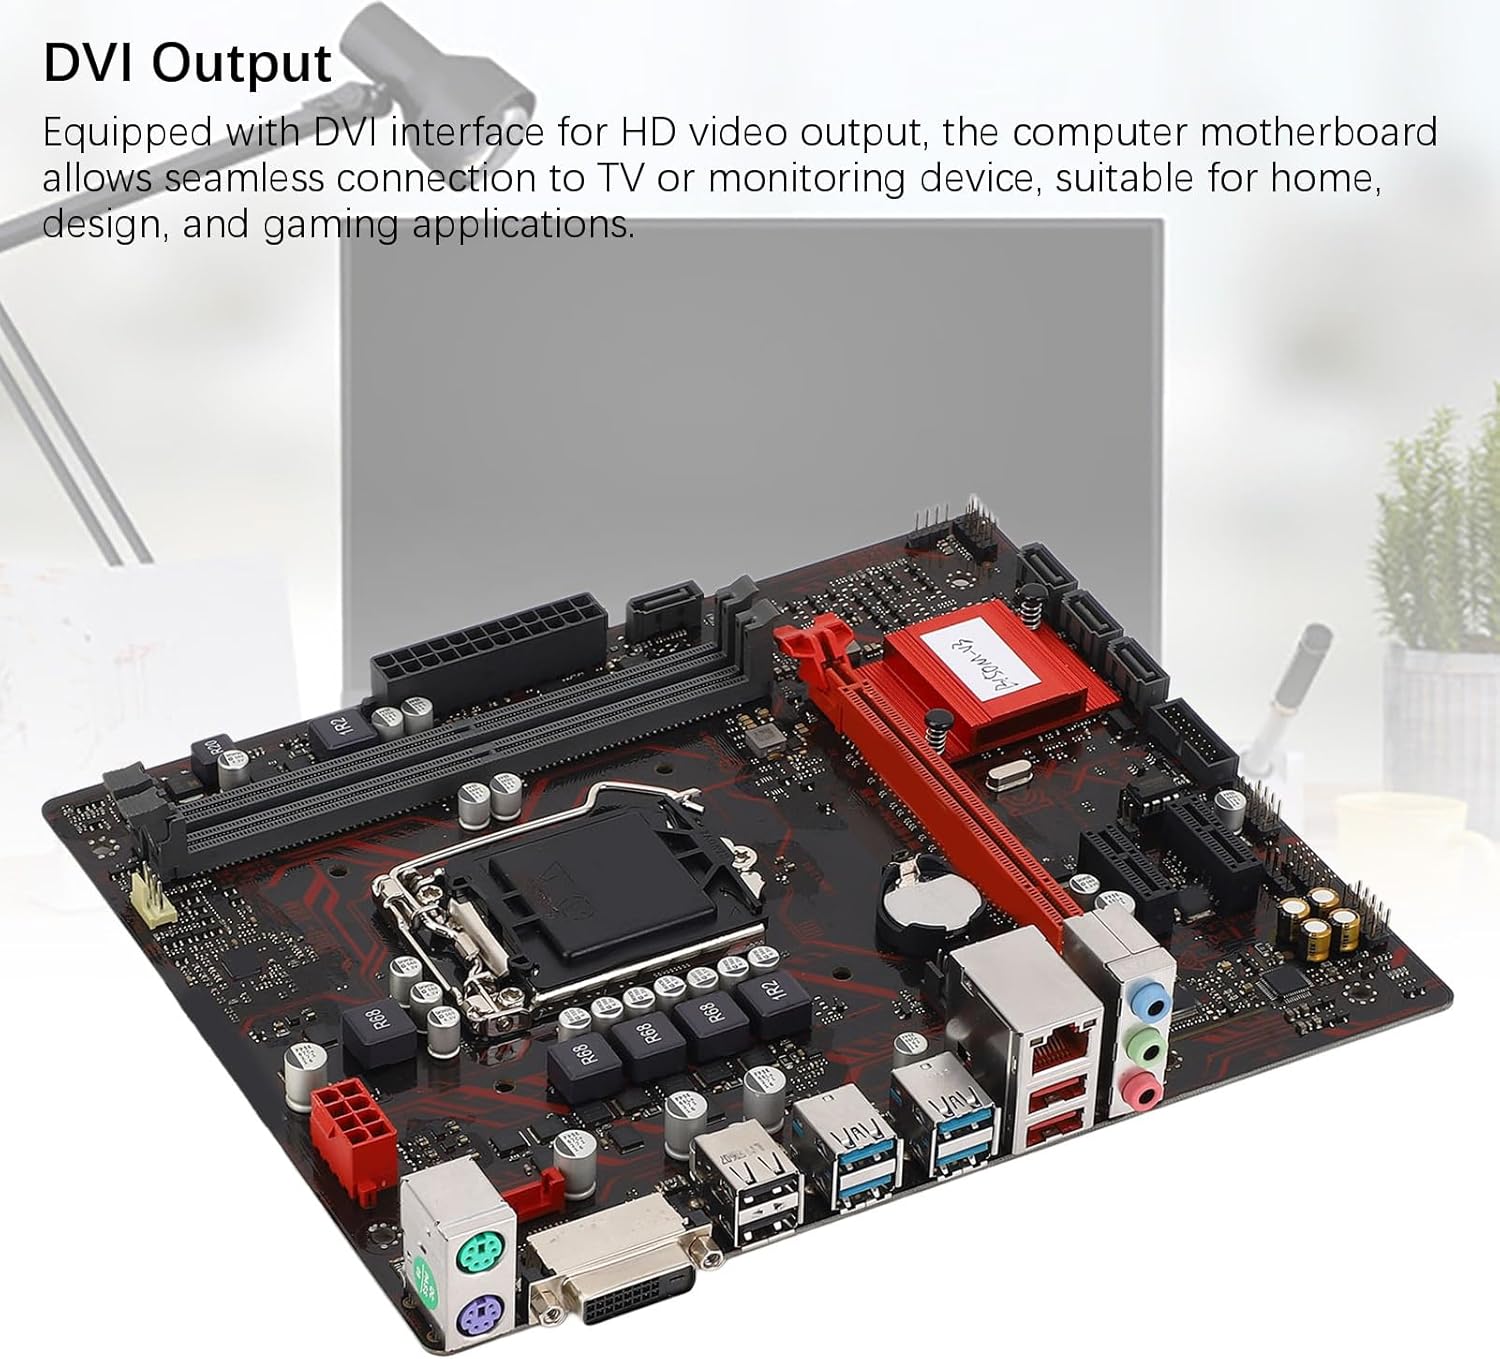
Figure 6: The DVI interface for connecting a display.
8. د بریښنا پيوستون
Connect the 24-pin ATX power connector and the 8-pin CPU power connector from your power supply to the respective ports on the motherboard. Ensure they are firmly seated.

شکل ۳: زاویه لرونکی view showing the location of power connectors and other ports.
عملیاتي لارښوونې
۳. لومړنی بوټ اپ
After all components are installed and connected, power on your system. The system should initiate the boot process. If no display appears, refer to the troubleshooting section.
۳.۱. د BIOS/UEFI ترتیب
During boot-up, press the designated key (usually DEL or F2) to enter the BIOS/UEFI setup. Here you can configure boot order, system time, and other advanced settings. Save changes before exiting.
3. د ډرایور نصب کول
After installing your operating system, install the necessary drivers for the motherboard chipset, network, and audio. These are typically provided on a driver CD or available for download from the manufacturer's webسایټ
ساتنه
۱. د دوړو پاکول
Regularly clean the inside of your computer case to prevent dust buildup, which can lead to overheating and component failure. Use compressed air to gently remove dust from fans, heatsinks, and motherboard surfaces.
۱۲. د BIOS تازه معلومات
په دوره یي ډول د تولید کونکي معاینه وکړئ webد BIOS تازه معلوماتو لپاره سایټ. د BIOS تازه معلومات کولی شي د سیسټم ثبات ښه کړي، د نوي هارډویر لپاره ملاتړ اضافه کړي، یا بګونه حل کړي. د تازه کولو لارښوونې په دقت سره تعقیب کړئ ترڅو د مور بورډ زیان ونه رسوي.
د ستونزو حل کول
1. هیڅ ځواک نشته
- Ensure the power supply is connected to the wall outlet and switched on.
- Verify that the 24-pin and 8-pin power connectors are securely attached to the motherboard.
- د مخکینۍ پینل د بریښنا سویچ اړیکه د مور بورډ سره وګورئ.
2. نه ښکاره کول
- Confirm that the monitor is connected to the correct video output (DVI) on the motherboard or graphics card and is powered on.
- Reseat the memory modules. Try booting with only one memory module installed.
- ګرافیک کارت بیا ځای پر ځای کړئ (که چیرې تطبیق شي).
- Ensure the CPU is properly installed and the CPU cooler is securely attached.
۷.۳. د سیسټم بې ثباتي / ټکرونه
- Check for overheating. Ensure all fans are working and heatsinks are clean.
- Verify that all components (CPU, RAM, storage) are properly seated.
- د غلط RAM د چک کولو لپاره د حافظې تشخیصي وسایل چل کړئ.
- ډاډ ترلاسه کړئ چې ټول چلوونکي تازه دي.
مشخصات

Figure 8: The motherboard's robust construction ensures stable performance and longevity.
| فیچر | تفصیل |
|---|---|
| د مور بورډ ماډل | B150M-V3 |
| چپسیټ | B150 چپسیټ |
| د CPU ساکټ | LGA 1151 |
| Compatible CPU Type | Intel Core i7, i5, i3, Pentium, Celeron (14nm processors) |
| د حافظې ډول | 2 x DDR4 DIMM (Dual Channel) |
| د حافظې سرعت | 2133MHz |
| د حافظې اعظمي ظرفیت | 32GB |
| د PCI-E معیار | PCI-E 3.0 |
| PCI-E x16 Slots | 1 |
| PCI-E x1 Slots | 2 |
| د ذخیره کولو انٹرفیسونه | 4 x Serial ATA III, 1 x M.2 |
| USB Interfaces (Rear) | 4 x USB3.0 ، 4 x USB2.0 |
| USB Interfaces (Internal) | 1 x USB3.0 header, 1 x USB2.0 header |
| ویډیو برسیر | 1 x DVI |
| Network Chip | Realtek RTL8111GR Gigabit Ethernet |
| غږ چپ | Realtek ALC887 8-Channel |
| د بریښنا انٹرفیسونه | One 8-Pin, One 24-Pin |
| د فارم فکتور | M-ATX |
| د بریښنا رسولو اکر | 5 پړاو |
| نورې خبرې | RJ45, Chassis Fan, Internal Speaker, System Panel, Sound, PS/2 Mouse, PS/2 Keyboard, COM |
د تضمین معلومات
For specific warranty terms and conditions, please refer to the documentation provided with your purchase or visit the official Zyyini webسایټ. د تضمین پوښښ معمولا د عادي استعمال لاندې موادو او کاریګرۍ نیمګړتیاوې شاملې دي.
د پیرودونکي ملاتړ
If you encounter any issues that cannot be resolved using this manual, please contact your retailer or visit the Zyyini official support channels for assistance. Have your product model number (B150M-V3) and purchase details ready when seeking support.