1. پیژندنه
This manual provides comprehensive instructions for the Cleyver T57W IP Phone and the Cleyver ODHW25V2 DECT Headset System. This professional VoIP package is designed to enhance communication efficiency in business environments.
په سیسټم کې شامل دي:
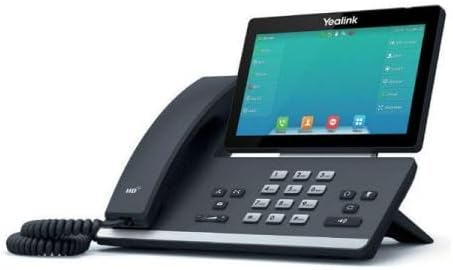
- Cleyver T57W IP Phone: A Voice over IP (VoIP) phone featuring a 7-inch color touchscreen, Wi-Fi, and Bluetooth connectivity.
- Cleyver ODHW25V2 DECT Duo Headset: A wireless DECT headset with dual earcups and noise cancellation for clear audio.
- Electronic Hook Switch (EHS) Module: Enables remote call control directly from the headset.

Figure 1.1: Cleyver T57W IP Phone, ODHW25V2 DECT Headset, and connecting cables.
2. د بسته محتويات
د نصبولو دمخه، ډاډ ترلاسه کړئ چې ټول توکي په بسته کې شتون لري:
- Cleyver T57W IP Phone
- هینډسیټ او هینډسیټ تار
- ایترنیټ کیبل
- Power Adapter for IP Phone
- Cleyver ODHW25V2 DECT Duo Headset
- DECT Headset Base Station
- Power Adapter for Headset Base Station
- EHS Module and Connecting Cables
- د چټک پیل لارښود (که شامل وي)
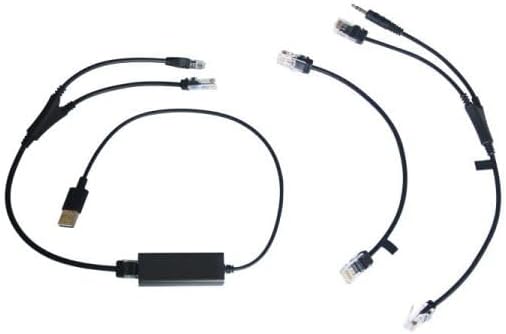
Figure 2.1: Included connecting cables for the IP phone and headset system.
3. ترتیب کول
3.1. Cleyver T57W IP Phone Setup
- هینډسیټ وصل کړئ: Plug one end of the coiled handset cord into the handset port on the IP phone and the other end into the handset.
- شبکې سره وصل شئ: Connect one end of the Ethernet cable to the Internet port on the IP phone and the other end to your network router or switch.
- بریښنا وصل کړئ: Plug the power adapter into the power port on the IP phone and then into an electrical outlet. The phone will power on automatically.
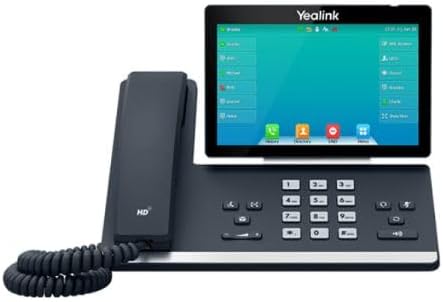
شکل 3.1: اړخ view of the Cleyver T57W IP Phone, illustrating port locations for connections.
3.2. Cleyver ODHW25V2 DECT Headset Setup
- Connect Headset Base Power: Plug the power adapter into the power port on the DECT headset base station and then into an electrical outlet.
- Connect to IP Phone (EHS): Use the provided EHS module and cables to connect the headset base station to the appropriate ports on the Cleyver T57W IP Phone. Refer to the EHS module's specific instructions for detailed connection steps, as ports may vary.
- Place Headset on Base: Place the ODHW25V2 headset onto the charging cradle of the base station. Ensure it is seated correctly for charging.
- جوړه کول (که اړتیا وي): The headset and base station are usually pre-paired. If pairing is required, follow the instructions in the headset's specific manual.

شکل 3.2: شاته view of the DECT headset base station, showing power and connection ports.
3.3. ابتدايي ترتیب
Upon first power-up, the T57W IP Phone will guide you through initial setup steps on its 7-inch touchscreen. This typically includes:
- د شبکې ترتیبات: Configure IP address (DHCP or Static), DNS.
- SIP Account Registration: Enter your SIP server address, username, password, and other credentials provided by your VoIP service provider.
- نېټه او وخت: Set the correct date and time or configure NTP server.
شکل 3.3: مخکی view of the Cleyver T57W IP Phone, highlighting the 7-inch color touchscreen.
4. عملیاتي لارښوونې
4.1. T57W IP Phone Basic Operations
- تلیفون کول: Lift the handset or press the Speaker button, then dial the number and press the Dial/Send key. Alternatively, use the touchscreen to select a contact.
- د زنګ په ځواب کې: Lift the handset, press the Speaker button, or press the Answer soft key on the touchscreen.
- د زنګ وهلو پای: هینډسیټ بدل کړئ یا د پای زنګ نرم کیلي فشار ورکړئ.
- ساتل: During a call, press the Hold soft key.
- لیږدول: During a call, press the Transfer soft key and follow the on-screen prompts.
- کنفرانس: During a call, press the Conference soft key and follow the on-screen prompts to add participants.
- د حجم سمون: Use the volume keys on the phone to adjust handset, speaker, or ringer volume.
4.2. ODHW25V2 DECT Headset Usage
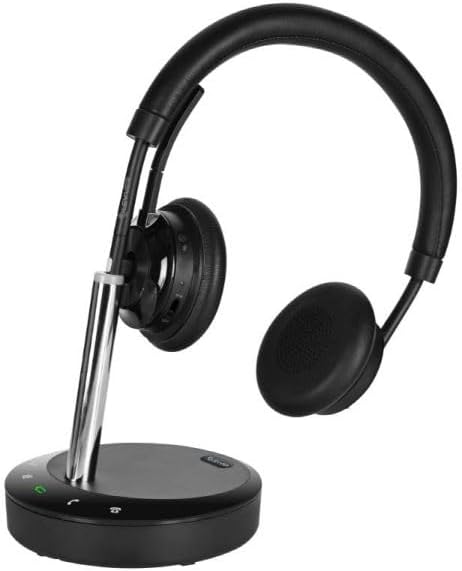
Figure 4.1: Cleyver ODHW25V2 DECT Headset on its charging base, ready for use.
- د هیډسیټ اغوستل: Adjust the headband and microphone boom for a comfortable fit. The dual earcups provide passive noise isolation.
- Answering/Ending Calls (EHS): When connected via EHS, you can answer or end calls by pressing the call control button on the headset.
- د حجم کنټرول: Use the volume buttons on the headset to adjust listening volume.
- خاموش: Press the mute button on the headset to mute your microphone during a call.
- چارج کول: Always return the headset to its base station when not in use to ensure it remains charged.

شکل 4.2: مثالample of a user operating the Cleyver T57W IP Phone and headset for business communication.
5. ساتنه
5.1. پاکول
- Use a soft, dry, anti-static cloth to clean the phone's surface and touchscreen.
- For the headset, gently wipe earcups and headband with a slightly damp ټوکر. د ډیر رطوبت څخه ډډه وکړئ.
- Do not use harsh chemicals, cleaning solvents, or abrasive cleaners.
5.2. د سافټویر تازه معلومات
Periodically check for firmware updates for your Cleyver T57W IP Phone through the phone's web interface or system settings. Updates can provide new features, performance improvements, and security enhancements. Consult your IT administrator or VoIP service provider for guidance on applying updates.
5.3. Headset Battery Care
- Always return the headset to its charging base when not in use to maintain optimal battery life.
- د بیټرۍ په مکرر ډول د بشپړ چارج کولو څخه ډډه وکړئ.
- Store the headset in a cool, dry place if not used for extended periods.
6. ستونزه حل کول
If you encounter issues with your Cleyver T57W IP Phone and ODHW25V2 DECT Headset System, refer to the following common problems and solutions:
| ستونزه | احتمالي لامل | د حل لاره |
|---|---|---|
| تلیفون نه چالانیږي | د بریښنا اډاپټر نه دی وصل شوی یا خراب شوی دی. | Ensure the power adapter is securely connected to the phone and a working electrical outlet. Try a different outlet. |
| No dial tone / Cannot make calls | Network connection issue; SIP account not registered. | Check Ethernet cable connection. Verify network status on the phone's screen. Ensure SIP account details are correctly entered and registered. Contact your VoIP provider if registration fails. |
| Headset not connecting or poor audio | Headset out of range; low battery; EHS module issue. | Ensure headset is within range of the base station. Place headset on base to charge. Verify EHS module connections and configuration. Re-pair headset if necessary. |
| د ټچ سکرین بې ځوابه | د سافټویر لنډمهاله ستونزه. | Restart the IP phone by unplugging and re-plugging the power adapter. |
7. مشخصات
Key technical specifications for the Cleyver T57W IP Phone and ODHW25V2 DECT Headset System:
| فیچر | تفصیل |
|---|---|
| برانډ | Cleyver |
| د ماډل شمیره | YEALINKT57WHW20V2 |
| IP Phone Display | ۲.۶۵ انچه رنګین ټچ سکرین |
| Connectivity (IP Phone) | SIP-VoIP, Built-in Wi-Fi, Bluetooth |
| د هیډسیټ ډول | DECT Duo, Wireless, Noise Cancellation |
| د اړیکې مدیریت | Electronic Hook Switch (EHS) support |
| د بریښنا سرچینه | Wired (Power Adapters included) |
| مواد | پلاستيک، فلزي |
| د محصول ابعاد | 30 x 22 x 23.5 سانتي متره (L x W x H) |
| د توکي وزن | 1.2 کیلو ګرامه |
| مطابقت لرونکې وسیلې | DECT phone systems, VoIP SIP phones |
8. تضمین او ملاتړ
8.1. د تضمین معلومات
The Cleyver T57W IP Phone and ODHW25V2 DECT Headset System comes with a دوه کلن تضمین د پیرود نیټې څخه. دا تضمین د عادي استعمال لاندې د تولید نیمګړتیاوې او نیمګړتیاوې پوښي. مهرباني وکړئ د تضمین ادعاوو لپاره د پیرود ثبوت وساتئ.
8.2. د پیرودونکي ملاتړ
For technical assistance, troubleshooting beyond this manual, or warranty inquiries, please contact your vendor or Cleyver customer support. Refer to the contact information provided with your purchase documentation or visit the official Cleyver webد ملاتړ سرچینو لپاره سایټ.