1. پیژندنه
This manual provides essential information for the proper setup, usage, and maintenance of your Yonex Astrox 99 Pro badminton racket. The Astrox 99 Pro is designed for advanced players seeking powerful offensive performance. Please read these instructions carefully to ensure optimal performance and longevity of your racket.
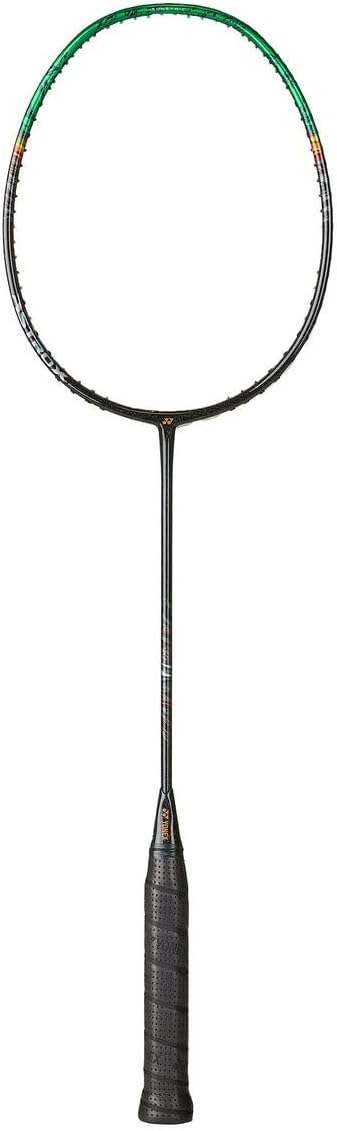
انځور ۱: بشپړ view of the Yonex Astrox 99 Pro badminton racket.
2. د محصول ب Featuresې
The Yonex Astrox 99 Pro incorporates several advanced technologies to enhance playability:
- Enhanced Rotational Generator System: Weight distribution across the grip, frame top, and joint facilitates quick recovery and seamless shot transitions, supporting continuous offensive play.
- Power-Assist Bumper: Located at the top of the frame, this bumper adds weight to the racket head, enhancing power transfer for more effective smashes.
- 2G-Namd Flex Force: A next-generation graphite material in the frame and shaft that allows for rapid flex and snap-back, holding the shuttlecock longer for maximum power and responsive feel.
- Lightweight End Cap: Reduces handle weight, shifting balance towards the racket head to maximize smash power.
- Shot Information Connector: Combined with a high-rigidity Anti-Torsion Shaft, this technology reduces frame torque and vibrations, providing a stable racket face and clear feedback.
- ساختمان: Flex: Stiff, Frame: HM Graphite / CFR / Tungsten / 2G-Namd FLEX FORCE, Shaft: HM Graphite / 2G-Namd FLEX FORCE / Ultra PE Fiber.

Image 2: Detail of the racket shaft, highlighting material composition and design.
۴. د تنظیم لارښوونې
The Yonex Astrox 99 Pro is supplied unstrung. Professional stringing is recommended to ensure optimal performance and to prevent damage to the racket frame.
3.1 Stringing the Racket
- Choose Your Strings: Select badminton strings appropriate for your playing style and desired tension. Consult with a professional stringer for recommendations.
- Recommended Tension: Refer to the racket's frame for recommended tension ranges. Exceeding these limits can void the warranty and damage the frame.
- Professional Stringing: It is highly recommended to have the racket strung by a certified badminton stringer. Improper stringing can lead to frame distortion or breakage.
- د ګرومېټ تفتیش: Before stringing, ensure all grommets are intact and properly seated. Replace any worn or missing grommets.
3.2 Applying a Grip
After stringing, apply an overgrip or replacement grip for comfort and control.
- پاک لاستی: Ensure the racket handle is clean and dry before applying the grip.
- Start from Base: Begin wrapping the grip from the base of the handle, overlapping slightly with each turn.
- حتی فشار: Apply even tension while wrapping to avoid lumps or loose spots.
- خوندي پای: Secure the end of the grip with the provided adhesive tape.
4. د عملیاتو لارښوونې
Proper handling and usage will maximize your performance and extend the life of your racket.
- Pre-Game Check: Before each use, inspect the strings, frame, and grip for any signs of damage or wear.
- د اغیزو څخه ډډه وکړئ: Do not hit the racket against the net post, floor, or other hard surfaces. This can cause frame damage.
- Shuttlecock Contact: Aim to hit the shuttlecock in the sweet spot of the string bed for optimal power and control.
- ذخیره کول: Store the racket in a racket bag or cover to protect it from impacts and extreme temperatures.

Image 3: Detail of the racket head, showing the frame and string bed area.
5. ساتنه
Regular maintenance helps preserve the racket's condition and performance.
- پاکول: Wipe the frame and grip with a soft, damp cloth after use to remove sweat and dirt. Avoid harsh chemicals.
- د تار ساتنه: If strings show signs of fraying or loss of tension, consider restringing. Old strings can negatively impact performance.
- د گرفت بدلول: Replace your grip regularly as it wears down to maintain optimal feel and prevent slippage.
- د تودوخې کنټرول: Avoid exposing the racket to extreme temperatures (e.g., direct sunlight in a car, freezing conditions) as this can weaken the frame materials.
6. ستونزه حل کول
لاندې عامې ستونزې او د هغوی احتمالي حلونه دي.
| مسله | احتمالي لامل | د حل لاره |
|---|---|---|
| د تار ماتول | High tension, worn strings, off-center hits, sharp grommets. | Restring with appropriate tension, inspect grommets, improve hitting technique. |
| د ځواک/کنټرول له لاسه ورکول | Worn strings, incorrect string tension, worn grip. | Restring the racket, adjust tension, replace grip. |
| Racket Frame Damage | Impact with hard surfaces, improper stringing, manufacturing defect. | Avoid impacts, ensure professional stringing. If defect suspected, contact support. |
| Slippery Grip | Sweat, worn grip material. | Replace grip regularly, use grip powder or towel during play. |
7. مشخصات
Detailed specifications for the Yonex Astrox 99 Pro racket:
- فلیکس: سخت
- د چوکاټ مواد: HM Graphite / CFR / Tungsten / 2G-Namd FLEX FORCE
- د شافټ مواد: HM Graphite / 2G-Namd FLEX FORCE / Ultra PE Fiber
- Weight / Grip Size: 4U (Avg. 83g) G5
- تار کول: Unstrung (requires professional stringing)
- رنګ: تور / شنه
- د تولید اصل: جاپان
- د توکي وزن: 0.28 کیلوګرامه
- د عمر حد: بالغ
- شاملې برخې: Yonex Astrox 99 Pro (Black/Green) 3rd Gen UnStrung Badminton Racket 2025, Full Cover
8. تضمین او ملاتړ
The Yonex Astrox 99 Pro racket comes with a manufacturer's warranty.
- د تضمین توضیحات: Manufacturer's warranty applies. Please retain your proof of purchase.
- د تضمین ادعاوې: For warranty claims or technical support, please contact your authorized Yonex dealer or the official Yonex customer service.
- مهمه یادونه: Damage resulting from improper stringing (e.g., exceeding recommended tension), misuse, or impact is typically not covered under warranty.
For further assistance, visit the official Yonex webسایټ یا د دوی پیرودونکي ملاتړ سره اړیکه ونیسئ.