1. پیژندنه
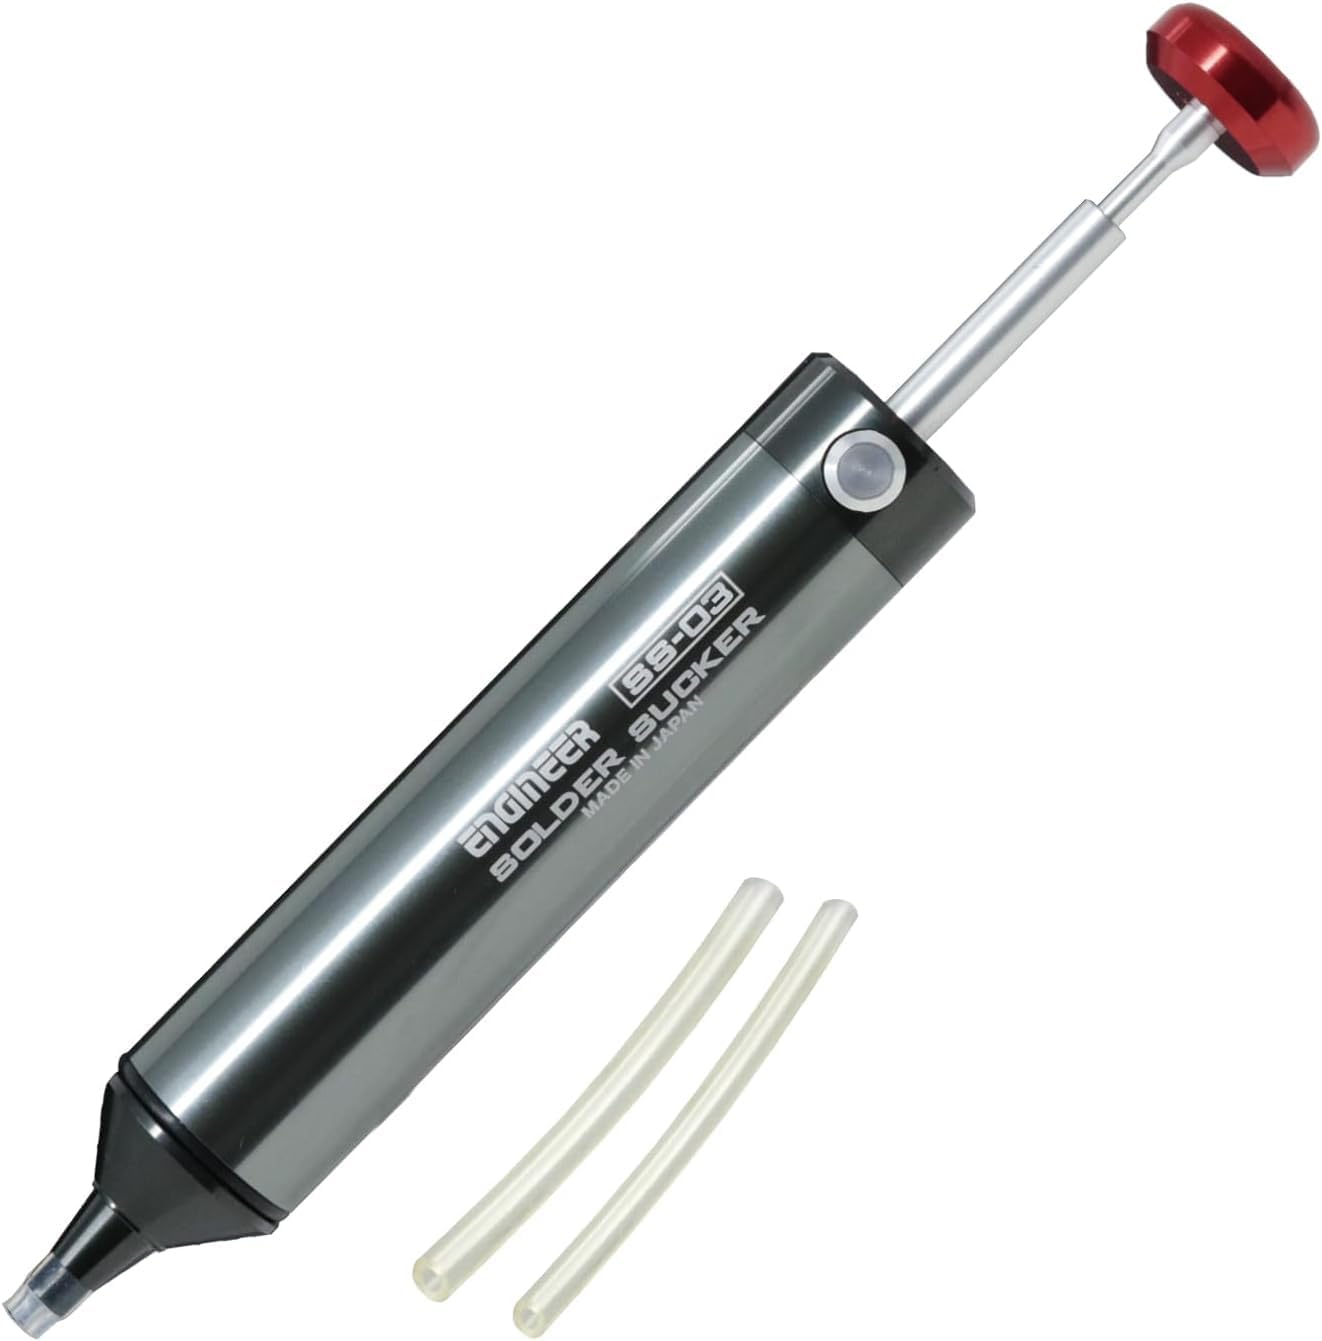
The ENGINEER SS-03 Solder Sucker is a high-quality, professional-grade desoldering pump designed for efficient solder removal. Manufactured in Japan, this device features a durable aluminum body and an innovative flexible, heat-resistant silicone nozzle. This design allows for direct contact with the soldering iron tip (up to 350℃) and creates a superior seal around the solder joint, significantly improving suction power and minimizing solder residue.
Its compact design ensures comfortable one-handed operation, and the built-in self-cleaning shaft helps prevent clogging, maintaining high productivity during continuous use. The SS-03 is an essential tool for electronics repair, circuit board work, and any task requiring precise and effective desoldering.
2. د خوندیتوب معلومات
- Always wear appropriate eye protection when desoldering to prevent injury from molten solder or flying debris.
- په خپل کاري ځای کې د هوا مناسبه هوا ورکول ډاډمن کړئ ترڅو د سولډر بخاراتو تنفس کولو څخه مخنیوی وشي.
- Handle the soldering iron and solder sucker with care, as both can reach high temperatures.
- وسیله د ماشومانو له لاسرسي لرې وساتئ.
- Do not attempt to desolder components while the circuit is powered on.
- The silicone nozzle is heat-resistant up to 350℃. Avoid prolonged contact with temperatures exceeding this limit.
3. د بسته محتويات
The ENGINEER SS-03 Solder Sucker package includes:
- 1 x ENGINEER SS-03 Solder Sucker Device
- 1 x SS-16 Silicone tube (50mm long, 4mm outer diameter)
- 1 x SS-17 Silicone tube (50mm long, 3mm outer diameter)
These spare silicone tubes can be cut to size to replace worn nozzles, extending the lifespan of your tool.
4. محصول ختم شوview
The ENGINEER SS-03 features a sleek aluminum body for durability and a comfortable grip. The key innovation is its flexible silicone nozzle, designed for optimal solder removal.

Unlike traditional rigid Teflon nozzles that leave a gap, the flexible silicone nozzle of the SS-03 'envelopes' the solder joint and soldering iron tip. This eliminates air gaps, significantly increasing suction efficiency and leaving less solder residue.
The compact size and ergonomic design ensure ease of handling and precise control during desoldering tasks.
5. ترتیب کول
- نوزل معاینه کړئ: Ensure the silicone nozzle is securely attached and free from damage. If a new nozzle is needed, cut one of the included spare silicone tubes (SS-16 or SS-17) to the desired length and attach it firmly.
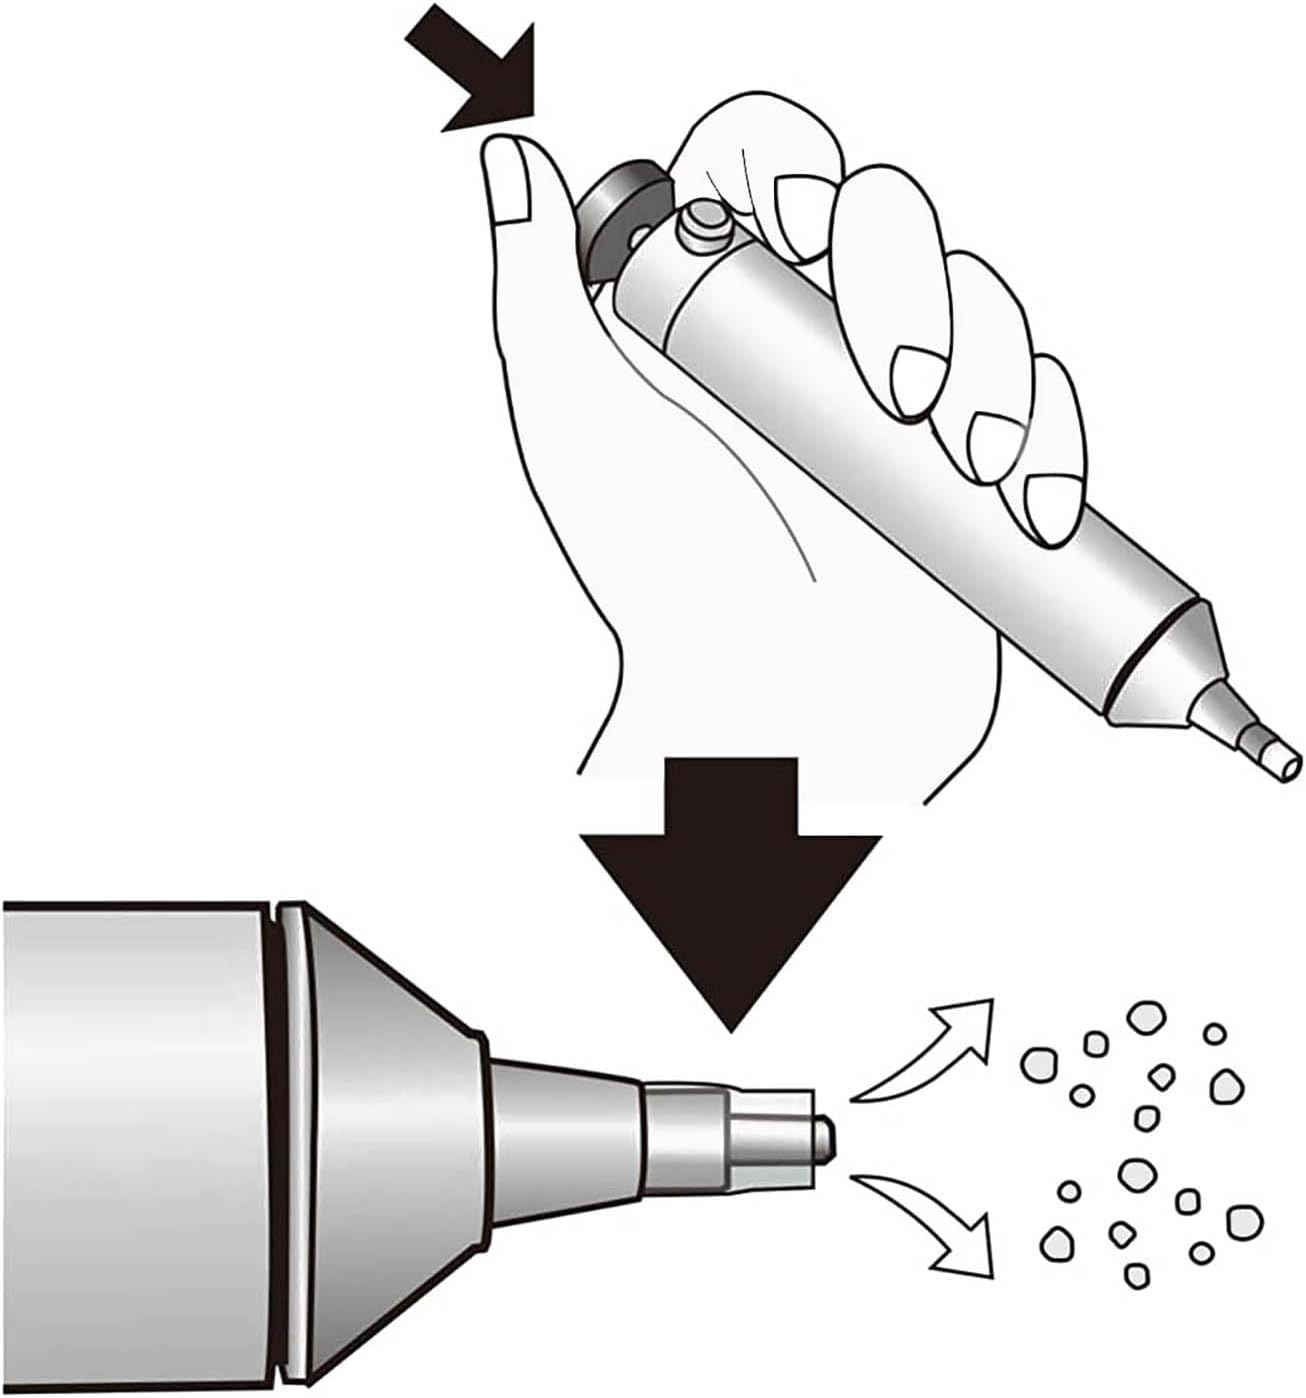
- پمپ لومړی: Push the plunger down until it locks into place. This cocks the spring mechanism, preparing the pump for suction.
6. عملیاتي لارښوونې
Follow these steps for effective solder removal:
- Prepare the Solder Joint: Heat the solder joint with your soldering iron until the solder melts and becomes liquid.
- Position the Solder Sucker: While the solder is still molten, quickly place the silicone nozzle of the SS-03 directly over the molten solder joint, ensuring the nozzle 'envelopes' the joint and the soldering iron tip for maximum contact and seal.
- سکشن فعال کړئ: Press the release button on the solder sucker. The spring-loaded plunger will retract rapidly, creating a strong vacuum that sucks the molten solder into the device.
- لرې کړئ او معاینه کړئ: Remove the solder sucker and soldering iron from the joint. Inspect the joint to ensure all unwanted solder has been removed. Repeat steps 1-3 if necessary.
- Reset the Plunger: Push the plunger down again to reset the mechanism for the next use.


7. ساتنه او پاکول
Regular cleaning ensures optimal performance and extends the lifespan of your SS-03 Solder Sucker.
- بې لارې کول: Unscrew the front nozzle assembly from the main body. The plunger and spring mechanism can then be carefully pulled out from the rear.
- Clean Solder Residue: Remove any accumulated solder from inside the nozzle, the main body, and around the plunger. A small brush or pick can be used for this. The built-in self-cleaning shaft helps minimize clogging during operation, but periodic manual cleaning is still recommended.
- Inspect Silicone Nozzle: Check the silicone nozzle for wear, tears, or excessive burning. Replace it with a fresh section from the spare tubes if necessary.
- بیا یوځای کول: Carefully reinsert the plunger and spring into the main body, ensuring proper alignment. Screw the nozzle assembly back onto the body until secure.
8. ستونزه حل کول
| ستونزه | احتمالي لامل | د حل لاره |
|---|---|---|
| ضعیف سکشن | Clogged nozzle or internal mechanism; worn or damaged silicone tip; improper seal over solder joint. | Clean the device thoroughly (Section 7); replace the silicone nozzle; ensure the nozzle fully covers the molten solder and iron tip. |
| Solder not fully removed | Solder not fully molten; insufficient suction; too slow activation. | Ensure solder is fully liquid before activating; check for clogs/worn tip; activate the plunger quickly and decisively. |
| Silicone nozzle wears quickly | Excessive heat or prolonged contact with soldering iron. | Minimize direct, prolonged contact with the hot iron; replace with spare silicone tubes as needed. |
9. مشخصات
- نښه: انجینر
- ماډل: SS-03 (New Version)
- مواد: Aluminum Body, Silicone Tip
- د توکي اوږدوالی: ۳.۱۵ انچه (تقریبا ۸۰ ملي متره)
- د توکي وزن: 48 ګرامه (1.69 اونس)
- ځانګړې ځانګړنه: High Power Suction, Heat-resistant (max. 350℃) silicone nozzle, Built-in self-cleaning shaft
- شاملې برخې: SS-16 Silicone tube x 1, SS-17 Silicone tube x 1
- د بریښنا سرچینه: Manual (No batteries required)
- جوړونکی: انجینر
- د اصلي هیواد: جاپان
10. تضمین او ملاتړ
For warranty information, technical support, or to purchase replacement parts (such as ENGINEER SS-16 & ENGINEER SS-17 replacement silicone tubes), please refer to the official ENGINEER webسایټ یا خپل مجاز پرچون پلورونکي سره اړیکه ونیسئ. د هر ډول تضمین ادعا لپاره د پیرود ثبوت په توګه د پیرود رسید وساتئ.


