1. پیژندنه
د پیرودلو لپاره مننهasing the Sharp XL-HF201P Micro Hi-Fi System. This system is designed to provide high-quality audio playback from various sources, including CDs, USB devices, and iPods. This manual provides essential information for the safe and efficient operation of your new audio system. Please read it thoroughly before use and retain it for future reference.
۱.۱. د خوندیتوب مهم معلومات
- د بریښنا سرچینه: واحد یوازې د حجم د AC آوټ لیټ سره وصل کړئtage د واحد په شا پینل کې مشخص شوی.
- وینټیلیشن: Ensure adequate ventilation. Do not block ventilation openings. Avoid placing the unit on soft surfaces that may block vents.
- اوبه او رطوبت: واحد د باران، رطوبت، یا څاڅکو/څاڅکو مایعاتو سره مه مخ کوئ. په واحد کې هغه شیان مه کېږدئ چې د مایعاتو څخه ډک وي، لکه ګلدانونه.
- تودوخه: واحد د تودوخې سرچینو لکه ریډیټرونو، د تودوخې راجسترونو، بخاریو، یا نورو وسایلو څخه لرې وساتئ (په شمول د ampلایفیر) چې تودوخه تولیدوي.
- پاکول: د پاکولو دمخه د دیوال له ساکټ څخه واحد خلاص کړئ. یوازې وچ ټوکر وکاروئ.
- خدمت کول: د دې محصول پخپله خدمت کولو هڅه مه کوئ. ټول خدمتونه وړ خدماتي پرسونل ته راجع کړئ.
3. د بسته محتويات
مهرباني وکړئ وګورئ چې لاندې ټول توکي ستاسو په بسته کې شامل دي:
- Main Unit (CD Player/Receiver)
- Left Speaker (x1)
- Right Speaker (x1)
- ریموټ کنټرول (د دوه AA بیټریو سره)
- FM انتن
- AM لوپ انتن
- د بریښنا تار
- د لارښود لارښود (دا سند)
4. ترتیب کول
4.1 پاکول او ځای پرځای کول
Carefully remove all components from the packaging. Place the main unit and speakers on a stable, flat surface. Ensure there is sufficient space around the unit for proper ventilation.
۵.۲ د سپیکرو نښلول
Connect the speaker wires to the corresponding terminals on the main unit and speakers. Match the positive (+) and negative (-) terminals. For optimal sound, ensure the wires are securely connected. If the speaker wires do not insert directly into the screw-knobs, wrap the bare wire ends around the terminal posts and then tighten the screw-knobs to secure them.
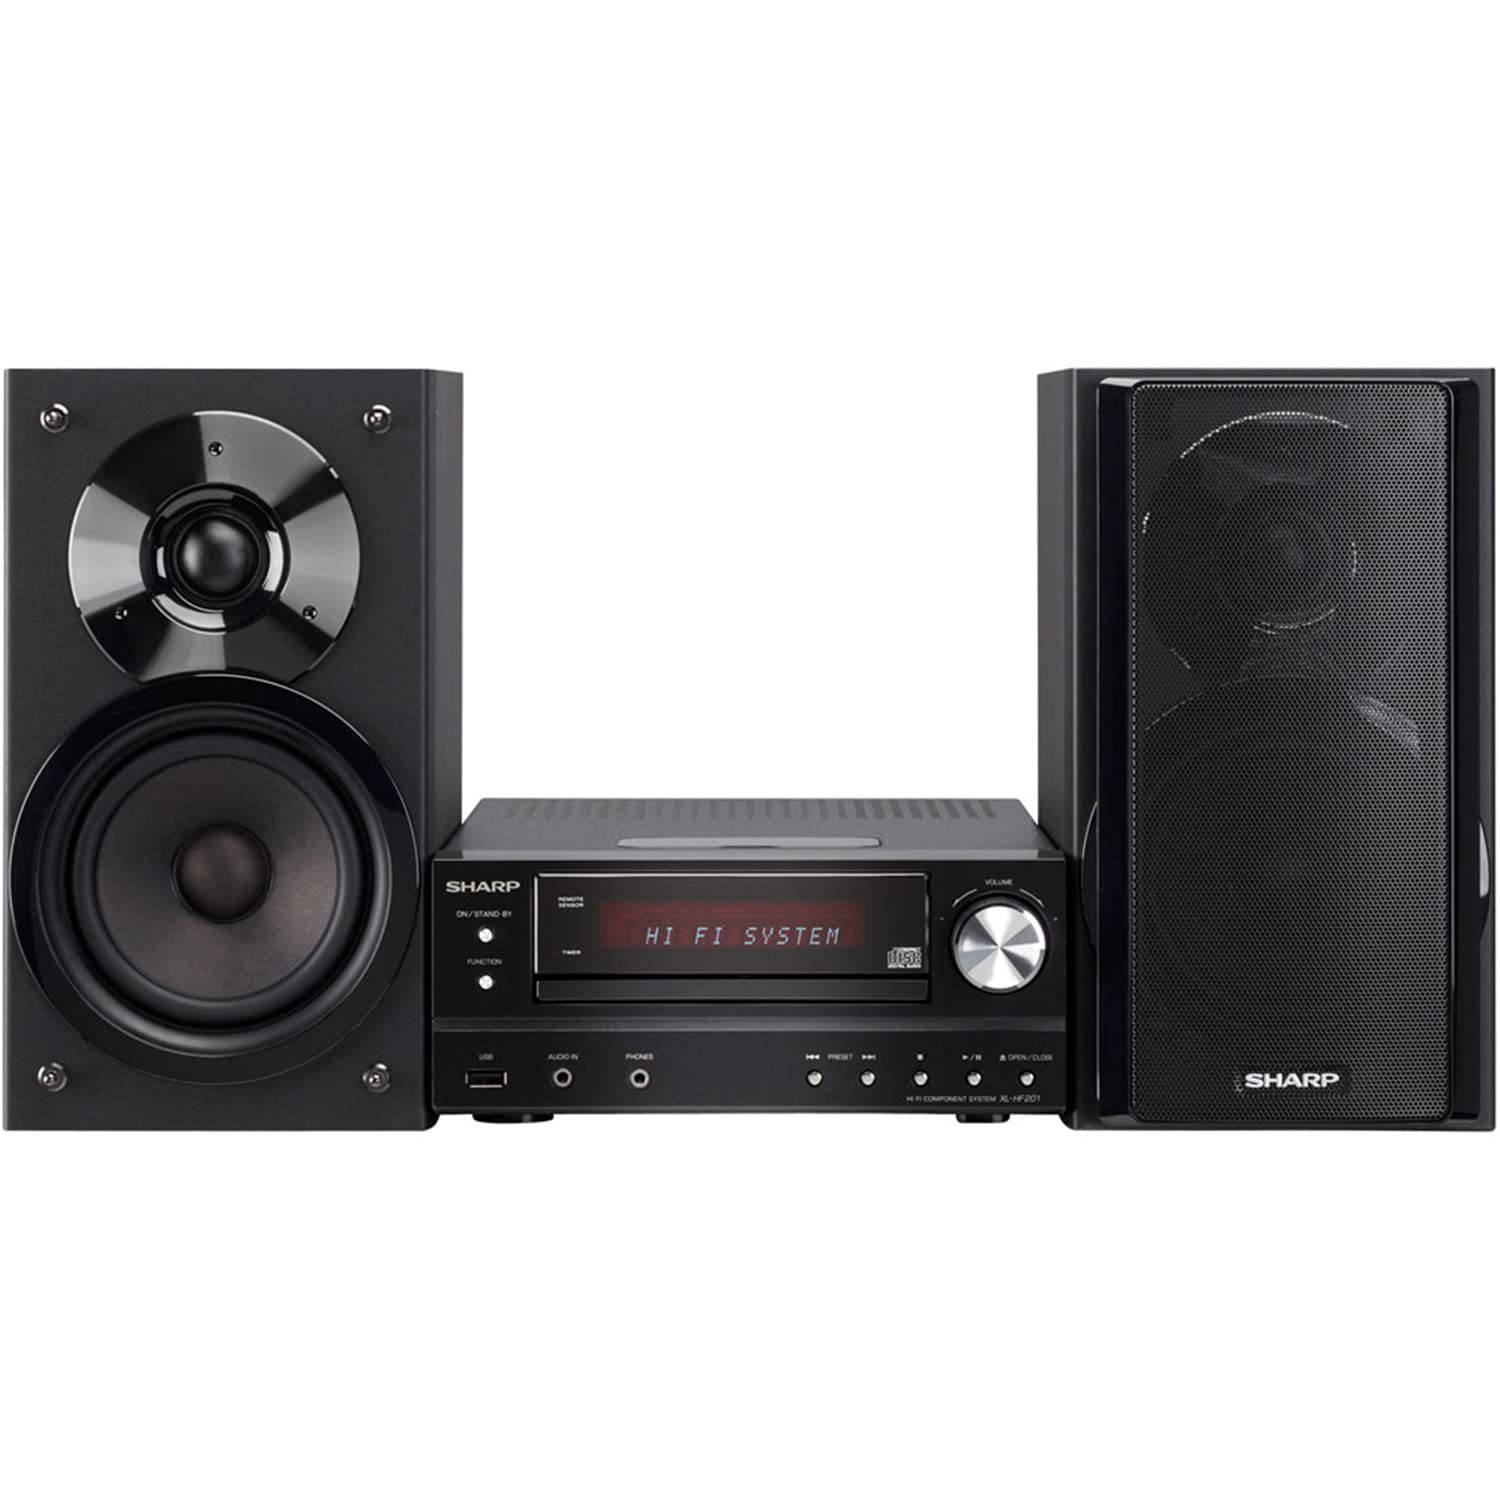
Image 4.2.1: The Sharp XL-HF201P Micro Hi-Fi System, showing the main unit and two speakers. This image illustrates the overall appearance of the system, which includes a central receiver with a CD tray and an iPod dock on top, flanked by two dark-colored speakers.
4.3 Connecting the Antennas
- FM انتن: Connect the supplied FM wire antenna to the FM antenna terminal on the rear of the main unit. Extend the wire for better reception.
- AM انتن: Assemble the AM loop antenna and connect it to the AM antenna terminals. Position the antenna for optimal AM reception.
4.4 د بریښنا نښلول
After all other connections are made, plug the power cord into the AC inlet on the rear of the main unit, then plug the other end into a wall outlet.
5. عملیاتي لارښوونې
۸ پاور آن/بند
فشار ورکړئ پاور button on the front panel or the remote control to turn the unit on or off (standby mode).
5.2 د سرچینې انتخاب
فشار ورکړئ فعالیت button on the front panel or the remote control repeatedly to cycle through available sources: CD, USB, iPod, FM, AM, AUX.
5.3 CD پلے بیک
- غوره کړئ CD فعالیت
- فشار ورکړئ خلاص/بند د CD ټری خلاصولو لپاره تڼۍ.
- Place a CD (CD-DA, MP3, WMA) with the label side up on the tray.
- مطبوعاتي خلاص/بند بیا د ټری تړلو لپاره. پلے بیک به په اوتومات ډول پیل شي.
- کارول پلی/پاز, ودروئ, SKIP (forward/backward) buttons for control.
۱۴ USB پلے بیک
- Insert a USB device (containing MP3 or WMA files) د مخکینۍ پینل په USB پورټ کې.
- غوره کړئ USB فعالیت
- Playback will begin automatically or you may need to select a track.
- کارول پلی/پاز, ودروئ, SKIP د کنټرول لپاره تڼۍ.
5.5 iPod/iPhone Dock
- Carefully place your compatible iPod or iPhone onto the dock connector on top of the main unit.
- غوره کړئ iPod فعالیت
- Your device will begin charging and you can control playback using the system's remote or your device's controls.
۳.۴ د راډیو ټونینګ
- غوره کړئ FM or AM فعالیت
- د کارولو TUNING buttons (or knob on the unit) to manually tune to a station.
- فشار ورکړئ او ونیسئ TUNING buttons for automatic station scanning.
- To preset stations, tune to the desired station, then press یادښت وروسته د مخکینۍ شمېرې تڼۍ.
5.7 د حجم کنټرول
د. په کارولو حجم تنظیم کړئ حجم +/- buttons on the remote control or the volume knob on the main unit.
6. ساتنه
6.1 د واحد پاکول
Wipe the exterior of the unit with a soft, dry cloth. Do not use abrasive cleaners, waxes, or solvents as they may damage the finish. For stubborn stains, lightly dampټوکر د اوبو او نرم صابون سره ومینځئ، بیا یې وچ کړئ.
۷.۲ د سي ډي لینز پاملرنه
Avoid touching the CD lens. If the lens becomes dirty, use a commercially available CD lens cleaner. Do not use compressed air or liquid cleaners directly on the lens.
7. ستونزه حل کول
| ستونزه | احتمالي لامل | د حل لاره |
|---|---|---|
| هیڅ ځواک نشته | د برېښنا تار په خوندي ډول نه دی تړل شوی. | د واحد او دیوال آوټ لیټ سره د بریښنا تار اتصال وګورئ. |
| غږ نشته | Volume is too low or muted. Speaker wires are not connected correctly. | Increase volume. Check speaker wire connections, ensuring correct polarity (+/-). |
| سي ډي نه غږېږي | CD is dirty, scratched, or inserted incorrectly. Incorrect function selected. | Clean or replace CD. Insert CD with label side up. Select CD function. |
| د USB وسیله ونه پیژندل شوه | د USB وسیله په سمه توګه فارمیټ شوې نه ده یا غیر ملاتړ شوې لري files. | Ensure USB device is FAT16/FAT32 formatted and contains MP3/WMA files. Try another USB device. |
| د راډیو ضعیف استقبال | Antenna not properly positioned or connected. Interference. | Adjust antenna position. Move unit away from other electronic devices. |
| ریموټ کنټرول کار نه کوي | بیټرۍ خالي شوي یا په غلط ډول داخل شوي دي. د ریموټ او واحد ترمنځ خنډ. | Replace batteries (2 AA). Ensure clear line of sight to the unit's remote sensor. |
8. مشخصات
- نښه: تیز
- ماډل: XL-HF201P
- د تولید ځواک: 100 واټونه RMS
- ملاتړ شوي رسنۍ: CD-DA, MP3, WMA (CD, USB)
- ارتباط: USB, iPod Dock, AUX Input, FM/AM Tuner
- د سپیکر ډول: Subwoofers (integrated into speaker design)
- د بریښنا سرچینه: د بریښنا تار شوی
- د محصول ابعاد (اصلي واحد): نږدې 13 x 15.09 x 20.15 انچه
- د توکي وزن: تقریبا 20.3 پونډه
- Batteries (Remote): 2 AA بیټرۍ (شامل)
9. تضمین او ملاتړ
د تضمین معلوماتو او پیرودونکو ملاتړ لپاره، مهرباني وکړئ د تضمین کارت ته مراجعه وکړئ چې ستاسو محصول سره شامل دی یا رسمي شارپ ته مراجعه وکړئ. website. You may also contact Sharp customer service directly for assistance with product registration, technical support, or service inquiries.
آنلاین ملاتړ: www.sharpusa.com


