1. پیژندنه
This manual provides essential information for the safe and effective operation, maintenance, and troubleshooting of your Crown CT21056LBMC 18V Cordless Drill Driver. Please read these instructions carefully before using the tool and keep them for future reference. This drill driver is designed for drilling into wood, metal, and plastics, and for driving screws.
2. د خوندیتوب لارښوونې
د بریښنا وسیلو د چلولو په وخت کې د اور، بریښنا شاک او شخصي ټپي کیدو خطر کمولو لپاره تل د خوندیتوب اساسي احتیاطي تدابیر تعقیب کړئ.
- د کاري ساحې خوندیتوب: خپل کاري ساحه پاکه او ښه روښانه وساتئ. ګډوډ یا تیاره سیمې د پیښو لامل کیږي. د بریښنا وسایل په چاودیدونکو فضا کې مه کاروئ، لکه د اور اخیستونکي مایعاتو، ګازونو یا دوړو په شتون کې.
- بریښنایی خوندیتوب: د بدن د بدن سره د ځمکې لاندې یا ځمکې لاندې سطحو لکه پایپونو، ریډیټرونو، رینجونو او یخچالونو سره د تماس څخه ډډه وکړئ. د بریښنا وسایل باران یا لوند شرایطو ته مه ښکاره کوئ.
- شخصي خوندیتوب: تل د سترګو محافظت واغوندئ. د اوږدې مودې لپاره د کار کولو پر مهال د اورېدو محافظت وکاروئ. په سمه توګه جامې واغوندئ؛ له خلاصو جامو یا زیوراتو څخه ډډه وکړئ. اوږده ویښتان خوندي کړئ.
- د وسایلو کارول او ساتنه: د بریښنا وسیله مه مجبوروئ. د خپل غوښتنلیک لپاره سم بریښنا وسیله وکاروئ. د هر ډول سمونونو کولو، لوازمو بدلولو، یا د بریښنا وسیلو ذخیره کولو دمخه د بیټرۍ پیک د بریښنا وسیلې څخه جلا کړئ.
- د بیټرۍ پیک خوندیتوب: یوازې د جوړونکي لخوا مشخص شوي چارجر سره چارج کړئ. د بیټرۍ کڅوړه مه سوځوئ حتی که دا سخته زیانمنه شوې وي.
3. د بسته محتويات
Carefully unpack all items and check against the list below. If any parts are missing or damaged, contact your retailer.
- 1 x Crown CT21056LBMC Cordless Drill Driver
- 2 x 18V Lithium-Ion Batteries (1.5 Ah)
- 1 د بیټرۍ چارجر
- ۱ x لارښود لارښود (دا سند)
- 1 x د بار وړلو قضیه

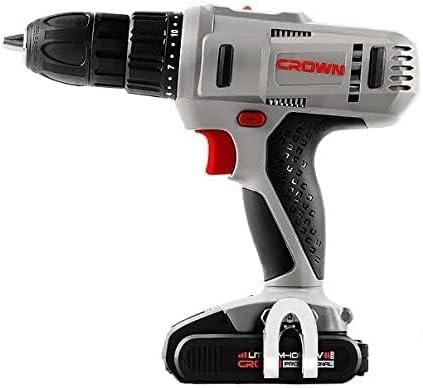
Image 1: The complete Crown CT21056LBMC kit, showing the drill driver, two batteries, charger, and the durable carrying case.
4. محصول ختم شوview
Familiarize yourself with the components of your drill driver before operation.
انځور ۵.۱: اړخ view of the drill driver, illustrating key components such as the chuck, torque adjustment collar, speed selector switch, and trigger.
- بې کیلي چک: د چټکو او اسانه بدلونونو لپاره.
- د تورک تنظیم کولو کالر: Selects the desired torque setting for driving screws or drill mode.
- د سرعت انتخابونکی سویچ: Allows selection between two mechanical speed ranges.
- مخکینۍ/بیرته سویچ: Changes the rotation direction of the chuck.
- د محرک سویچ: ډرل فعالوي او سرعت کنټرولوي.
- د LED کاري رڼا: د کار ساحه روښانه کوي.
- د بیټرۍ بسته: وسیلې ته ځواک ورکوي.
- د بیټرۍ د خوشې کولو تڼۍ: د بیټرۍ پیک لرې کولو لپاره.
5. ترتیب کول
5.1. د بیټرۍ چارج کول
The battery pack is not fully charged at the time of purchase. It must be fully charged before first use.
- چارجر د معیاري بریښنا سایټ سره وصل کړئ.
- Slide the battery pack onto the charger base. Ensure it clicks into place.
- The charging indicator light on the charger will show the charging status. A full charge takes approximately 45 minutes for a 1.5 Ah battery.
- کله چې په بشپړه توګه چارج شي، بیټرۍ له چارجر څخه جلا کړئ او چارجر له ساکټ څخه وباسئ.
5.2. د بیټرۍ کڅوړه نصب او لرې کول
- د نصبولو لپاره: Align the battery pack with the base of the drill driver and slide it in until it clicks securely into place.
- د لرې کولو لپاره: د بیټرۍ د خوشې کولو تڼۍ فشار ورکړئ او د بیټرۍ پیک له وسیلې څخه بهر کړئ.

Image 3: The drill driver with a fully installed battery pack, ready for use.
۴.۳. د ډرل بټونو/ډرایور بټونو نصب او لرې کول
- د ژامې د خلاصولو لپاره بې کیلي چک د ساعت په مقابل لوري وګرځوئ.
- Insert the drill bit or driver bit into the chuck, ensuring it is centered.
- Rotate the keyless chuck clockwise to tighten the jaws firmly around the bit. Do not overtighten.
- د لرې کولو لپاره، چک د ساعت په مقابل لوري وګرځوئ تر هغه چې بټ را ایستل شي.
6. عملیاتي لارښوونې
۲. د سرعت غوره کول
The drill driver features two mechanical speed settings:
- سرعت ۱ (ټیټ سرعت، ۰-۶۰۰ RPM): د چلولو پیچونو، لویو برمه کولو قطرونو، یا هغه غوښتنلیکونو لپاره مثالی چې لوړ تورک ته اړتیا لري.
- سرعت ۲ (لوړ سرعت، ۰-۱۸۵۰ RPM): Suitable for smaller drilling diameters and faster drilling.
To change speed, slide the speed selector switch located on top of the drill. Ensure the tool is stopped before changing speeds.
۶.۲. د تورک تنظیم کول
The torque adjustment collar has 18 torque settings plus a drill mode (indicated by a drill bit symbol).
- د تورک ترتیبات (۱-۲۲): Use these settings for driving screws. Lower numbers are for smaller screws or softer materials, higher numbers for larger screws or harder materials. The clutch will disengage when the set torque is reached, preventing overtightening or stripping.
- Drill Mode (Drill Bit Symbol): Provides maximum torque for drilling applications without the clutch disengaging.
د مطلوب ترتیب غوره کولو لپاره د تورک تنظیم کولو کالر وګرځوئ.
۲. مخکینۍ/ برعکس گردش
The forward/reverse switch is located above the trigger. Push it to the left for forward rotation (for drilling and driving screws) and to the right for reverse rotation (for removing screws or freeing jammed bits). Position the switch in the center to lock the trigger and prevent accidental starting.
6.4. Operating the Trigger Switch and LED Light
Squeeze the trigger switch to start the drill. The speed is variable depending on how far the trigger is pressed. The integrated LED work light will illuminate when the trigger is pressed, providing visibility in dimly lit areas.
7. ساتنه
منظم ساتنه غوره فعالیت تضمینوي او ستاسو د وسیلې ژوند اوږدوي.
- پاکول: Keep the ventilation openings clear and free of dust. Use a soft, damp د وسیلې د پاکولو لپاره ټوکر casinج. محلولونه یا د کثافاتو پاکوونکي مه کاروئ.
- د بیټرۍ پاملرنه: بیټرۍ په یخ او وچ ځای کې د مستقیم لمر وړانګو څخه لرې وساتئ. په بشپړه توګه خارج شوي بیټرۍ د اوږدې مودې لپاره مه ساتئ. که چیرې په کارولو کې نه وي نو په دوره یي ډول یې چارج کړئ.
- ذخیره کول: Store the drill driver, batteries, and charger in the provided carrying case in a dry, secure location out of reach of children.
- معاینه: Regularly inspect the power tool for any signs of damage, loose screws, or worn parts. If damage is found, have it repaired by a qualified service technician.
8. ستونزه حل کول
Before attempting any repairs, ensure the battery is removed from the tool.
| ستونزه | احتمالي لامل | د حل لاره |
|---|---|---|
| ډرل نه پیل کیږي | Battery not charged or improperly installed. Forward/Reverse switch in center (locked) position. | Charge battery fully and ensure it is securely installed. Move Forward/Reverse switch to either forward or reverse position. |
| بیټرۍ چارج نه کوي | Charger not plugged in. Battery or charger is faulty. | Check power connection. If problem persists, contact customer support for replacement. |
| د عملیاتو په جریان کې د بریښنا له لاسه ورکول | بیټرۍ ټیټه ده. د ډیر بار محافظت فعال شوی. | Recharge the battery. Reduce pressure on the tool or use a lower speed setting. |
| په چک کې ټوټه ټوټه کېږي | چک په کافي اندازه نه دی ټینګ شوی. د بټ شینک چټل یا خراب شوی دی. | چک په کلکه سره ټینګ کړئ. بټ پاک کړئ یا بدل کړئ. |
9. مشخصات
| فیچر | مشخصات |
|---|---|
| د ماډل شمیره | CT21056LBMC |
| والیtage | 18 ولټه |
| د بیټرۍ ډول | لیتیم آیون |
| د بیټرۍ ظرفیت | ۲۵۲هـ |
| د چک ظرفیت | ۱.۵ - ۱۳ ملي متره |
| د نه بار سرعت (سرعت ۱) | ۰ - ۳۵۰۰ RPM |
| د نه بار سرعت (سرعت ۱) | ۰ - ۳۵۰۰ RPM |
| مکس توریک | 4 Newton-Meter (Nm) |
| د کلچ موقعیتونه | ۱۷ + ۱ (د ډرل حالت) |
| د چارج کولو وخت | نږدې 45 دقیقې |
| د محصول ابعاد | 20.5 x 5 x 20 سانتي متره |
| د محصول وزن | 1.54 کیلو ګرامه |
| ځانګړي ځانګړتیاوې | مدغم LED کاري څراغ |
10. تضمین او ملاتړ
For warranty information, service, or technical support, please refer to the warranty card included with your product or contact your point of purchase. Keep your purchase receipt as proof of purchase for any warranty claims.


