1. پیژندنه
The BSIDE ZT109 is a portable, True RMS digital multimeter designed for professional and practical use. It features a large 9999-count LCD with backlight, offering clear readability. This device is capable of measuring AC/DC voltage, AC/DC current, resistance, capacitance, frequency, diode, and continuity. Its robust design includes strong anti-interference capabilities and an auto power-off function after 15 minutes of inactivity to conserve battery life.
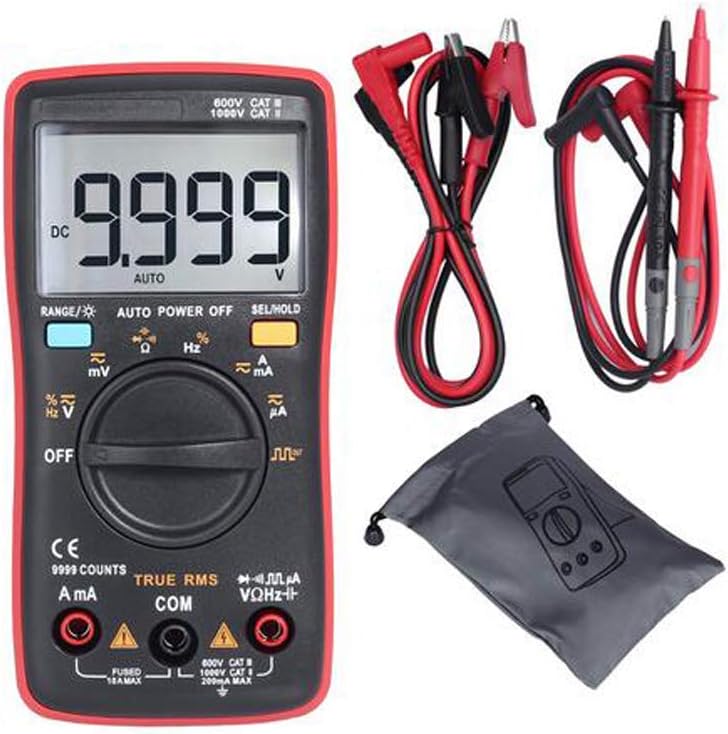
Figure 1: BSIDE ZT109 Digital Multimeter with included accessories.
2. د خوندیتوب معلومات
To ensure safe operation and service of the multimeter, please read all instructions carefully before use. Failure to observe these safety warnings may result in electric shock, injury, or damage to the meter or equipment under test.
- Always ensure the test leads are properly connected and the function switch is set to the correct range before making any measurements.
- د والیت غوښتنه مه کوئtage یا هغه جریان چې د میټر لپاره له ټاکل شوي اعظمي حد څخه تیریږي.
- د حجم سره کار کولو پرمهال خورا احتیاط وکړئtagد 30V AC RMS، 42V چوکۍ، یا 60V DC څخه پورته. دا حجمونهtagد شاک خطر رامنځته کوي.
- Before measuring resistance, continuity, or diode, ensure that the circuit under test is de-energized and all capacitors are discharged.
- کله چې د بیټرۍ ټیټ شاخص څرګند شي نو سمدلاسه بیټرۍ بدله کړئ ترڅو دقیق لوستل ډاډمن شي.
- که چیرې میټر خراب ښکاري یا کیس خلاص وي نو مه یې چلوئ.
- Use only the specified replacement parts when servicing the meter.
3. محصول ختم شوview
Familiarize yourself with the components of your BSIDE ZT109 Digital Multimeter.

Figure 2: Front panel components including LED display, range button, function switch key, rotary switch, and input sockets.

3 شکل: تړل view highlighting the display screen, input jacks, and function selection button.
The multimeter features a large LCD display, a rotary switch for selecting measurement functions, and buttons for range, backlight, and data hold. The input sockets are clearly labeled for current (mA/A), common (COM), and voltage/resistance/diode/capacitance (VΩHz™).
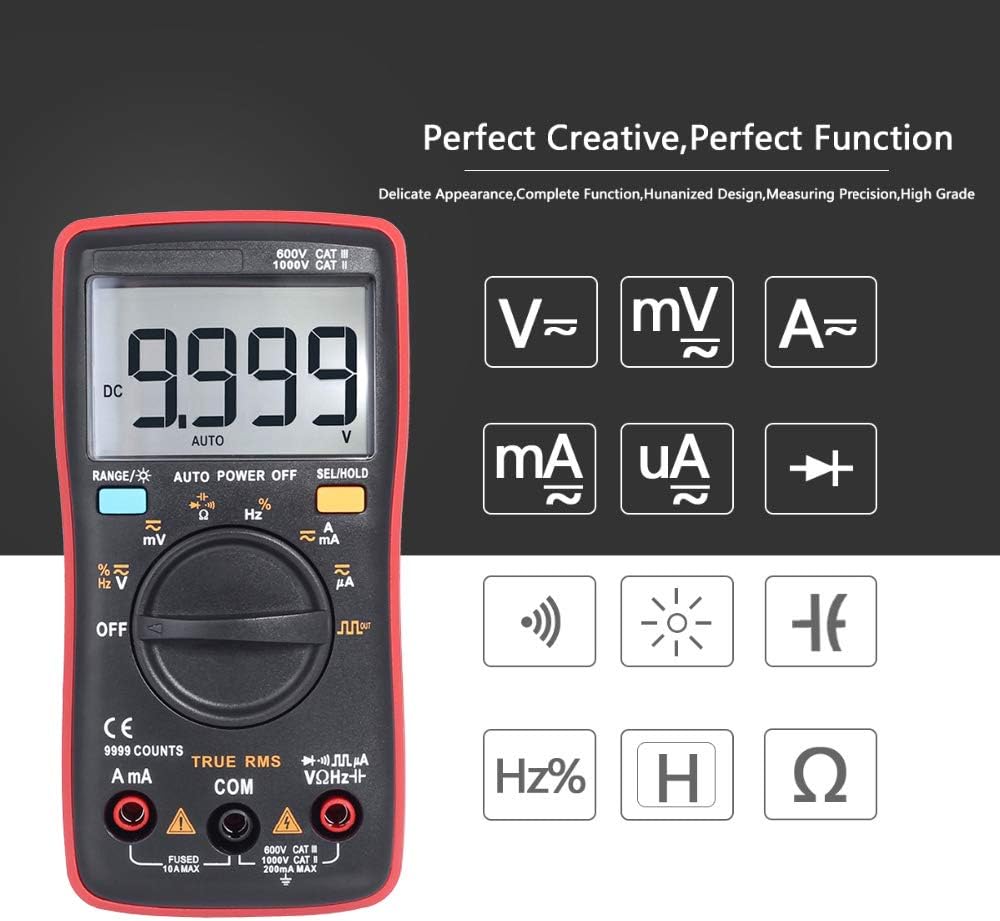
شکل 4: پایview of measurement capabilities indicated by symbols on the display.
4. ترتیب کول
4.1 د بیټرۍ نصب کول
The BSIDE ZT109 multimeter requires two 1.5V AAA batteries for operation. Ensure the batteries are installed correctly before first use or when replacing them.
- ملټي میټر بند کړئ او د ازموینې ټولې لیډونه جلا کړئ.
- د بیټرۍ د برخې پوښ د واحد په شا کې ومومئ.
- د بیټرۍ پوښ خوندي کولو لپاره د سکرو ډرایور څخه کار واخلئ.
- Remove the cover and insert two 1.5V AAA batteries, observing the correct polarity (+ and -).
- د بیټرۍ پوښ بدل کړئ او پیچ پیچ کړئ.
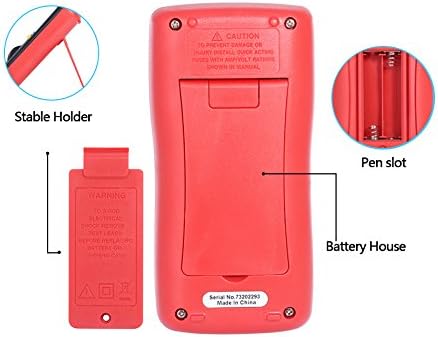
شکل 5: شاته view of the multimeter, illustrating the battery compartment and integrated stable holder.
۶.۲ د ټیسټ لیډونو نښلول
Always connect the black test lead to the COM (common) input jack. Connect the red test lead to the appropriate input jack based on the measurement type:
- د voltage, resistance, capacitance, frequency, and diode measurements, connect the red lead to the VΩHz™ input jack.
- For current measurements (mA or A), connect the red lead to the mA/A input jack.
5. عملیاتي لارښوونې
5.1 Power On/Off and Auto Power Off
To turn on the multimeter, rotate the function switch from the 'OFF' position to any desired measurement function. The meter will automatically power off after approximately 15 minutes of inactivity to conserve battery life. To disable auto power off, press and hold the 'SEL/HOLD' button while turning the meter on.
۴.۲ د اندازه کولو دندې
Select the desired measurement function using the rotary switch. Use the 'RANGE' button to switch between auto-ranging and manual-ranging modes, and the 'SEL/HOLD' button to select sub-functions (e.g., AC/DC, diode/continuity) or to hold the current reading on the display.
5.2.1 DC Voltage اندازه کول (V)
- Set the rotary switch to the 'V™' position.
- Connect the black test lead to the COM jack and the red test lead to the VΩHz™ jack.
- د ازموینې لیډونه د DC والیوم په اوږدو کې وصل کړئtagد اندازه کولو لپاره سرچینه.
- ټوک ولولئtage ارزښت په نندارتون کې.
5.2.2 AC Voltage اندازه کول (V)
- Set the rotary switch to the 'V™' position.
- Press the 'SEL/HOLD' button to switch to AC voltage measurement if necessary.
- Connect the black test lead to the COM jack and the red test lead to the VΩHz™ jack.
- د ازموینې لیډونه د AC حجم په اوږدو کې وصل کړئtagد اندازه کولو لپاره سرچینه.
- ټوک ولولئtage ارزښت په نندارتون کې.
5.2.3 DC/AC Current Measurement (mA & A)
- Set the rotary switch to the 'mA™' or 'A™' position depending on the expected current.
- Press the 'SEL/HOLD' button to switch between DC and AC current measurement if necessary.
- Connect the black test lead to the COM jack and the red test lead to the mA/A jack.
- مهم: Connect the multimeter in series with the circuit to measure current. Do not connect it in parallel across a voltage سرچینه.
- په ښودنه کې اوسنی ارزښت ولولئ.
۴.۶ د مقاومت اندازه کول (Ω)
- د څرخي سویچ 'Ω' موقعیت ته تنظیم کړئ.
- Ensure the circuit under test is de-energized and all capacitors are discharged.
- Connect the black test lead to the COM jack and the red test lead to the VΩHz™ jack.
- د مقاومت اندازه کولو لپاره د ازموینې لیډونه د برخې په اوږدو کې وصل کړئ.
- په ښودنه کې د مقاومت ارزښت ولولئ.
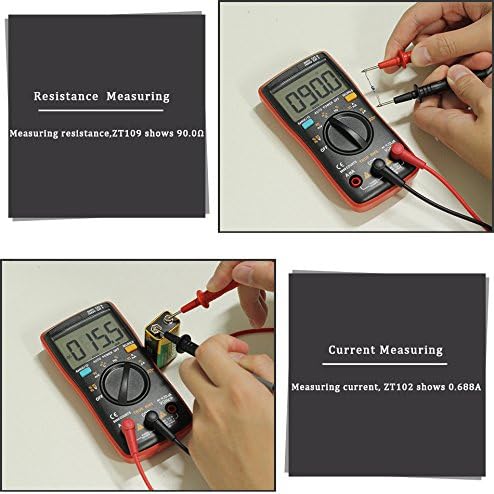
شکل 6: مثالample of measuring resistance using the ZT109 multimeter.
۵.۴ د ظرفیت اندازه کول (F)
- Set the rotary switch to the '™F' position.
- د اندازه کولو دمخه ډاډ ترلاسه کړئ چې کپیسیټر په بشپړ ډول خارج شوی دی.
- Connect the black test lead to the COM jack and the red test lead to the VΩHz™ jack.
- د ازموینې لیډونه د کپیسیټر په اوږدو کې وصل کړئ.
- په ښودنه کې د ظرفیت ارزښت ولولئ.
۵.۵ د فریکونسۍ اندازه کول (Hz)
- Set the rotary switch to the 'Hz%' position.
- Connect the black test lead to the COM jack and the red test lead to the VΩHz™ jack.
- د سیګنال سرچینې په اوږدو کې د ازموینې لیډونه وصل کړئ.
- په ښودنه کې د فریکونسۍ ارزښت ولولئ.
5.2.7 Diode Test (→|→)
- Set the rotary switch to the '→|→' position.
- Press the 'SEL/HOLD' button to select the diode test function.
- Connect the black test lead to the COM jack and the red test lead to the VΩHz™ jack.
- سور ټیسټ لیډ د انود سره او تور ټیسټ لیډ د ډایډ کیتوډ سره وصل کړئ.
- ښودنه به د مخکینۍ حجم وښييtage drop. Reverse the leads; the display should show 'OL' (open loop) for a good diode.
5.2.8 Continuity Test (™))
- Set the rotary switch to the '→|→' position.
- Press the 'SEL/HOLD' button to select the continuity test function.
- Connect the black test lead to the COM jack and the red test lead to the VΩHz™ jack.
- د ازموینې لیډونه د سرکټ یا برخې په اوږدو کې وصل کړئ.
- که چیرې مقاومت تقریبا 50Ω څخه کم وي، نو بزر به غږ وکړي، چې دوام ښیي.
6. ساتنه
6.1 پاکول
قضیه د اعلان سره پاک کړئamp ټوکر او یو معتدل صابون. د کثافاتو یا محلولونو څخه کار مه اخلئ. ډاډ ترلاسه کړئ چې میټر د کارولو دمخه په بشپړه توګه وچ دی.
6.2 د بیټرۍ بدلول
Refer to Section 4.1 for detailed instructions on battery replacement. Always replace both batteries with new 1.5V AAA batteries when the low battery indicator appears.
6.3 د فیوز بدلول
The multimeter is protected by internal fuses. If the current measurement function stops working, the fuse may need replacement. Fuse replacement should only be performed by qualified personnel. Use only fuses with the specified ratings (e.g., FUSED 10A MAX, FUSED 200mA MAX as indicated near the input sockets).
6.4 ذخیره کول
If the meter is not to be used for an extended period, remove the batteries to prevent leakage and damage to the device. Store the multimeter in a cool, dry place, away from direct sunlight and extreme temperatures.
7. ستونزه حل کول
- میټر نه چالانیږي: د بیټرۍ نصب کول وګورئ او ډاډ ترلاسه کړئ چې بیټرۍ خالي نه دي. که اړتیا وي نو بدل یې کړئ.
- هیڅ لوستل یا 'OL' (اوورلوډ) نه ښودل کیږي: Ensure test leads are correctly connected and making good contact. Verify the function switch is set to the correct range. If measuring resistance or continuity, ensure the circuit is de-energized. 'OL' can also indicate a value exceeding the meter's range.
- ناسم لوستل: Check battery level. Ensure test leads are not damaged. Verify the correct function and range are selected.
- اوسنی اندازه کول کار نه کوي: Check the fuse. If blown, it needs to be replaced by a qualified technician with a fuse of the correct rating.
8. مشخصات
| پیرامیټر | حد / ارزښت | دقت |
|---|---|---|
| DC Voltage (V) | ۲۰۰ ملی وولټ - ۲۵۰ وولټ | (0.5% +3) |
| DC Voltage (mV) | 9.999mV - 99.99mV | (0.5% +3) |
| AC Voltage (V) | ۲۰۰ ملی وولټ - ۲۵۰ وولټ | (1% +3) |
| AC Voltage (mV) | 9.999mV - 99.99mV | (1% +3) |
| DC Current (mA & A) | 999.9mA - 9.999A | (1% +3) |
| DC Current (ℬ) | 99.99ℬ - 999.9ℬ | (0.8% +3) |
| AC Current (mA & A) | 999.9mA - 9.999A | (1.2% +3) |
| AC Current (ℬ) | 99.99ℬ - 999.9ℬ | (1.0% +3) |
| مقاومت | ۲۰۰ اوه - ۲۰ متره | (0.5% +3) |
| ظرفیت | ۲ نانوفارټ - ۲ ملي متره فارنهایټ | (2.0% +5) |
| فریکونسی | ۲۰۰.۰۰ هرټز - ۲۰.۰۰۰ میګاهرتز | (0.1% +2) |
| ډایډ | هو | N/A |
| دوام | هو | N/A |
| اعظمي ښودنه | د 9999 شمیره | N/A |
| رنګارنګ | اتومات / لارښود | N/A |
| د عملیاتي حرارت درجه | 0℃ ~ 40℃ | N/A |
| د ذخیرې د حرارت درجه | -20℃ ~ 60℃ | N/A |
| د بریښنا رسول | 2* 1.5V AAA Battery | N/A |
| ابعاد | 130mm x 65mm x 32mm | N/A |
| وزن | نږدې 130 ګرامه (بغیر بیټرۍ) | N/A |
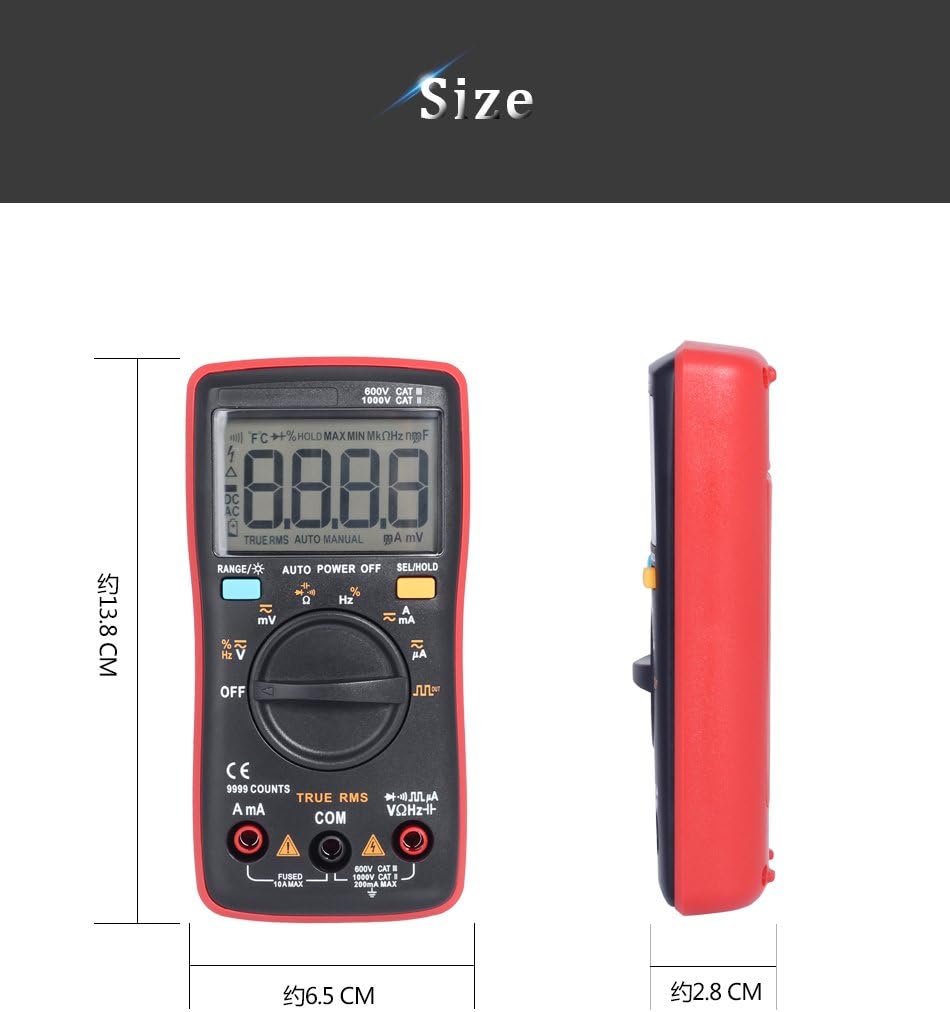
Figure 7: Physical dimensions of the BSIDE ZT109 multimeter.
9. تضمین او ملاتړ
د تضمین معلوماتو او تخنیکي ملاتړ لپاره، مهرباني وکړئ د خپل پیرود سره چمتو شوي اسنادو ته مراجعه وکړئ یا مستقیم له پلورونکي سره اړیکه ونیسئ. د هر ډول تضمین ادعا لپاره د پیرود ثبوت وساتئ.


