1. پیژندنه
Thank you for choosing the HoldPeak HP-890CN Digital Multimeter. This device is designed for stable and reliable performance, featuring an anti-drop design and a clear 25mm high LCD display. It is capable of measuring various electrical parameters including DC/AC voltage, diode, resistance, capacitance, frequency, duty cycle, temperature, and hFE, along with a non-contact voltage (NCV) detection function. Please read this manual thoroughly before use to ensure safe and proper operation.
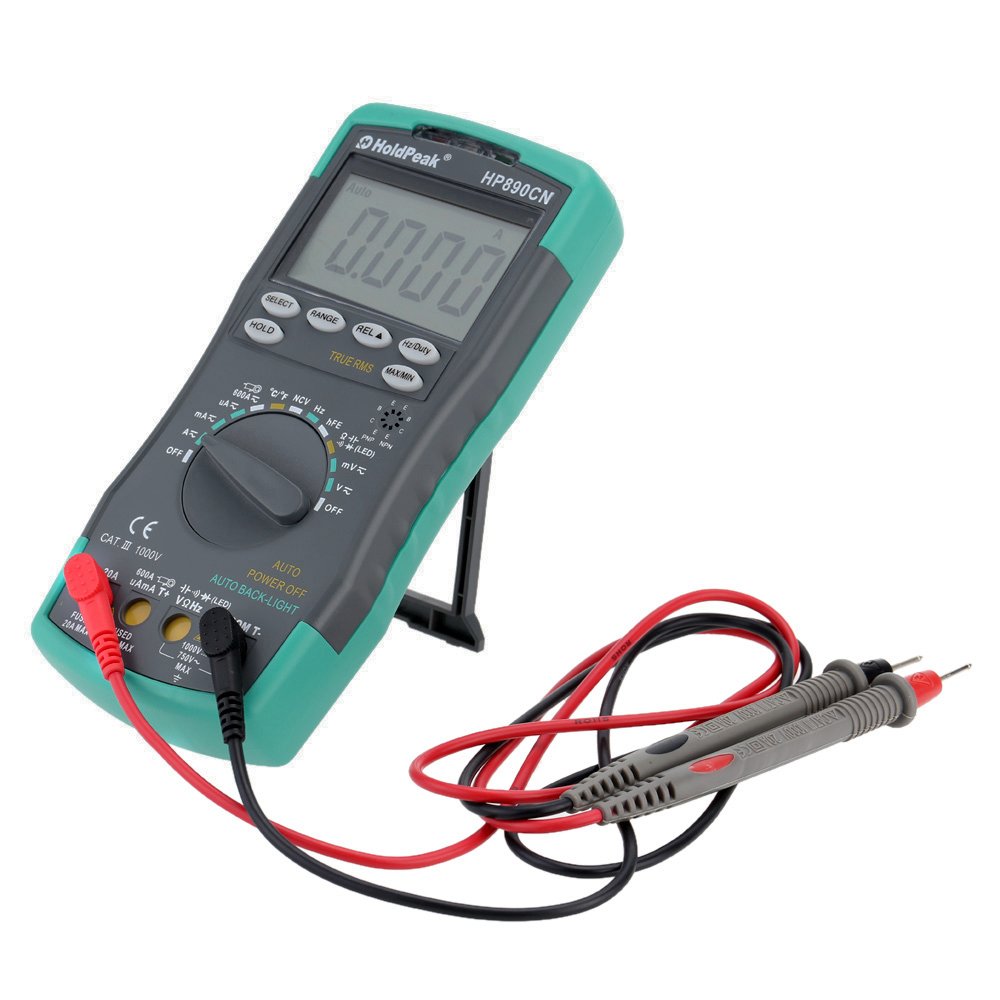
Figure 1: HoldPeak HP-890CN Digital Multimeter
2. د خوندیتوب معلومات
WARNING: To avoid electrical shock or damage to the meter, please observe the following safety precautions:
- Always remove test leads from the circuit before opening the case or battery cover.
- Do not operate the meter with the case or battery cover open.
- To prevent damage or injury, ensure quick-acting fuses with the specified amp and volt ratings are installed.
- This device complies with IEC 1010-1 1000V CAT III, Pollution Degree 2 standards.
- د اندازه کولو لپاره تل سم فعالیت او حد وکاروئ.
- هيڅکله د حجم غوښتنه مه کوئtage or current that exceeds the maximum specified limits.
- محتاط اوسئ کله چې د حجم سره کار کوئtagد 30V AC RMS، 42V چوکۍ، یا 60V DC څخه پورته. دا حجمونهtagد شاک خطر رامنځته کوي.
- د اندازه کولو په وخت کې ګوتې د پروب خنډونو شاته وساتئ.

شکل 2: شاته view of the multimeter showing safety warnings and battery compartment.
3. محصول ختم شوview
The HoldPeak HP-890CN Digital Multimeter features a large LCD display and intuitive controls for ease of use. Below is a diagram illustrating the main components and their functions.

Figure 3: Labeled diagram of the HP-890CN Multimeter.
مهمې برخې:
- د LCD نندارې: Shows measurement readings, units, and function indicators. Features smart backlight.
- د فعالیت سویچ: د اندازه کولو دندو غوره کولو لپاره روټري سویچ (حجمtage، جریان، مقاومت، او نور).
- داخله جیکونه:
- COM: Common input jack for the black test lead.
- VΩHz: د حجم لپاره داخلولtage, resistance, frequency, capacitance, diode, and temperature measurements (red test lead).
- mAµA: Input for current measurements up to 600mA (red test lead).
- 20A: د اوسني اندازه کولو لپاره ان پټ تر 20A پورې (سور ټیسټ لیډ).
- تڼۍ:
- انتخاب: Toggles between functions within a single rotary switch position (e.g., AC/DC, Diode/Continuity).
- رینج: په لاسي ډول د اندازه کولو حد غوره کوي (آټو رینج کول ډیفالټ دي).
- REL (Relative Value): Measures relative changes.
- هرټز/وظیفه: د فریکونسۍ یا دندې دورې اندازه کول غوره کوي.
- هولډ: د اوسني ښودنې لوستل کنګل کوي.
- TRUE RMS: Indicates True RMS measurement capability for AC.
- MAX/MIN: اعظمي او لږترلږه لوستل ثبتوي.
- NCV Induction Area: د غیر تماس لپاره والیومtage کشف.
- hFE Testing Interface: د ټرانزیسټر ازموینې لپاره ساکټ.
- کیک سټینډ: د اسانتیا لپاره مدغم شوی سټینډ viewing (rotates 180 degrees).
4. ترتیب کول
4.1 د بیټرۍ نصب کول
The multimeter requires either two 1.5V AAA batteries or one 9V 6F22 battery (not included). The specific battery type included with your product may vary. To install or replace batteries:
- ډاډ ترلاسه کړئ چې ملټي میټر بند دی او ټول ټیسټ لیډونه منقطع شوي دي.
- د میټر په شا کې د بیټرۍ کڅوړه ومومئ.
- د بیټرۍ پوښ خوندي کولو لپاره د سکرو ډرایور څخه کار واخلئ.
- د بیټرۍ پوښ لرې کړئ.
- Insert the new batteries, observing the correct polarity (+ and -).
- د بیټرۍ پوښ بدل کړئ او پیچ په خوندي ډول ټینګ کړئ.

شکل 4: داخلي view of the multimeter, showing the battery compartment.
۶.۲ د ټیسټ لیډونو نښلول
Always connect the black test lead to the COM jack. Connect the red test lead to the appropriate input jack based on the measurement you intend to perform:
- د والی لپارهtage, Resistance, Capacitance, Frequency, Diode, and Temperature: Connect the red lead to the VΩHz جیک
- For Current up to 600mA: Connect the red lead to the mAµA جیک
- For Current up to 20A: Connect the red lead to the 20A جیک
5. عملیاتي لارښوونې
Before taking any measurements, ensure the test leads are correctly connected and the function switch is set to the desired measurement type.
۸ پاور آن/بند
Rotate the function switch from the OFF position to any desired measurement function to turn the meter ON. Rotate it back to OFF to power it down. The meter features an auto power-off function to conserve battery life.
5.2 د DC حجم اندازه کولtagای (وی =)
- Set the function switch to the V= position.
- تور ټیسټ لیډ د COM جیک سره او سور ټیسټ لیډ د VΩHz جیک سره وصل کړئ.
- Connect the test probes across the component or circuit to be measured, in parallel.
- ټوک ولولئtagد LCD نندارې ارزښت.
5.3 اندازه کول د AC حجمtage (V~)
- د فعالیت سویچ د V ~ موقعیت ته تنظیم کړئ.
- تور ټیسټ لیډ د COM جیک سره او سور ټیسټ لیډ د VΩHz جیک سره وصل کړئ.
- Connect the test probes across the component or circuit to be measured, in parallel.
- ټوک ولولئtage value on the LCD display. This meter provides True RMS readings for AC voltage.

شکل ۵.۱: د AC حجم اندازه کولtagد بریښنا له سوري څخه.
5.4 Measuring DC/AC Current (A= / A~)
CAUTION: Always connect the meter in series with the circuit when measuring current. Ensure the circuit is de-energized before connecting the meter.
- Set the function switch to the A= or A~ position. Use the SELECT button to toggle between DC and AC if necessary.
- د تور ټیسټ لیډ د COM جیک سره وصل کړئ.
- د 600mA پورې د جریانونو لپاره، سور ټیسټ لیډ د mAµA جیک. د 20A پورې د جریانونو لپاره، سور ټیسټ لیډ سره وصل کړئ 20A جیک
- Break the circuit and connect the test probes in series with the circuit.
- په سرکټ کې بریښنا واچوئ او اوسنی ارزښت په LCD ډسپلې کې ولولئ.
۶.۲ د مقاومت اندازه کول (Ω)
- د فعالیت سویچ د Ω موقعیت ته تنظیم کړئ.
- تور ټیسټ لیډ د COM جیک سره او سور ټیسټ لیډ د VΩHz جیک سره وصل کړئ.
- Connect the test probes across the component to be measured. Ensure the component is de-energized.
- په LCD ډسپلې کې د مقاومت ارزښت ولولئ.
۶.۷ د ظرفیت اندازه کول (F)
- Set the function switch to the capacitance (F) position.
- تور ټیسټ لیډ د COM جیک سره او سور ټیسټ لیډ د VΩHz جیک سره وصل کړئ.
- د ازموینې پروبونه د کپاسیټر سره وصل کړئ. ډاډ ترلاسه کړئ چې کپاسیټر د اندازه کولو دمخه په بشپړ ډول خارج شوی دی.
- په LCD نندارې کې د ظرفیت ارزښت ولولئ.
۶.۸ د اندازه کولو فریکونسي (Hz) / د دندې دوره (٪)
- Set the function switch to the Hz/% position.
- تور ټیسټ لیډ د COM جیک سره او سور ټیسټ لیډ د VΩHz جیک سره وصل کړئ.
- د سیګنال سرچینې په اوږدو کې د ازموینې پروبونه وصل کړئ.
- Press the Hz/Duty button to toggle between frequency and duty cycle measurements.
- د LCD په ښودنه کې ارزښت ولولئ.
5.8 د ډایډ ټیسټ
- Set the function switch to the Diode/Continuity position. Press SELECT to choose Diode Test.
- تور ټیسټ لیډ د COM جیک سره او سور ټیسټ لیډ د VΩHz جیک سره وصل کړئ.
- سور پروب د انود سره او تور پروب د ډایډ کیتوډ سره وصل کړئ.
- مخکینۍ برخه ولولئtage drop on the LCD display. Reverse the probes to check for open circuit (OL).
5.9 د دوام ازموینه
- Set the function switch to the Diode/Continuity position. Press SELECT to choose Continuity Test.
- تور ټیسټ لیډ د COM جیک سره او سور ټیسټ لیډ د VΩHz جیک سره وصل کړئ.
- د ازموینې پروبونه د سرکټ یا برخې په اوږدو کې وصل کړئ.
- که چیرې مقاومت تقریبا 50Ω څخه کم وي، نو بزر به غږ وکړي، چې دوام ښیي.
۷.۹ د تودوخې اندازه کول (°C/°F)
- د فعالیت سویچ د °C/°F موقعیت ته تنظیم کړئ.
- Connect the K-type thermocouple probe to the VΩHz and COM jacks, observing polarity.
- د ترموکوپل نوک په هغه شی یا نږدې کېږدئ چې تودوخه یې اندازه کیږي.
- Read the temperature on the LCD display. Use the SELECT button to switch between Celsius and Fahrenheit.
5.11 hFE Test (Transistor Test)
- د فنکشن سویچ د HFE موقعیت ته تنظیم کړئ.
- Insert the transistor's Emitter, Base, and Collector leads into the corresponding holes in the hFE socket, ensuring correct NPN or PNP type.
- Read the hFE value (DC current gain) on the LCD display.
5.12 غیر اړیکه والیومtage (NCV) کشف
- Set the function switch to the NCV position.
- Move the NCV induction area of the meter close to the conductor being tested.
- که AC voltage is detected (90V to 1000V AC RMS), the NCV red indicator will light up, and the buzzer will sound. The intensity of the sound and light indicates the strength of the detected voltage.
5.13 ځانګړې دندې
- هولډ: په ښودنه کې د اوسني لوستلو د کنګل کولو لپاره فشار ورکړئ. د خوشې کولو لپاره بیا فشار ورکړئ.
- REL (Relative Value): Press to store the current reading as a reference. Subsequent measurements will show the difference from this reference.
- MAX/MIN: Press to enter MAX/MIN mode. The meter will display the maximum or minimum reading recorded since entering this mode. Press again to cycle between MAX, MIN, and current reading.
6. ساتنه
6.1 پاکول
میټر د اعلان سره پاک کړئamp cloth and mild detergent. Do not use abrasives or solvents. Keep the contacts of the input jacks clean.
6.2 د بیټرۍ بدلول
When the battery symbol appears on the LCD, the batteries need to be replaced. Refer to section 4.1 for battery installation instructions.
6.3 د فیوز بدلول
WARNING: To avoid electrical shock, disconnect the test leads before opening the case. Replace fuses only with quick-acting fuses of the specified type and rating.
The meter is protected by two fuses:
- F1: 600mA/250V fast-blow fuse for the mAµA input.
- F2: 20A/250V fast-blow fuse for the 20A input.
د فیوز بدلولو لپاره:
- Turn the meter OFF and disconnect all test leads.
- د بیټرۍ پوښ او بیټرۍ لرې کړئ.
- Unscrew the screws holding the back case and carefully open the meter.
- زوړ فیوز په احتیاط سره لرې کړئ او په نرمۍ سره یې له کلپونو څخه وباسئ.
- Install a new fuse of the correct type and rating.
- میټر بیا سره یوځای کړئ، ډاډ ترلاسه کړئ چې ټول پیچونه ټینګ شوي دي.
7. ستونزه حل کول
- Random values in mV mode: It is normal for the display to show random values in mV mode when the input terminals are open (not connected to a circuit). Simply short the input terminals to zero the reading. This will not affect measurement results.
- هیڅ ښودنه یا تیاره ښودنه نشته: د بیټرۍ کچه وګورئ. که بیټرۍ ټیټه وي نو بدل یې کړئ.
- No reading in current mode: Check if the fuse is blown. Replace if necessary (refer to section 6.3). Ensure test leads are connected to the correct current input jack (mAµA or 20A) and in series with the circuit.
- "OL" ښودل شوی: Indicates an overload (measurement exceeds the selected range) or an open circuit.
8. مشخصات
| پیرامیټر | مشخصات |
|---|---|
| برانډ | هولډپیک |
| ماډل | HP-890CN |
| رنګ | Gray + Blue-Green |
| مواد | پلاستیک |
| اعظمي ښودنه | 6000 شمېرې |
| د رینج کنټرول | د اتومات رینج |
| د سکرین اندازه | 60 × 35 mm |
| DC Voltage | 60mV/600mV/6V/60V/600V/1000V |
| AC Voltage (ریښتیا RMS) | 60mV/600mV/6V/60V/600V/750V |
| DC اوسنی | 600µA/6000µA/60mA/600mA/6A/20A |
| AC اوسنی (ریښتینی RMS) | 600µA/6000µA/60mA/600mA/6A/20A |
| مقاومت | 600Ω/6KΩ/60KΩ/600KΩ/6MΩ/60MΩ |
| ظرفیت | 9.999nF/99.99nF/999.9nF/9.999µF/99.99µF/999.9µF/9.99mF/99.99mF |
| فریکونسی | 9.999Hz/99.99Hz/999.9Hz/9.999KHz/99.99KHz/999.9KHz/9.999MHz |
| د دندې سایکل | له 0.1٪ څخه تر 99.9٪ |
| د حرارت درجه | -20 ~ 1000 ° C / -4 ~ 2222 ° F |
| د ډایډ ټیسټ | هو |
| دوامدار بجر | هو |
| د ټرانزیسټر hFE ازموینه | 0-1000 |
| د NCV کشف | 90V ~ 1000V AC rms |
| د بریښنا رسول | 2 * 1.5V AAA batteries / 1 * 9V 6F22 battery (not included) |
| عملیاتي چاپیریال | 0-40°C (32-104°F) |
| د ذخیره کولو چاپیریال | -20-60 ° C (-4-140 ° F) |
| د محصول اندازه (L×W×H) | Approx. 19 × 8.5 × 3.5 cm (7.67 × 3.35 × 1.37 inches) |
| د محصول وزن | 300 ګرامه (10.58 اونس) |
| جوړونکی | MIS-E0833 |
| UPC | 783950206936، 791592905193 |
9. د بسته محتويات
په بسته کې لاندې توکي شامل دي:
- 1 * HoldPeak HP-890CN Digital Multimeter
- 1 * د ذخیره کولو کڅوړه
- 1 * Pair of Test Leads (Red and Black)
- 1 * K-Type Thermocouple Probe
- 1 * د انګلیسي کارونکي لارښود

شکل ۲.۱: ملټي میټر او پکې شامل لوازمات.

Figure 7: Included storage bag for the multimeter.
10. تضمین او ملاتړ
For warranty information or technical support, please refer to the documentation provided with your purchase or contact the seller/manufacturer directly. Keep your purchase receipt as proof of purchase.


