1. پیژندنه
Thank you for choosing the BSIDE ACM92 Mini Clamp Meter. This device is a compact, auto-ranging digital multimeter designed for accurate measurement of AC/DC current, AC/DC voltage, resistance, and frequency. It also features non-contact voltage detection and continuity testing. Please read this manual thoroughly before operation to ensure safe and correct usage.
د خوندیتوب معلومات: Always adhere to safety precautions when working with electrical circuits. Incorrect use can lead to electric shock or damage to the meter. This device conforms to IEC-61010-1, IEC-61010-2-030, IEC-61010-2-032, IEC-61010-2-033 standards and has over-voltage protection class CAT III 300V, CAT II 600V, pollution degree II.
2. محصول ختم شوview
2.1 اجزا
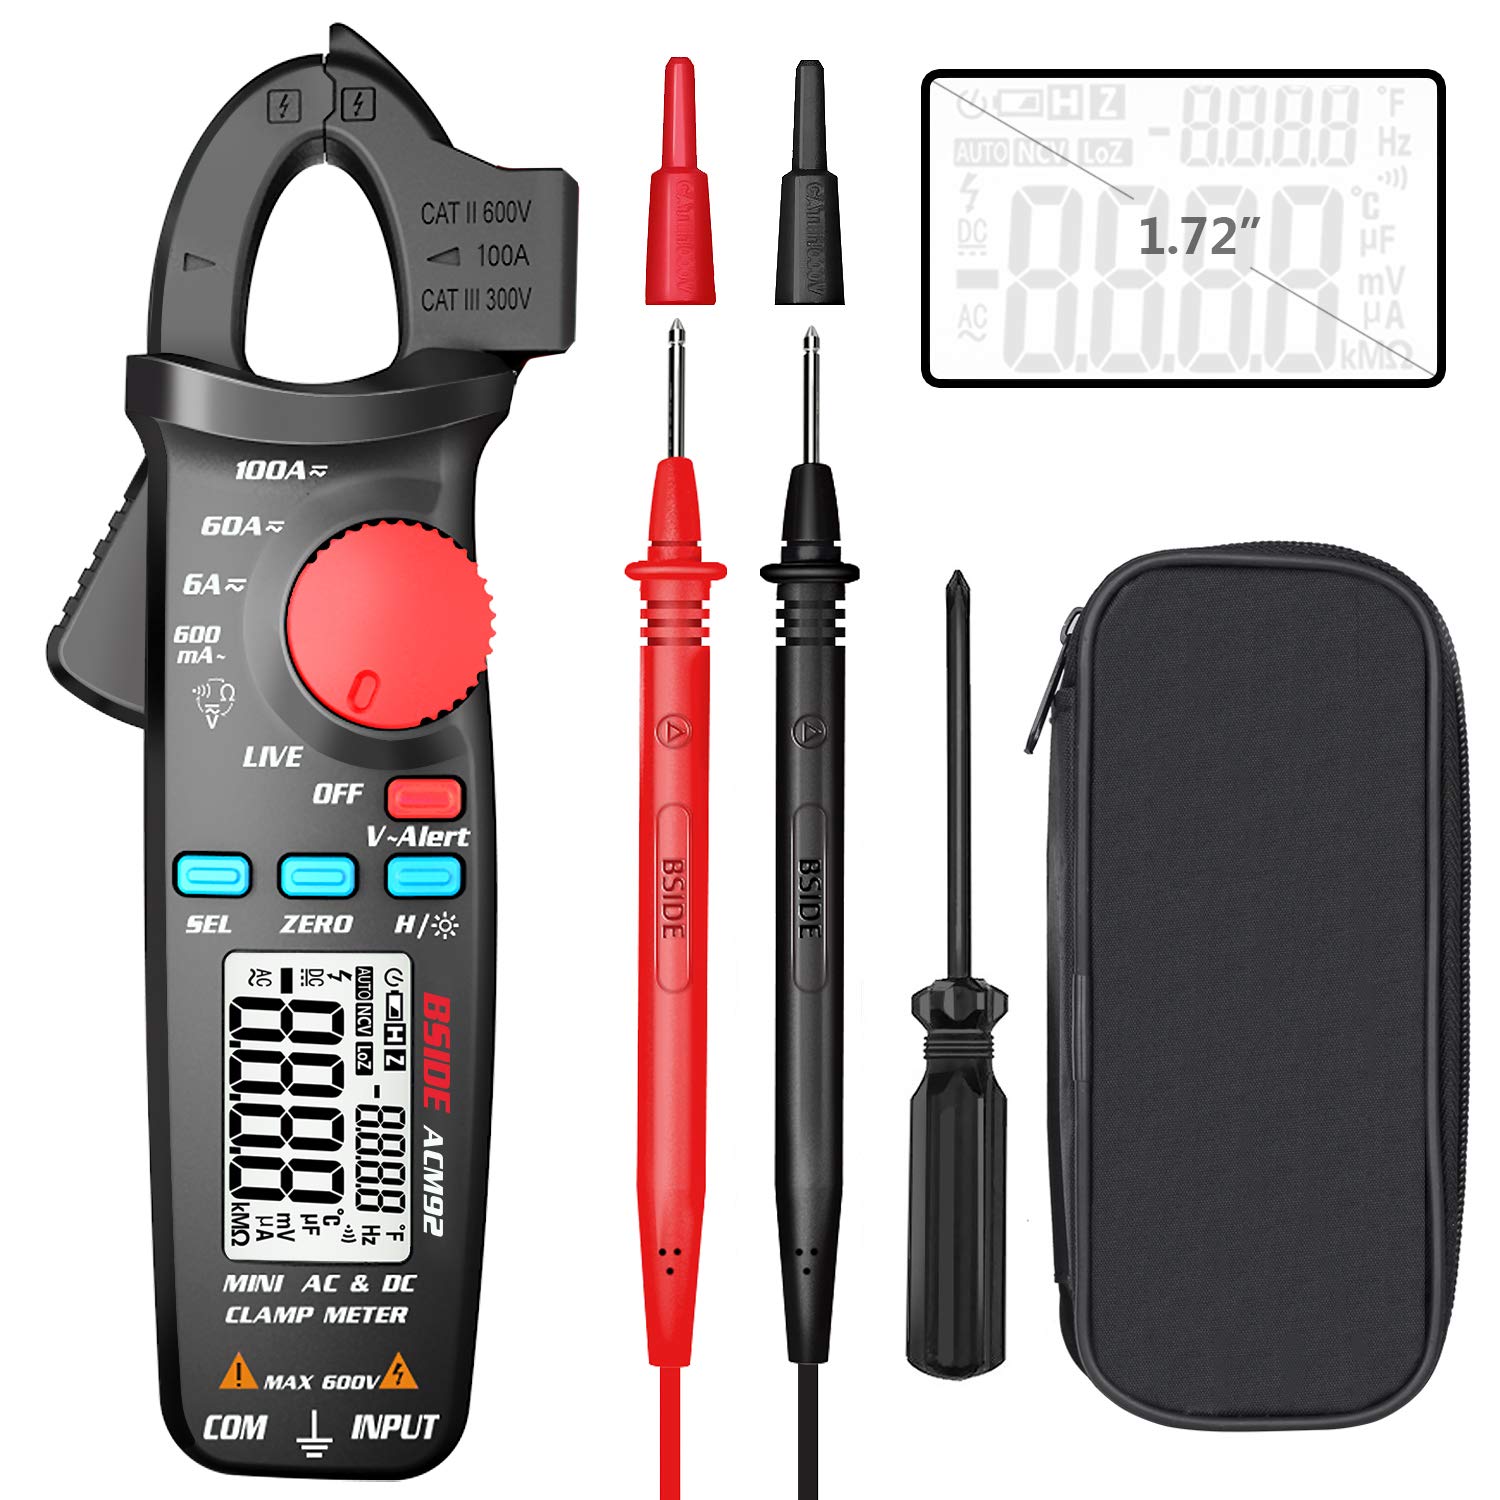
This image displays the BSIDE ACM92 Mini Clamp Meter along with its standard accessories. Included are the clamp meter unit, a pair of test probes (red and black), a carrying bag for protection and portability, and a small screwdriver for battery compartment access.
2.2 کلیدي ځانګړتیاوې
- Measures AC Current (minimum 0.1mA by jaws)
- Measures DC Current (minimum 1mA by jaws)
- اندازه کول AC/DC حجمtage
- V-Alert (Non-Contact Voltage Detection) and Live-Wire Check
- Measures Frequency, Resistance, and Continuity
- Clamp-on Frequency Function
- Auto Power Off for battery conservation
- د ډیټا هولډ فعالیت
- د ټیټ بیټرۍ نښه
- Backlight for improved visibility in dark environments
- 20mm jaw capacity with side probe holder
3. ترتیب کول
3.1 د بیټرۍ نصب کول
- ډاډ ترلاسه کړئ چې میټر بند دی.
- د میټر په شا کې د بیټرۍ د برخې پوښ ومومئ.
- Use the provided screwdriver to loosen the screw securing the battery cover.
- پوښ لرې کړئ.
- دوه ۱.۵V AAA بیټرۍ دننه کړئ، سم قطبي حالت (+/-) وګورئ.
- د بیټرۍ پوښ بدل کړئ او پیچ پیچ کړئ.
4. عملیاتي لارښوونې
۸ پاور آن/بند
Rotate the rotary switch from 'OFF' to any desired measurement function to power on the meter. To power off, rotate the switch back to 'OFF'. The meter will automatically power off after 20 minutes of inactivity.
4.2 د DC اوسني اندازه کول

This image illustrates the BSIDE ACM92 Mini Clamp Meter being used to measure DC current. The clamp jaws are placed around a single conductor connected to a car battery, and the display shows a current reading.
- Rotate the rotary switch to the '6A/60A/100A' DC current range.
- Press the 'ZERO' button to zero out any residual magnetic field before measurement.
- cl خلاص کړئamp jaws and enclose only one conductor (not a bundle of wires).
- په ښودنه کې د DC اوسني ارزښت ولولئ.
4.3 Measuring AC Current
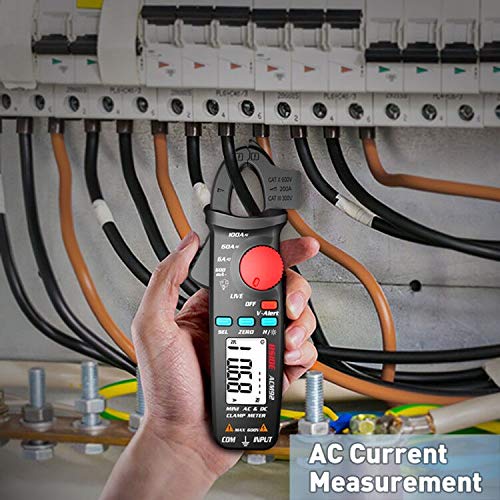
This image shows the BSIDE ACM92 Mini Clamp Meter measuring AC current. The clamp jaws are positioned around a single live wire within an electrical distribution panel, with the measurement displayed on the screen.
- Rotate the rotary switch to the '600mA' or '6A/60A/100A' AC current range.
- cl خلاص کړئamp jaws and enclose only one conductor.
- په ښودنه کې د AC اوسني ارزښت ولولئ.
4.4 اندازه کول د AC/DC حجمtage
- Insert the red test probe into the 'INPUT' jack and the black test probe into the 'COM' jack.
- Rotate the rotary switch to the 'V' (Voltage) function. The meter will automatically detect AC or DC voltage.
- د ازموینې پروبونه د هغه سرکټ یا برخې سره موازي وصل کړئ چې اندازه کیږي.
- ټوک ولولئtage ارزښت په نندارتون کې.
4.5 V-Alert (Non-Contact Voltagای کشف)

This image demonstrates the V-Alert function of the BSIDE ACM92 Mini Clamp Meter. The meter is held near an electrical circuit breaker, and its display shows 'V-Alert' with a flashing indicator, signifying the detection of AC voltagد مستقیم تماس پرته.
- Rotate the rotary switch to the 'V-Alert' position.
- Bring the top end of the meter near the conductor or outlet.
- که AC voltage is detected, the LCD display will flash, and an alarm buzzer will sound.
4.6 د مقاومت اندازه کول
- Insert the red test probe into the 'INPUT' jack and the black test probe into the 'COM' jack.
- Rotate the rotary switch to the 'Ω' (Resistance) function.
- د پروبونو سره د نښلولو دمخه ډاډ ترلاسه کړئ چې سرکټ یا برخه غیر انرژي شوې ده.
- Connect the test probes across the component to measure its resistance.
- په ښودنه کې د مقاومت ارزښت ولولئ.
4.7 د دوام ازموینه
- Insert the red test probe into the 'INPUT' jack and the black test probe into the 'COM' jack.
- Rotate the rotary switch to the 'Ω' (Resistance) function and press 'SEL' to cycle to continuity mode (indicated by a buzzer symbol).
- د ازموینې پروبونه د سرکټ یا برخې په اوږدو کې وصل کړئ.
- If the resistance is less than 30Ω, the continuity beeper will sound, indicating a continuous path.
4.8 د فریکونسی اندازه کول
- Using Test Probes: Insert probes, rotate switch to 'Hz' function, connect probes to the circuit.
- د Cl کارولamp ژامې: Rotate switch to 'Hz' function, open jaws and enclose a single conductor carrying AC current.
- په ښودنه کې د فریکونسۍ ارزښت ولولئ.
4.9 د معلوماتو ساتل
Press the 'H/☀' button briefly to hold the current reading on the display. Press it again to release the hold function.
4.10 شالید
Press and hold the 'H/☀' button for approximately 2 seconds to turn the backlight on or off.
5. ساتنه
5.1 پاکول
د میټر سی پاک کړئasinد اعلان سره gamp ټوکر او نرم صابون. د کثافاتو یا محلولونو څخه کار مه اخلئ. ډاډ ترلاسه کړئ چې میټر د کارولو دمخه په بشپړه توګه وچ دی.
5.2 د بیټرۍ بدلول
کله چې د ټیټ بیټرۍ شاخص په ډسپلې کې څرګند شي، بیټرۍ بدل کړئ لکه څنګه چې په 3.1 برخه کې تشریح شوي. که چیرې میټر د اوږدې مودې لپاره ونه کارول شي نو بیټرۍ لرې کړئ.
6. ستونزه حل کول
6.1 عام مسایل
| ستونزه | احتمالي لامل | د حل لاره |
|---|---|---|
| میټر نه چالانېږي | مړه یا په غلط ډول نصب شوي بیټرۍ | بیټرۍ بدل کړئ، د سم قطبیت ډاډ ترلاسه کړئ. |
| Inaccurate current reading | Multiple conductors in jaws; residual magnetism (DC) | Ensure only one conductor is in jaws. Press 'ZERO' for DC current. |
| د دوام غږ نشته | Resistance too high; meter not in continuity mode | Check circuit for breaks. Press 'SEL' to select continuity mode. |
| ښودنه 'OL' ښیې | Overload or out of range | Select a higher range if available, or the measured value exceeds meter's maximum. |
7. مشخصات
7.1 تخنیکي مشخصات
| اندازه کول | رینج | دقت |
|---|---|---|
| ښودل | 6000 شمېرې | |
| DC اوسنی | 6A/60A/100A | ±(2.5%+10 counts) |
| AC اوسنی | 600mA/6A/60A/100A | ±(3.0%+10 counts) for 600mA; ±(2.5%+10 counts) for others |
| DC Voltage | 600V | ±(1.0%+5 counts) |
| AC Voltage | 600V | ±(1.0%+3 counts) |
| مقاومت | 6000Ω | ±(1.0%+3 counts) |
| Frequency (Probes) | 60Hz/1000Hz | ±(1.5%+5 counts) |
| Frequency (Jaws) | 60Hz/1000Hz | ±(1.0%+5 counts) |
| د ژامې ظرفیت | 20mm | |
| ځواک | 1.5V (AAA) x 2 | |
| اندازه | 179 x 67 x 36 mm | |
| وزن | 137 ګرامه | |
د خوندیتوب مهم احتیاطي تدابیر
- د هر فعالیت لپاره ټاکل شوي اعظمي ان پټ ارزښتونو څخه ډیر مه کوئ.
- که چیرې میټر یا د ازموینې لیډونه زیانمن ښکاري، هیڅکله یې مه کاروئ.
- میټر په چاودیدونکي ګاز، بخار یا دوړو ډک چاپیریال کې مه چلوئ.
- د حجم سره کار کولو پر مهال له احتیاط څخه کار واخلئtagد 30V AC RMS، 42V چوکۍ، یا 60V DC څخه پورته. دا حجمونهtagد شاک خطر رامنځته کوي.
- تل د سرکټ سره بریښنا قطع کړئ او ټول لوړ ولټ خارج کړئtagد مقاومت یا دوام اندازه کولو دمخه د e کیپسیټرونه.
- Ensure the rotary switch is set to the correct function before making a measurement.
- د کارولو پرمهال ګوتې د ازموینې پروبونو کې د ګوتو ساتونکو شاته وساتئ.
- کله چې د بیټرۍ ټیټ شاخص څرګند شي نو سمدلاسه بیټرۍ بدل کړئ ترڅو دقیق لوستل ډاډمن شي.
9. د بسته محتويات
- 1 x BSIDE ACM92 Clamp متره
- 1 x Pair of Test Probes
- 1 x بار وړونکې کڅوړه
- 1 x سکرو ډرایور
- ۱ x د کارونکي لارښود (دا سند)
۷. تضمین او د پیرودونکو ملاتړ
د تضمین معلوماتو یا تخنیکي ملاتړ لپاره، مهرباني وکړئ د محصول بسته بندۍ ته مراجعه وکړئ یا خپل پرچون پلورونکي سره اړیکه ونیسئ. د پیرود ثبوت په توګه د پیرود رسید وساتئ.


