1. پیژندنه
This manual provides detailed instructions for the installation, operation, and maintenance of your ESLYYDS Double Din Car Stereo. This advanced multimedia system offers a wide range of features including Apple CarPlay, Android Auto, Bluetooth connectivity, a high-definition touchscreen, and support for a backup camera, enhancing your in-car entertainment and navigation experience.

Figure 1.1: ESLYYDS Double Din Car Stereo Overview
2. د بسته محتويات
مهرباني وکړئ تصدیق کړئ چې لاندې ټول توکي ستاسو په کڅوړه کې شامل دي:
- ESLYYDS Double Din Car Stereo Unit
- د نصب کولو بریکٹ سیټ
- Camera Wire A
- Camera Wire B
- Steering Wheel Control Unit
- د تار هارنس A
- د تار هارنس ب
- شاته-view کیمره
- ریموټ کنټرول
- د کارونکي لارښود (دا لاسوند)

Figure 2.1: Stereo Dimensions and Included Accessories
3. د محصول ب Featuresې
The ESLYYDS Double Din Car Stereo is equipped with a variety of features designed for convenience and enhanced driving experience:
- د ایپل کارپلې او انډرایډ آټو مطابقت: Seamlessly integrate your smartphone for navigation, music, calls, and messages using voice control.
- 7-inch HD Capacitive Touch Screen: A responsive and accurate display supporting 1080P video playback.
- بلوتوث 5.2: For stable and clear hands-free calling and audio streaming.
- Phone Mirror Link: Display your smartphone's screen directly on the stereo.
- دوه ګونی USB انٹرفیس: One port for media playback and another with 2.1A fast charging capability.
- شاته View د کیمرې داخلول: Supports the included 12 HD LED light, night vision, 170° viewing angle waterproof backup camera for safer reversing.
- د سټیرینګ ویل کنټرول (SWC): Compatible with existing steering wheel controls for convenient operation.
- AM/FM Audio Receiver: Access to radio stations with user-friendly digital control.
- AUX IN Connectivity: د بهرنیو آډیو وسیلو لپاره.
- 7 Color LED Buttons: Customizable button illumination.
۴.۳ د ایپل کارپلی او انډرایډ آټو
Connect your smartphone via USB to access navigation, phone contacts, email, notifications, and music directly on the stereo display. This feature utilizes voice control technology for safe operation while driving.
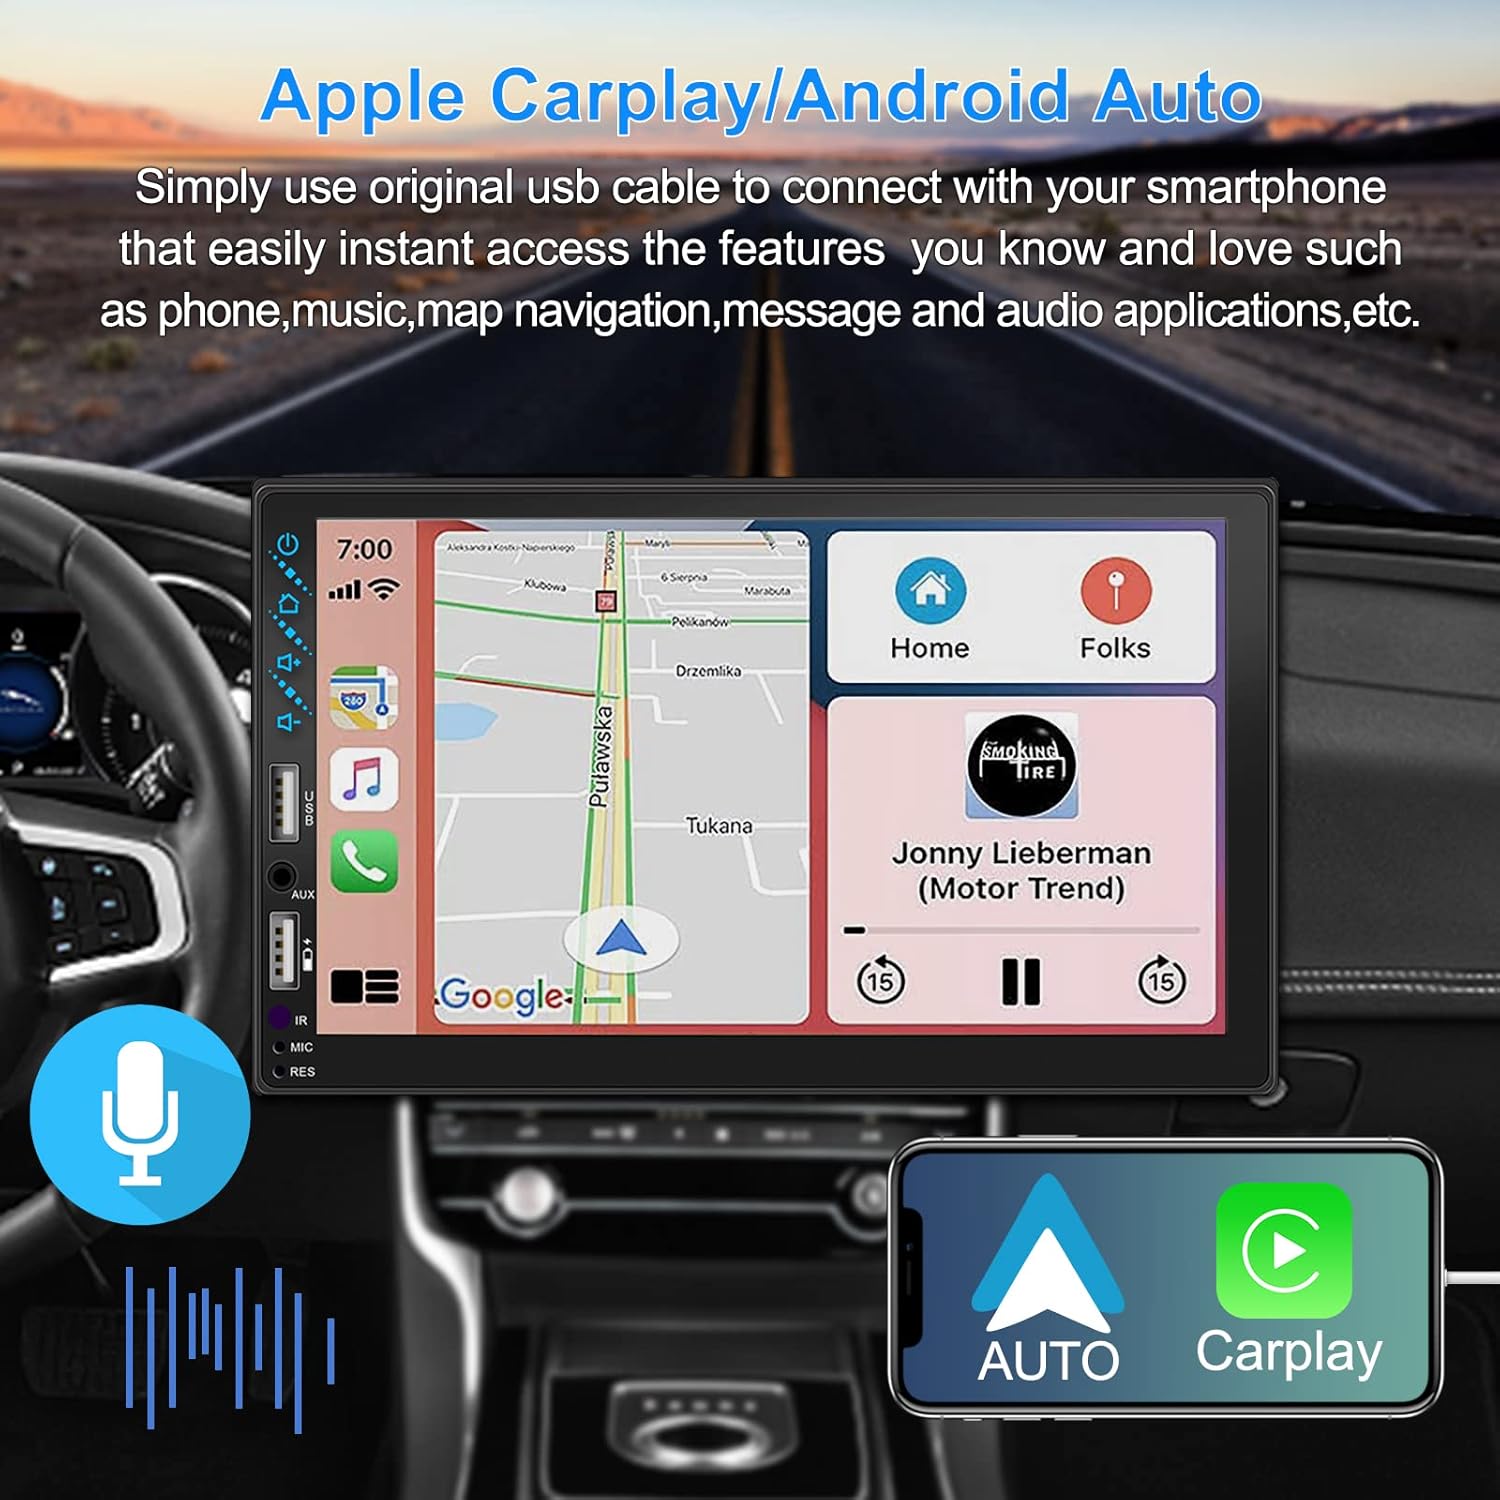
Figure 3.1: Apple CarPlay and Android Auto Interface
3.2 د غږ کنټرول
Utilize voice commands to control various functions such as making calls, playing music, and navigating, allowing you to keep your hands on the wheel and eyes on the road.

شکل ۴.۵: د غږ کنټرول فعالیت
۶.۶ د تلیفون عکس لینک
The Mirror Link function allows you to display your smartphone's screen directly onto the stereo's touchscreen. This supports Android devices (version 10.1 and below) and iPhone devices (version 14.5 and below, including iPhone 12, 11, XR, and 8 series and below) with resolutions up to 1920x1080 pixels.
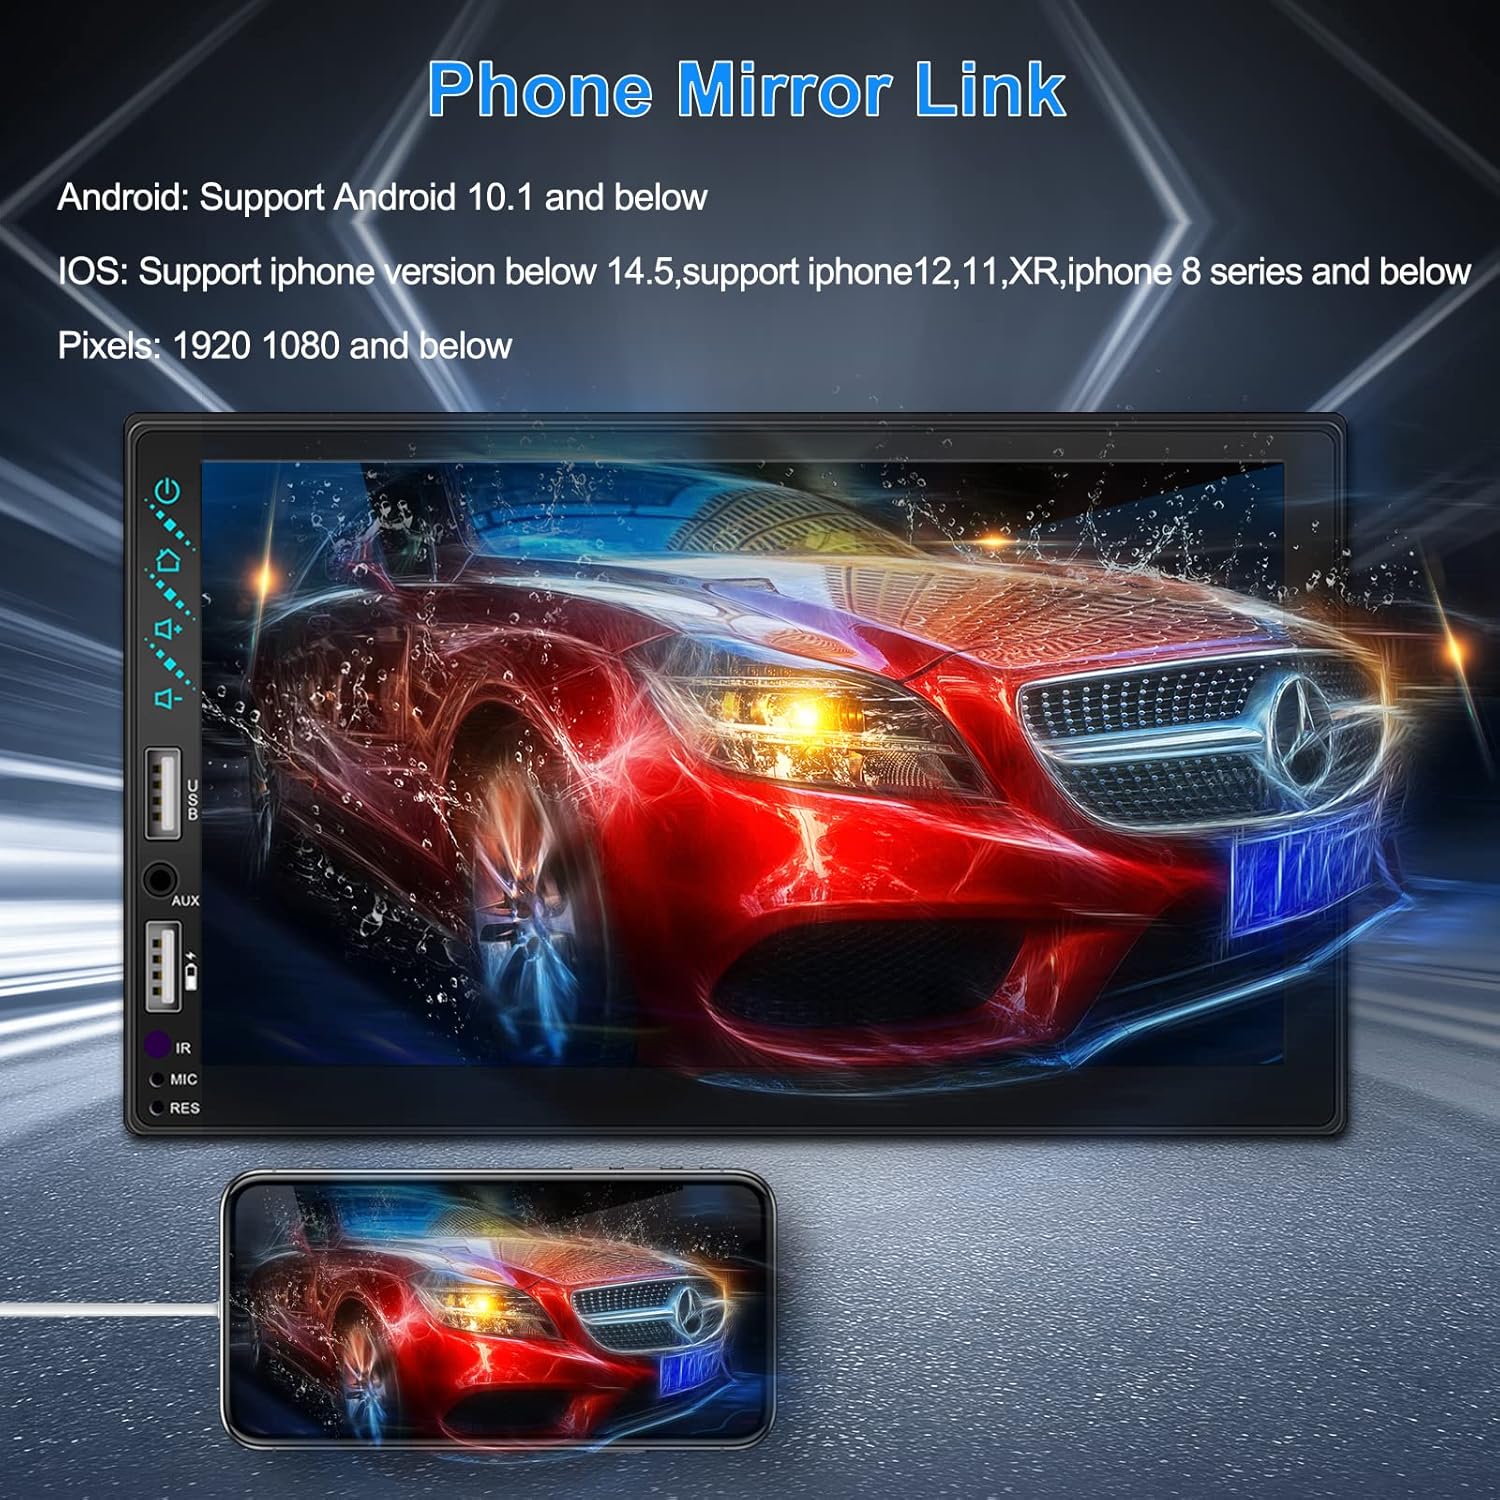
Figure 3.3: Phone Mirror Link
3.4 شاته View کیمره
The included waterproof backup camera features 12 HD LED lights for night vision and a 170° viewing angle. When you shift into reverse, the system automatically displays the camera feed on the screen, providing optimal visibility in various weather conditions.
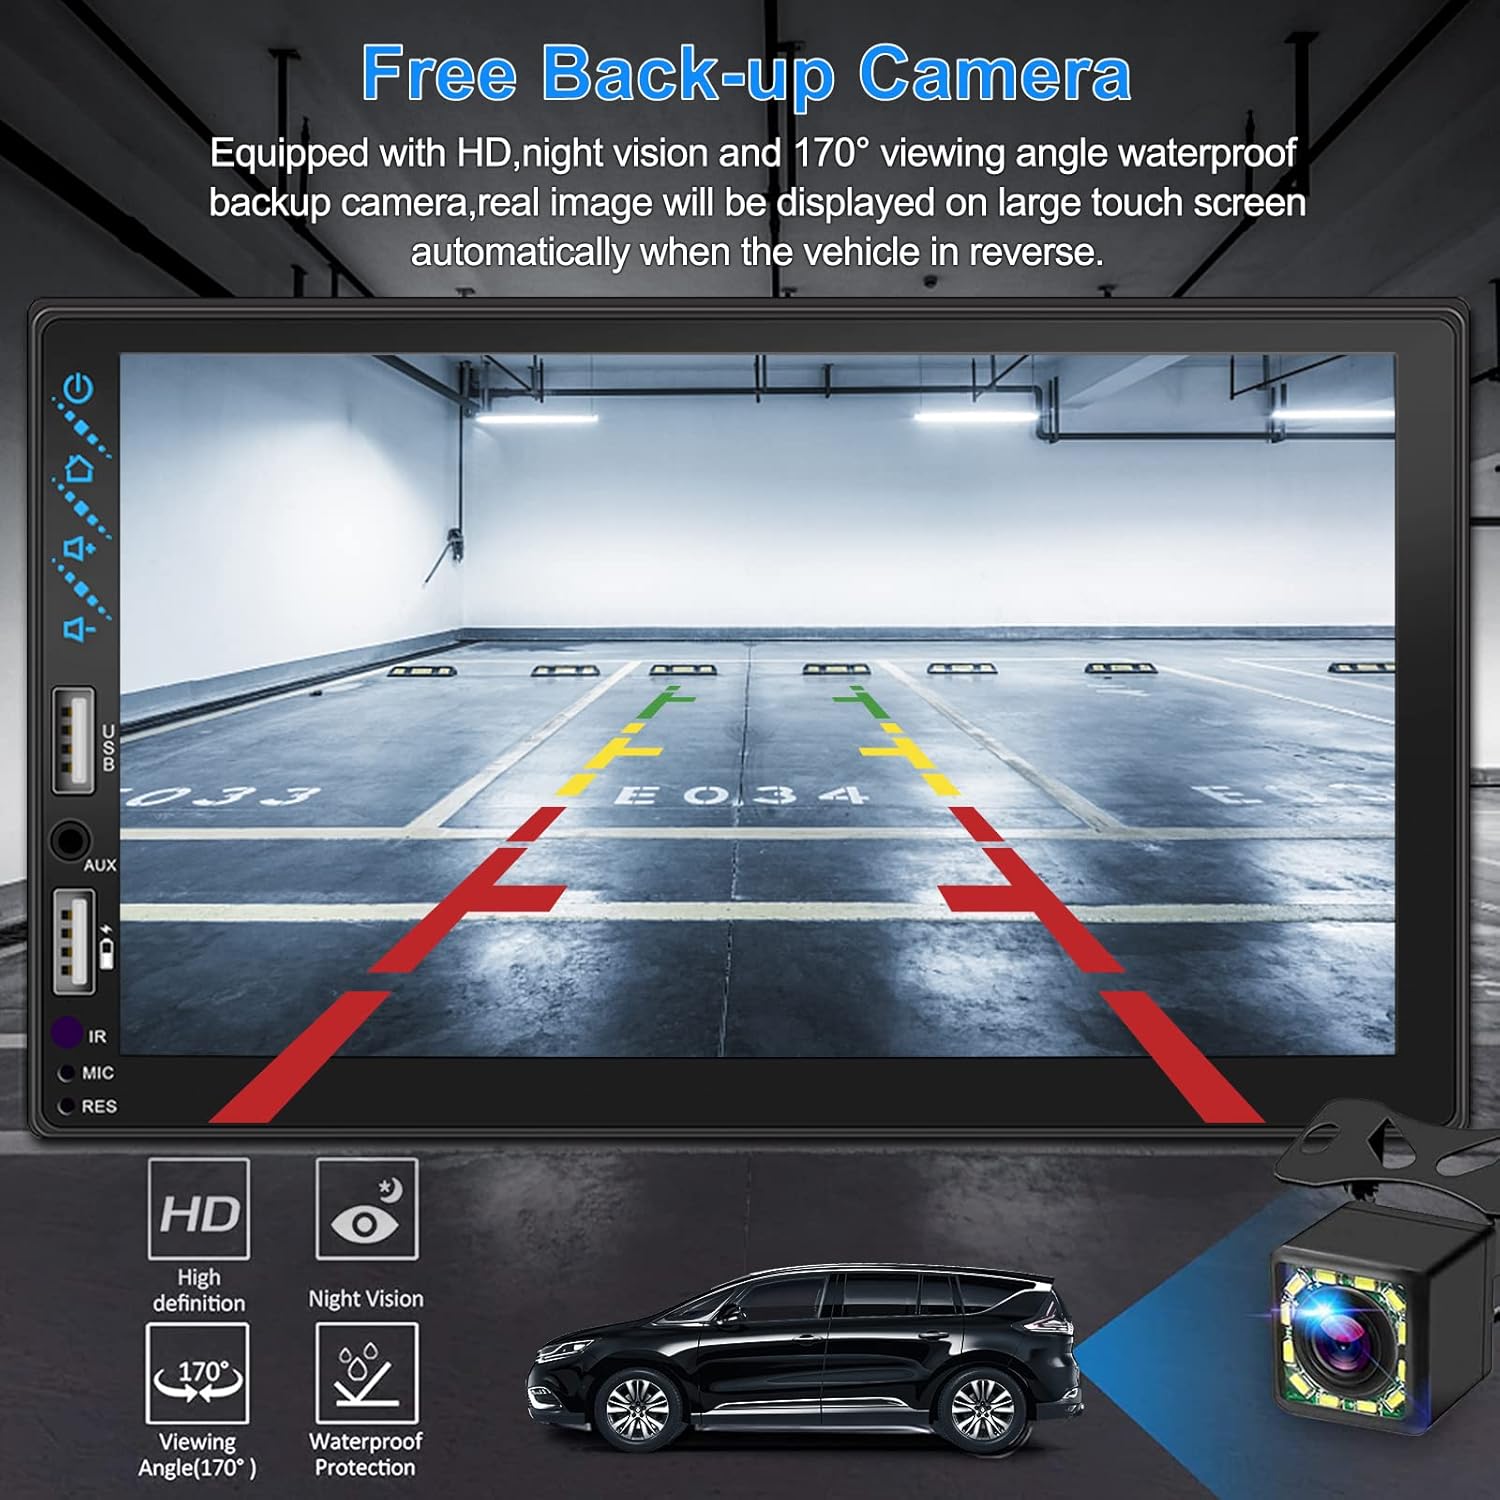
شکل 3.4: شاته View د کیمرې ښودنه
4. د نصب لارښود
Proper installation is crucial for optimal performance. It is recommended to have the unit installed by a professional if you are unfamiliar with car audio wiring.
4.1 ابعاد
The stereo unit has a standard double din size. Refer to Figure 2.1 for detailed dimensions.
- پلنوالی: 178 7 ملي میتره (.XNUMX XNUMX..XNUMX inches انچه)
- لوړوالی: 102 ملي متره (4 انچه)
- ژوروالۍ: 60 ملي متره (2.6 انچه)
4.2 د تارونو ډیاګرام
Carefully follow the wiring diagram below to connect the stereo to your vehicle's electrical system. Ensure all connections are secure to prevent malfunctions.
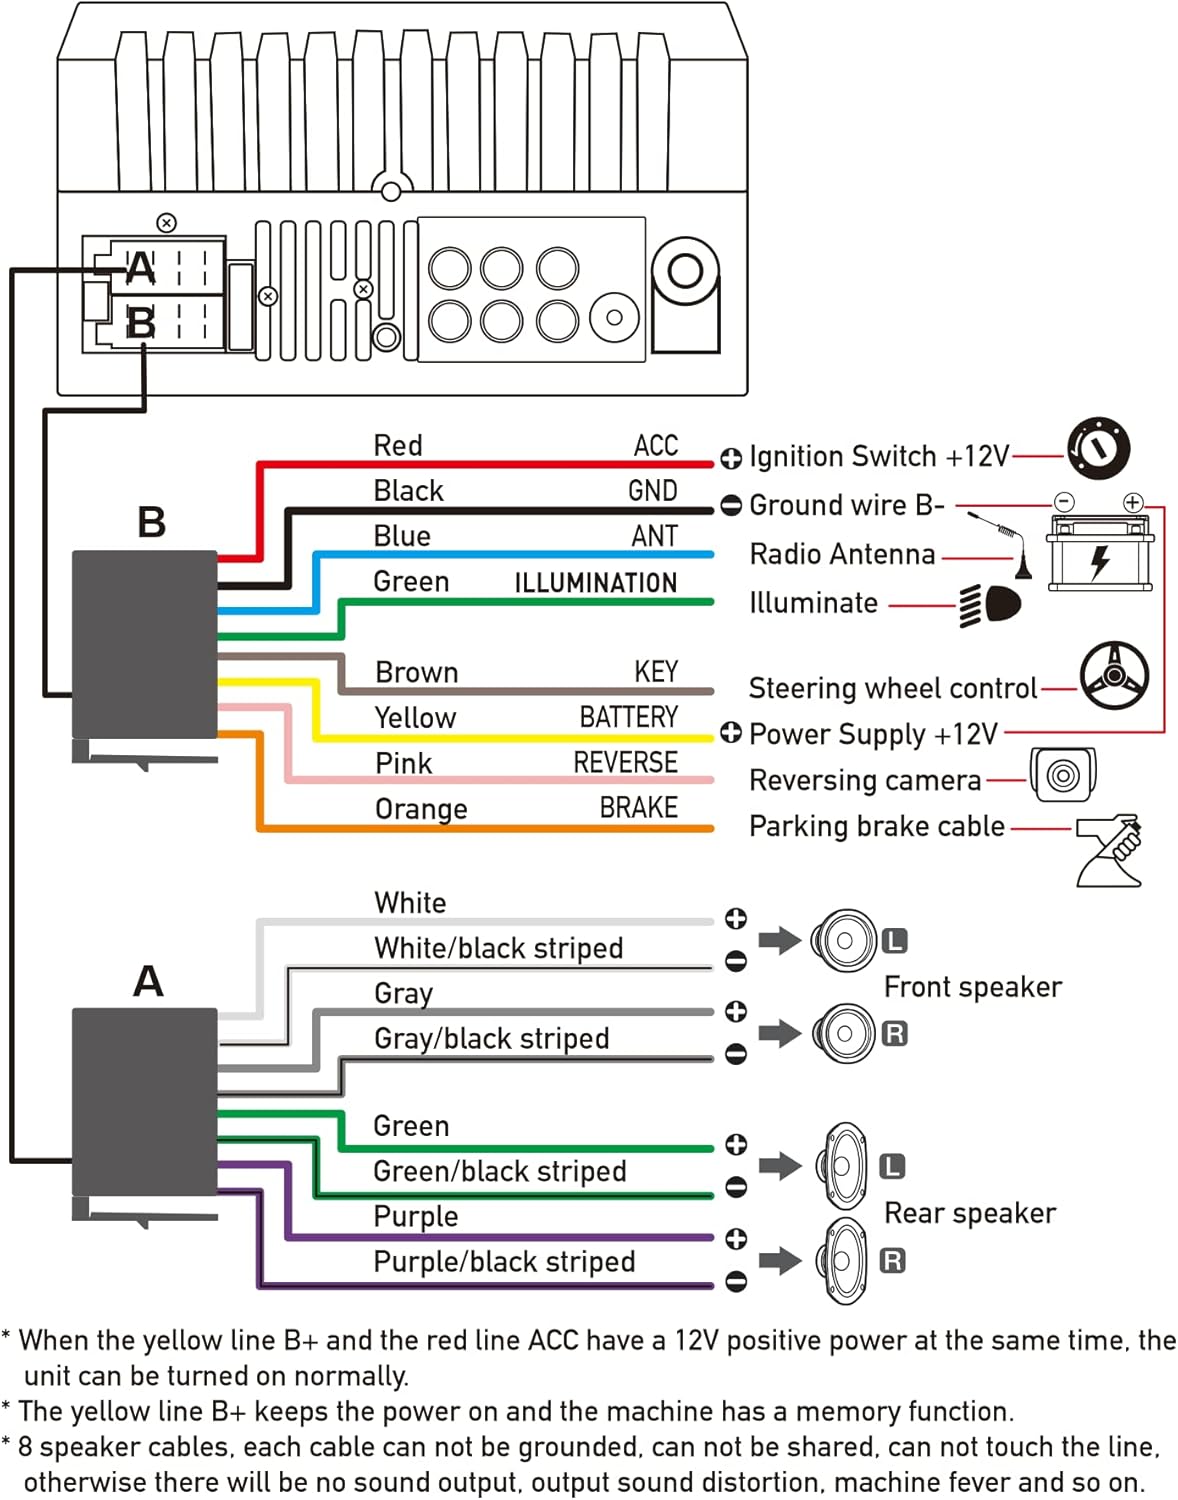
شکل ۳.۱: د اصلي تارونو ډیاګرام
- سور (ACC): Connect to Ignition Switch +12V.
- تور (GND): Connect to Ground wire B-.
- نیلي (ANT): Connect to Radio Antenna (if applicable).
- شنه (روښانه): Connect to Illuminate wire.
- نسواري (کلیدي): Connect to Steering wheel control.
- ژیړ (بیټرۍ): Connect to Power Supply +12V.
- ګلابي (عکس العمل): Connect to Reversing camera input.
- نارنجي (بریک): Connect to Parking brake cable.
Speaker Connections (8 speakers supported):
- White / White/black striped: مخکی کیڼ سپیکر
- Gray / Gray/black striped: مخکی ښی سپیکر
- Green / Green/black striped: شاته چپ سپیکر
- Purple / Purple/black striped: شاته ښي سپیکر
مهم یادښتونه:
- The unit requires both the Yellow (BATTERY) and Red (ACC) wires to have a 12V positive power supply simultaneously for normal operation.
- The Yellow (BATTERY) wire keeps the power on and maintains memory functions.
- For speaker connections, each cable must not be grounded or shared with other cables. Incorrect wiring can lead to no sound output, sound distortion, or damage to the machine.
5. عملیاتي لارښوونې
5.1 بنسټیز عملیات
- پاور آن/بند: په مخکینۍ پینل یا ریموټ کنټرول کې د بریښنا تڼۍ فشار ورکړئ.
- د حجم کنټرول: Use the volume buttons on the front panel, steering wheel controls, or remote control.
- د سرچینې انتخاب: Tap the 'Source' or 'Mode' icon on the touchscreen to switch between Radio, Bluetooth, USB, AUX, CarPlay, and Android Auto.
5.2 Apple CarPlay / Android Auto Usage
- Connect your compatible iPhone or Android smartphone to the stereo's USB port using a certified USB cable.
- The stereo will automatically detect the connection and prompt you to launch CarPlay or Android Auto.
- د تنظیم بشپړولو لپاره د سکرین پر لارښوونو تعقیب کړئ.
- Once connected, you can access supported apps like Maps, Phone, Messages, and Music directly from the stereo's touchscreen or via voice commands.
5.3 د بلوتوټ جوړه کول
- په خپل سمارټ فون کې بلوتوټ فعال کړئ.
- On the stereo, navigate to the Bluetooth menu.
- لټون available devices on your smartphone. The stereo's Bluetooth name will typically be 'ESLYYDS' or similar.
- Select the stereo from your smartphone's list and confirm the pairing code if prompted.
- یوځل چې جوړه شي، تاسو کولی شئ زنګونه وکړئ/ترلاسه کړئ او غږ په بېسیم ډول واورئ.
5.4 Phone Mirror Link Usage
- Connect your smartphone to the stereo's USB port.
- Select the 'Mirror Link' option on the stereo's screen.
- Follow the specific instructions displayed on the stereo for your phone's operating system (Android or iOS) to enable screen mirroring. This may involve enabling USB debugging for Android or trusting the device for iOS.
5.5 د راډیو عملیات
- Select the 'Radio' source.
- Use the 'Scan' function to automatically search and save stations, or manually tune using the frequency controls.
- د چټک لاسرسي لپاره خپل غوره سټیشنونه په مخکینۍ بټنونو کې خوندي کړئ.
۱۴ USB پلے بیک
- Insert a USB drive containing audio or video files into the designated USB playback port.
- The stereo will automatically switch to USB mode or prompt you to select it.
- Browse and play your media files using the touchscreen controls.
6. ساتنه
د خپل موټر سټیریو د اوږد عمر او غوره فعالیت ډاډمن کولو لپاره، د ساتنې دا لارښوونې تعقیب کړئ:
- پاکول: Use a soft, dry cloth to clean the screen and exterior. For stubborn smudges on the screen, use a screen cleaner specifically designed for electronic displays. Avoid abrasive cleaners or solvents.
- دحرارت درجه: د اوږدې مودې لپاره د یونټ د سختو تودوخې، ګرم او سړې دواړو سره د تماس څخه ډډه وکړئ.
- رطوبت: Keep the unit dry. Do not expose it to water or excessive humidity.
- د فرم ویئر تازه معلومات: جوړونکي وګورئ webد فعالیت ښه کولو او نوي ځانګړتیاو اضافه کولو لپاره د موجوده فرم ویئر تازه معلوماتو لپاره په دوره یي ډول سایټ وګورئ.
7. ستونزه حل کول
If you encounter issues with your ESLYYDS car stereo, please refer to the following common problems and solutions. If the problem persists, contact customer support.
| ستونزه | احتمالي لامل | د حل لاره |
|---|---|---|
| هیڅ ځواک نشته | ناسم تارونه؛ چاودېدلی فیوز؛ د موټر د بیټرۍ ستونزه. | Check power (Yellow and Red) and ground (Black) wire connections. Inspect vehicle fuses. Ensure vehicle battery is charged. |
| غږ نشته | Speaker wires incorrectly connected; Volume too low; Mute function active. | Verify all speaker wire connections (ensure no shorts or grounds). Increase volume. Check if mute is enabled. |
| بلوتوث نه نښلي | Bluetooth not enabled on phone/stereo; Incorrect pairing process. | Ensure Bluetooth is active on both devices. Delete previous pairings and re-attempt pairing process. |
| CarPlay/Android Auto not launching | Faulty USB cable; Phone not compatible; Software issue. | Use a high-quality, certified USB cable. Ensure your phone's OS version is compatible. Restart both phone and stereo. |
| شاته کیمره نه ښکاري | Camera wire disconnected; Reverse trigger wire not connected. | Check the camera's video input and power connections. Ensure the Pink (REVERSE) wire is correctly connected to the vehicle's reverse light trigger. |
| USB not reading media | بې ملاتړه file format; Corrupted USB drive; USB port issue. | رسنۍ ډاډمن کړئ files are in supported formats (e.g., MP3, MP4, MKV). Try a different USB drive. |
8. مشخصات
| فیچر | مشخصات |
|---|---|
| د محصول ابعاد | 7 x 2.6 x 3.94 انچه |
| د توکي وزن | ۲.۴۵ پونډه |
| د ماډل شمیره | L3 |
| د ښودلو اندازه | 7 انچه (18 سانتي متره) |
| د ښودلو ډول | HD Capacitive Touchscreen |
| د ارتباط ټیکنالوژي | Carplay, Android Auto, Mirror-Link, Bluetooth 5.2, USB, AUX |
| د کنټرولر ډول | Google Assistant, iOS, Android |
| ځانګړي ځانګړتیاوې | Touchscreen, RDS, Steering Wheel Control (SWC), Fast Charging USB (2.1A) |
| مطابقت لرونکې وسیلې | سمارټ فون |
| د نښلونکي ډول | USB |
| د آډیو وتلې حالت | محاصره |
| شاوخوا د غږ چینل ترتیب کول | 5.1 |
| د ویډیو کوډ کولو ملاتړ | MKV |
| رنګ | تور |
| نیټه لومړی شتون لري | د سپتمبر ۲۵، ۲۰۲۴ |
9. تضمین او ملاتړ
ESLYYDS is committed to providing excellent customer service and technical support. For any inquiries or assistance, please contact our professional technical team.
- د پیسو بیرته ورکولو تضمین: 30-day period from purchase.
- د بدلولو تضمین: 12-month period for product replacement.
- تخنیکي ملاتړ: د ژوند وخت تخنیکي ملاتړ چمتو کیږي.
Please refer to your purchase documentation for specific contact details or visit the official ESLYYDS webد ملاتړ معلوماتو لپاره سایټ.


