پیژندنه
This manual provides detailed instructions for the assembly, installation, operation, and maintenance of your Tecmojo Elite Collection 6U Wall Mount Server Cabinet. Please read these instructions carefully before beginning assembly or use to ensure proper functionality and safety. This server cabinet is designed for housing IT, AV, audio, and data equipment in various environments such as studios, homes, and offices.
د محصول اجزا
The Tecmojo Elite Collection 6U Wall Mount Server Cabinet is shipped flat-packed and requires assembly. Please verify that all components listed below are present before beginning assembly.

شکل 1: Included components for the Tecmojo 6U Wall Mount Server Cabinet. This includes the instruction manual, M6 cross screws (10), M6 cage nuts (10), keys (2), and two cooling fans.
- Cabinet Frame Components (Side Frames, Front/Back Brackets, Top/Bottom Panels)
- د غاړې تختې (2)
- Front Glass Door (1)
- د دیوال غره قوس (1)
- M6 Cross Screws (10)
- M6 Cage Nuts (10)
- کیلي (2)
- Cooling Fans (2)
- د لارښوونې لارښود
مجلس او نصب کول
Follow these steps to assemble and install your Tecmojo 6U Wall Mount Server Cabinet. It is recommended to have assistance for wall mounting due to the cabinet's weight and size.
ویډیو 1: This video demonstrates the step-by-step assembly and wall mounting process for the Tecmojo Elite Wall Mount Server Cabinet. It covers assembling the frame, attaching panels, and securing the cabinet to a wall bracket.
د مجلس پړاوونه:
- Assemble Rack Rails: Symmetrically place the side frames.
- Fix L Bracket: Secure the L brackets using screws and cage nuts.
- Fix Front and Back Brackets: Attach the front and back brackets to complete the main frame structure.
- Assemble Bottom and Top Panels: Install the bottom panel, then the top panel, securing them with screws.
- Fix Back Plate: Attach the back plate to the rear of the cabinet frame.
د دیوال نصبولو مرحلې:
- Install Wall Mount Bracket: Securely install the wall mount bracket on the desired wall location. Ensure it is level and capable of supporting the cabinet's weight (up to 176 lbs / 80 kg) plus equipment.
- Hang and Fix Cabinet: Carefully hang the assembled cabinet onto the installed wall mount bracket. Secure the cabinet to the bracket using the provided screws.
وروستۍ مجلس:
- د غاړې تختې راټولول: Attach the two side panels to the cabinet. These panels are detachable for convenient access.
- Install Front Glass Door: Install the front glass door. The door is reversible, allowing it to be opened from either the right or left side.

شکل 2: The interior of the cabinet features a 360mm mountable depth and clearly marked square rack holes for easy equipment installation.

شکل 3: The cabinet is designed with 16-inch mounting holes to accommodate standard stud placement, and features removable side panels for easy access.
عملیاتي لارښوونې
Security and Access:
- The server cabinet is equipped with keys to lock the front door and side panels, preventing unauthorized access and protecting your equipment.
- Detachable side panels and a reversible front door allow for convenient inspection and replacement of equipment from various directions.
Cooling and Cable Management:
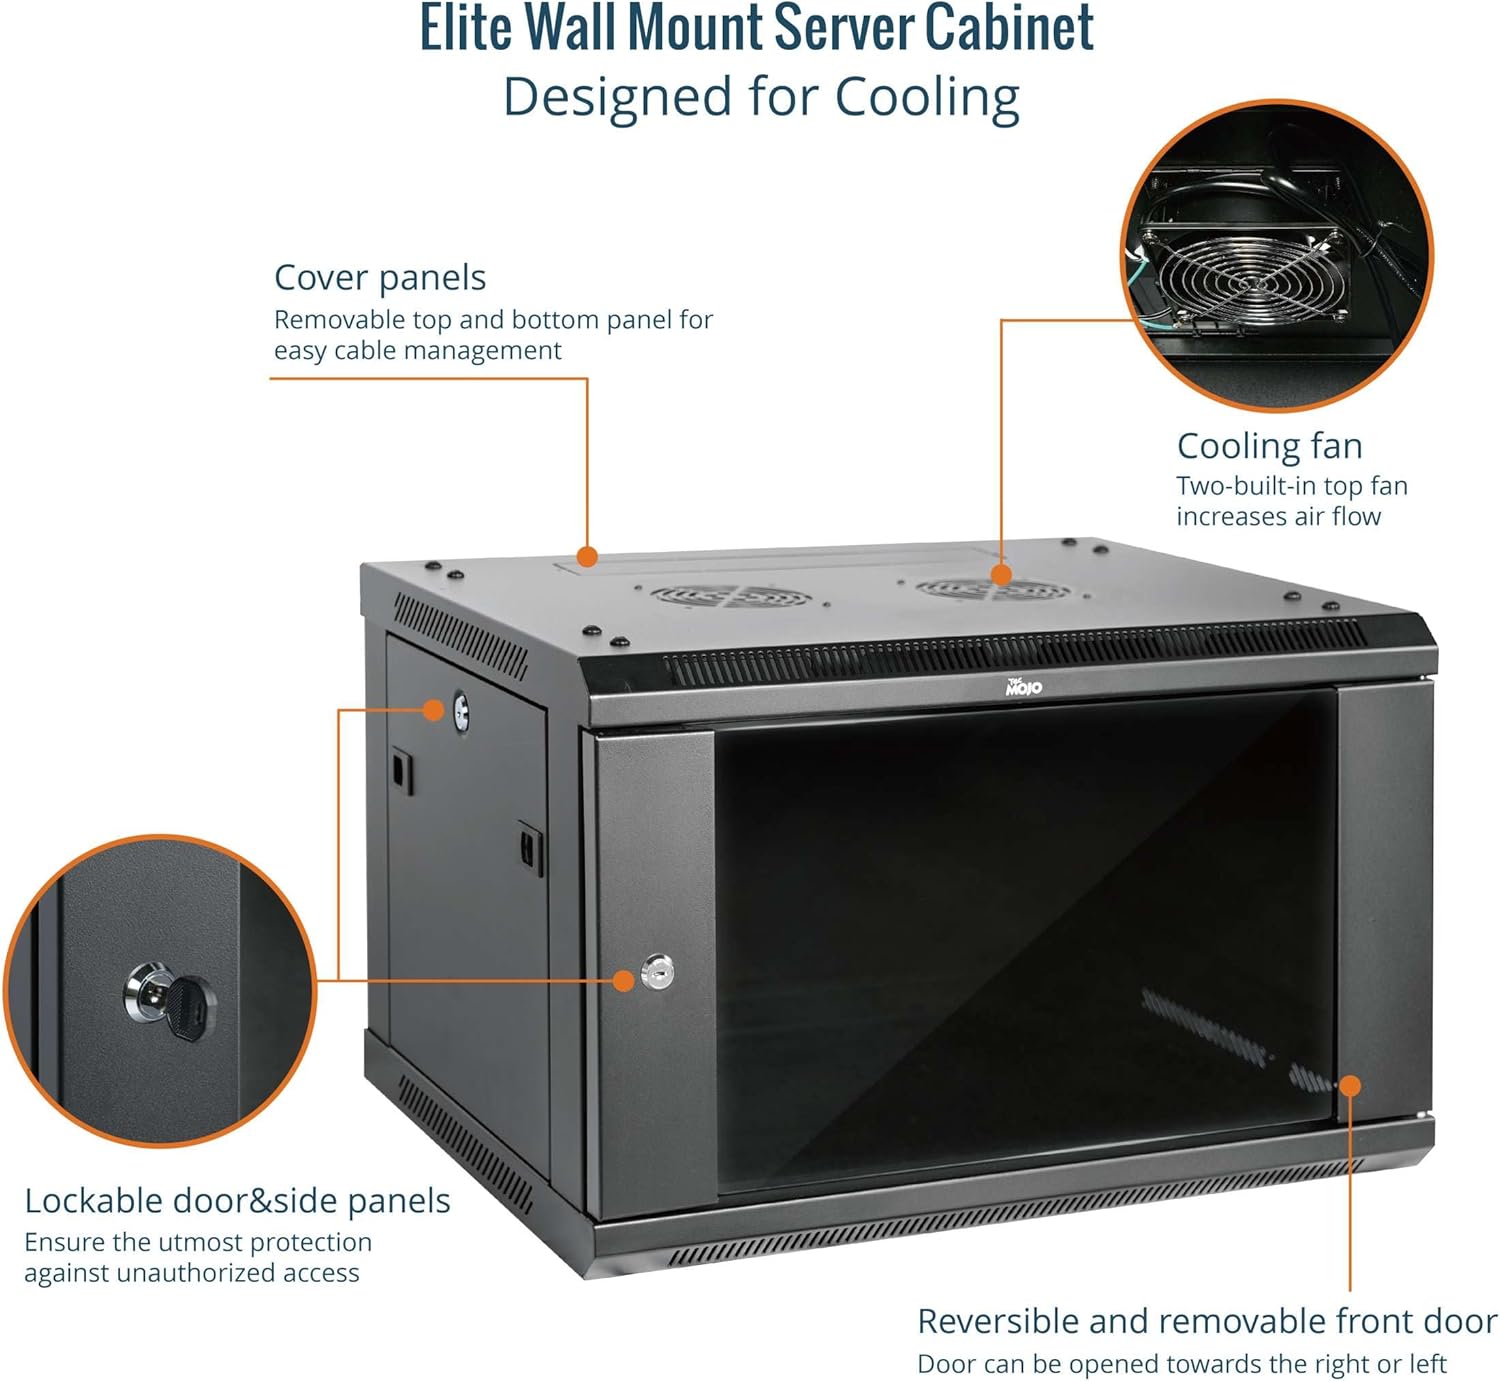
شکل 4: The cabinet features two built-in top fans for enhanced cooling and removable cover panels for efficient cable management.
- Two built-in cooling fans are located on the top panel to ensure dependable heat dissipation and maintain internal temperature equilibrium.
- Removable covers at the top and bottom of the cabinet allow for organized cable routing and management.
ساتنه
Regular maintenance ensures the longevity and optimal performance of your server cabinet.
- پاکول: Periodically wipe down the exterior surfaces with a soft, damp ټوکر د کثافاتو پاکونکو څخه ډډه وکړئ.
- د فین معاینه: Check the cooling fans regularly for dust accumulation. Clean them gently with compressed air or a soft brush to ensure proper airflow.
- د هارډویر معاینه: Periodically inspect all screws and fasteners to ensure they remain tight. Retighten as necessary.
- Door and Panel Operation: Ensure the front door and side panels open and close smoothly. Lubricate hinges if needed.
د ستونزو حل کول
If you encounter issues with your server cabinet, consider the following common solutions:
- Overheating Equipment: Ensure the cooling fans are operational and not obstructed. Verify that the cabinet is not placed in an area with poor ventilation.
- Difficulty with Cable Routing: Utilize the removable top and bottom covers for easier cable access. Consider using cable management accessories if needed.
- Door/Panel Not Closing Properly: Check for any obstructions or misalignment. Ensure hinges are properly secured and lubricated.
- د کابینې بې ثباتي: Verify that the wall mount bracket is securely fastened to the wall and that all cabinet assembly screws are tightened.
مشخصات
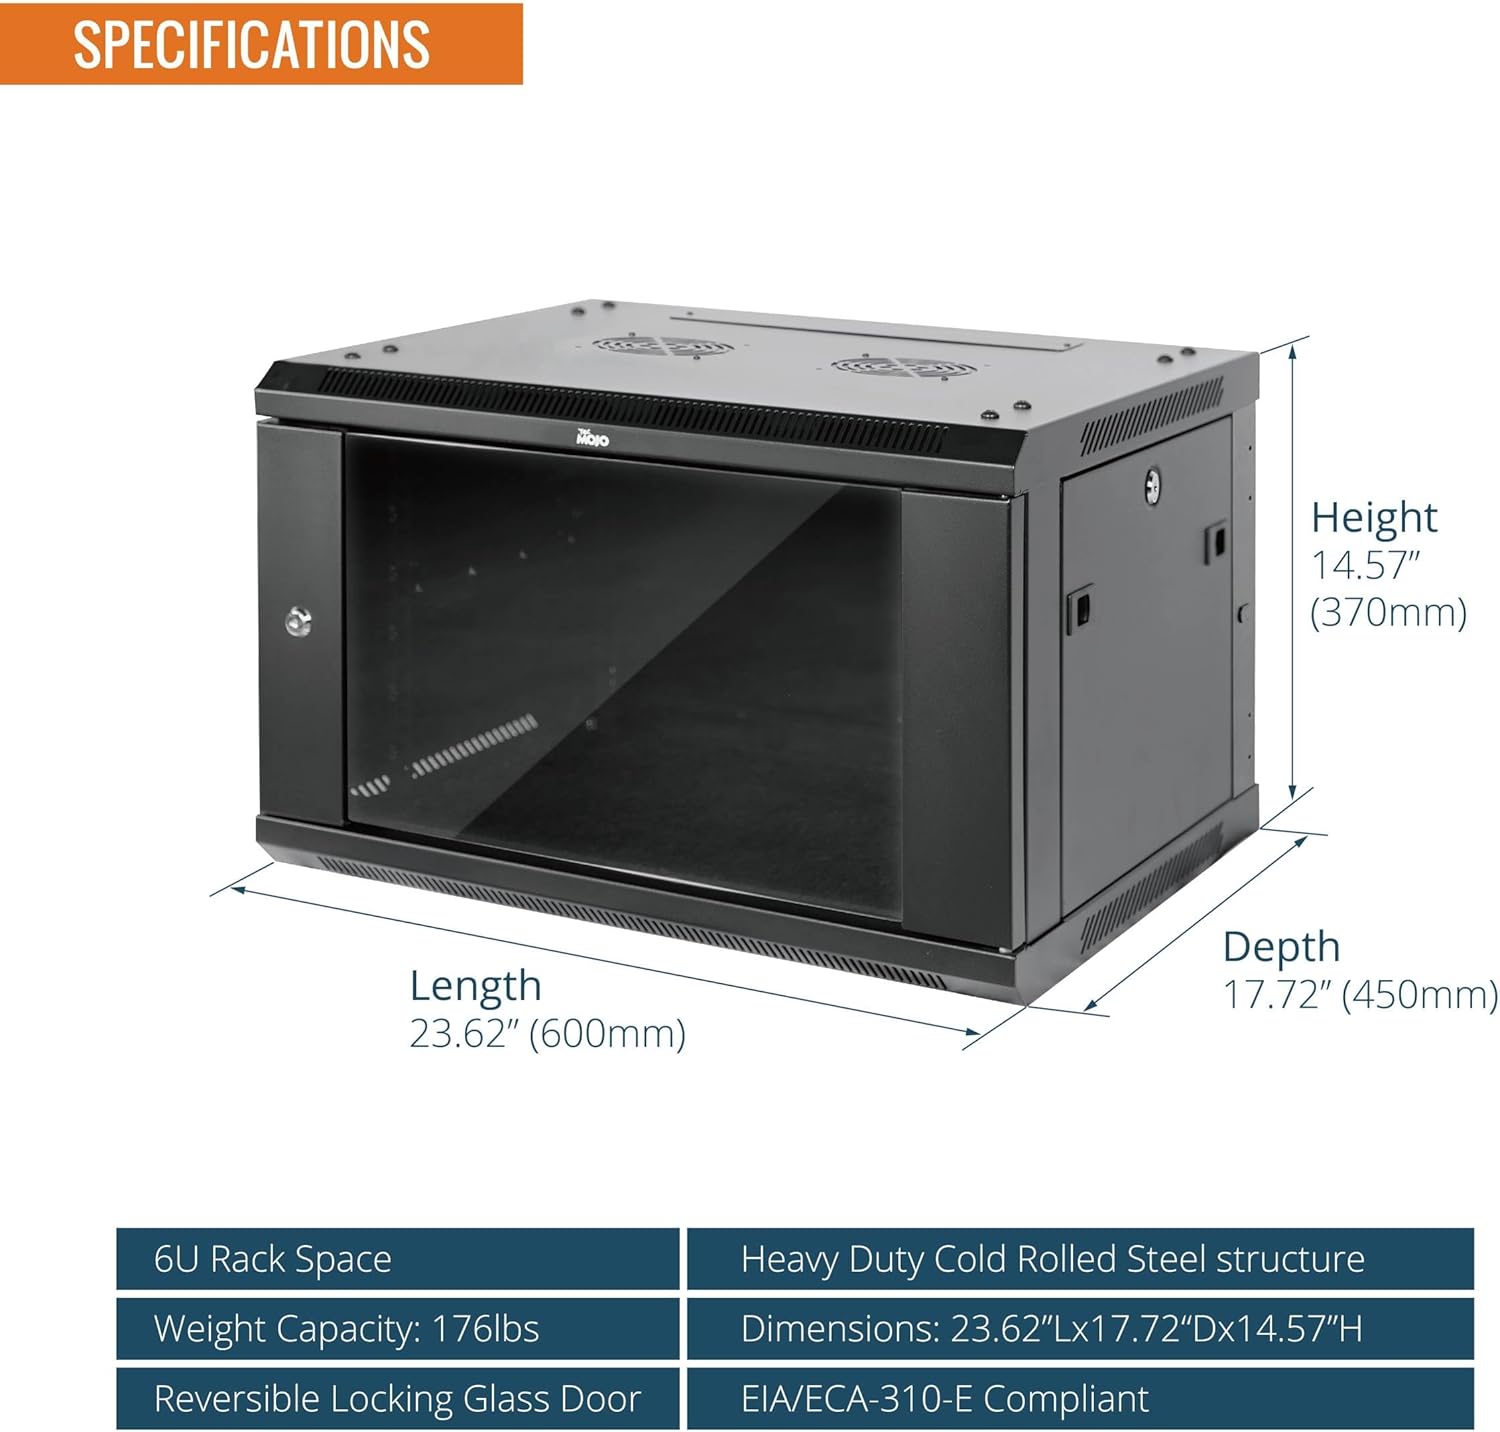
شکل 5: Detailed dimensions and key specifications of the Tecmojo 6U Wall Mount Server Cabinet.
| مشخصات | تفصیل |
|---|---|
| د محصول ابعاد | 17.72 x 23.62 x 14.57 inches (450mm D x 600mm W x 370mm H) |
| د توکي وزن | ۶ پونډه (۳ کیلو ګرامه) |
| مواد | دروند ډیوټي سړه رول شوی فولاد |
| د ریک واحدونه | 6U |
| Mountable Depth | 14.2 انچه (360 ملي متره) |
| د وزن ظرفیت | ۱۱.۵۷ پونډه (۵.۲۵ کیلو ګرامه) |
| د دروازې ډول | Reversible Locking Glass Door |
| مطابقت لرونکې وسیلې | Server, CPU, IT/AV/Audio/Data Equipment |
| جوړونکی | ټیکموجو |
تضمین او ملاتړ
For warranty information and technical support, please refer to the contact details provided with your purchase documentation or visit the official Tecmojo webسایټ. د هر ډول تضمین ادعا لپاره د پیرود ثبوت وساتئ.


