محصول پای ته ورسیدview
The Artillery Sidewinder X3 Plus is a high-performance 3D printer designed for both hobbyists and professionals, offering a large build volume and advanced features for efficient and precise 3D printing.

شکل 1: مخکی view of the Artillery Sidewinder X3 Plus 3D Printer, showcasing its robust frame and integrated control panel.
کلیدي ځانګړتیاوې
- Large Build Size: 300mm × 300mm × 400mm (11.8in × 11.8in × 15.7in) for greater creative freedom.
- الټرا-کویټ لوړ سرعت چاپ کول: Achieves speeds up to 300 mm/s with 0.1 mm precision.
- Upgraded 300°C High-Temperature Nozzle: Supports various filaments including PLA, TPU, PETG, ABS, and Nylon, with automatic nozzle cleaning.
- د ۴۹ نقطو اتومات بستر سطحه کول: Ensures quick and accurate leveling of the build platform.
- Dual-Gear Direct Extruder: Provides powerful extrusion and smoother filament feeding for improved print quality.
- د CV د چاپ دنده: Detects filament runout/breakage or power loss and resumes printing after recovery.
- دوه ګونی زیډ محورونه او دوه ګونی موټرې: Ensures stability and higher printing accuracy through coordinated movement.

شکل 2: Illustration demonstrating the large print volume of the Sidewinder X3 Plus, capable of accommodating substantial models.
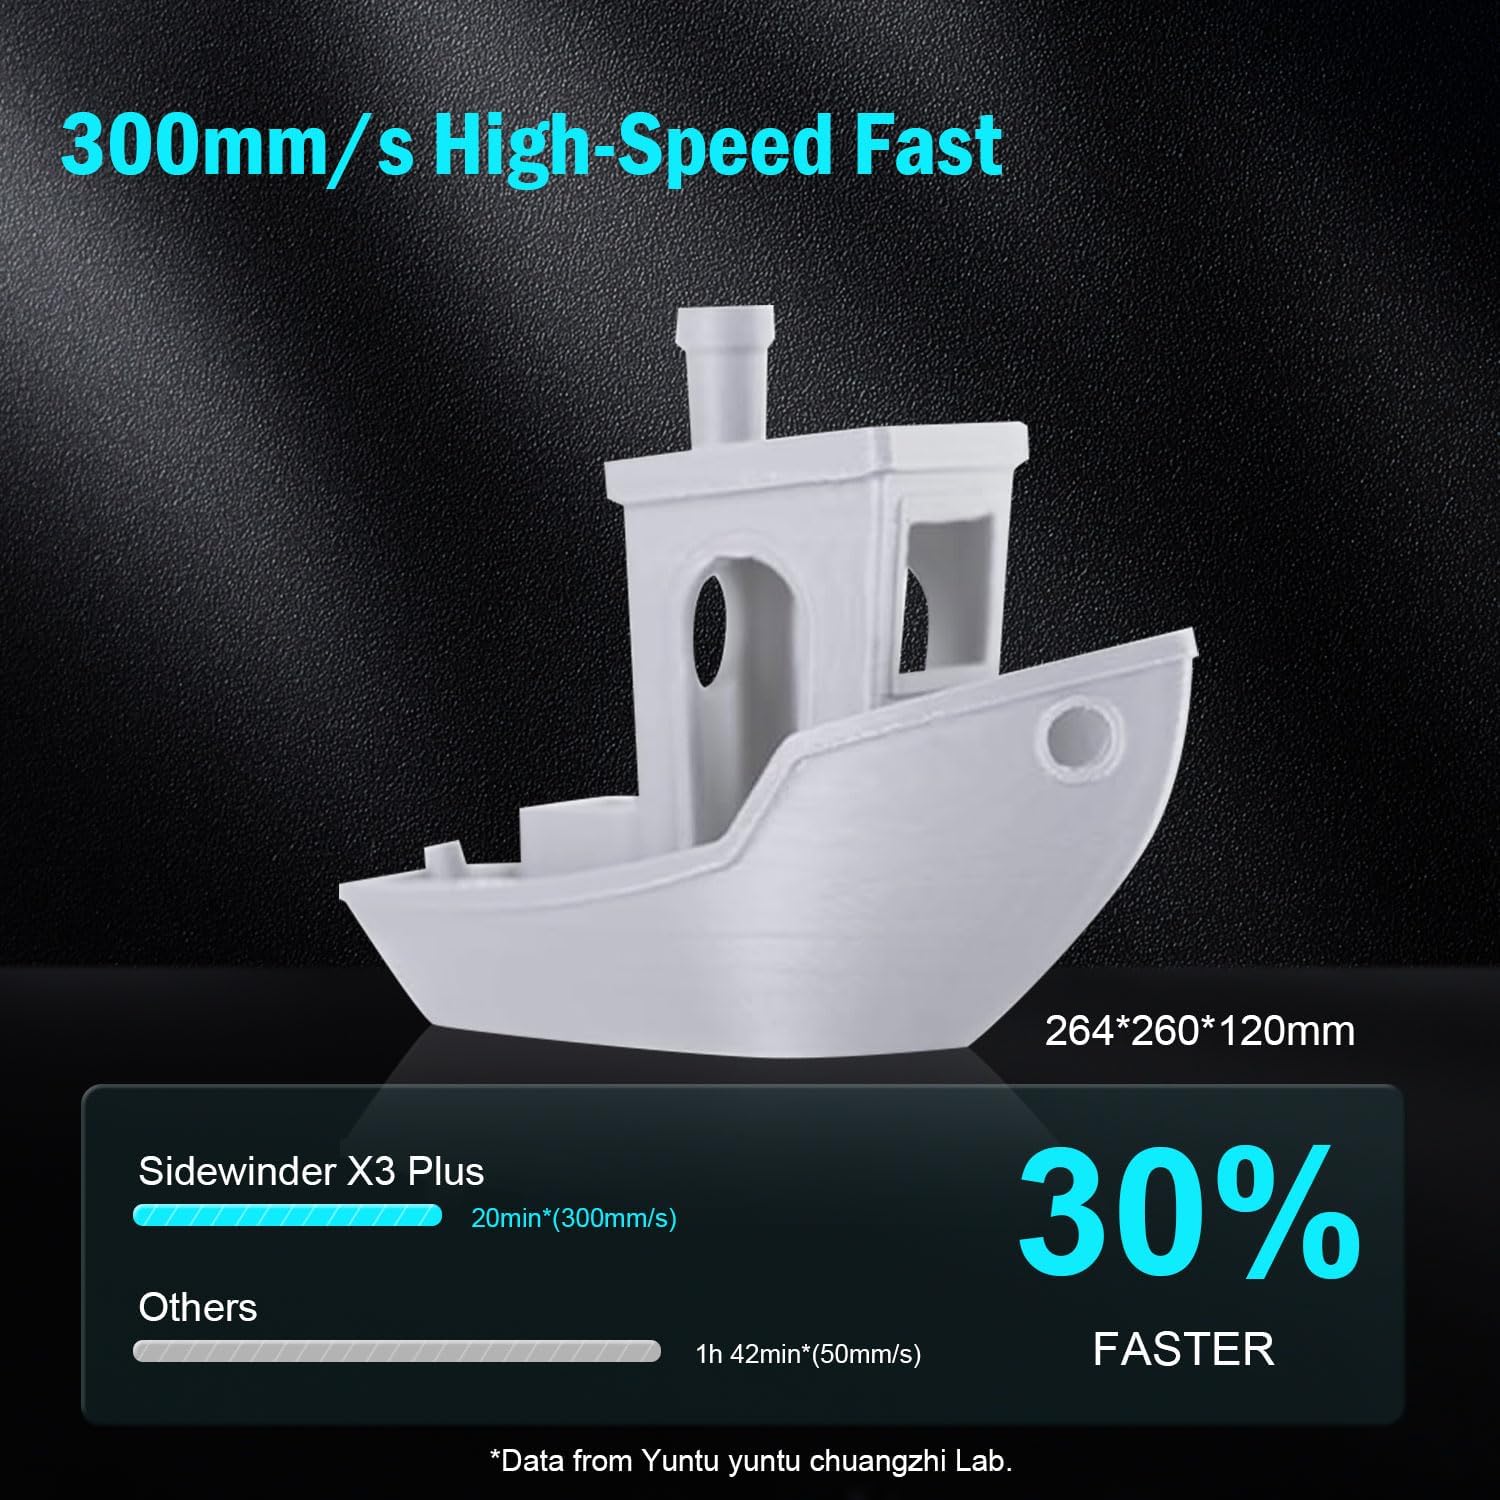
شکل 3: Visual representation of the Sidewinder X3 Plus's high-speed printing capability, showing a printed boat model.

شکل 4: تړل view of the all-metal hotend and automatic cleaning nozzle, highlighting its high-temperature capabilities.

شکل 5: Diagram illustrating the 49-point smart auto-leveling system on the print bed, simplifying the leveling process.
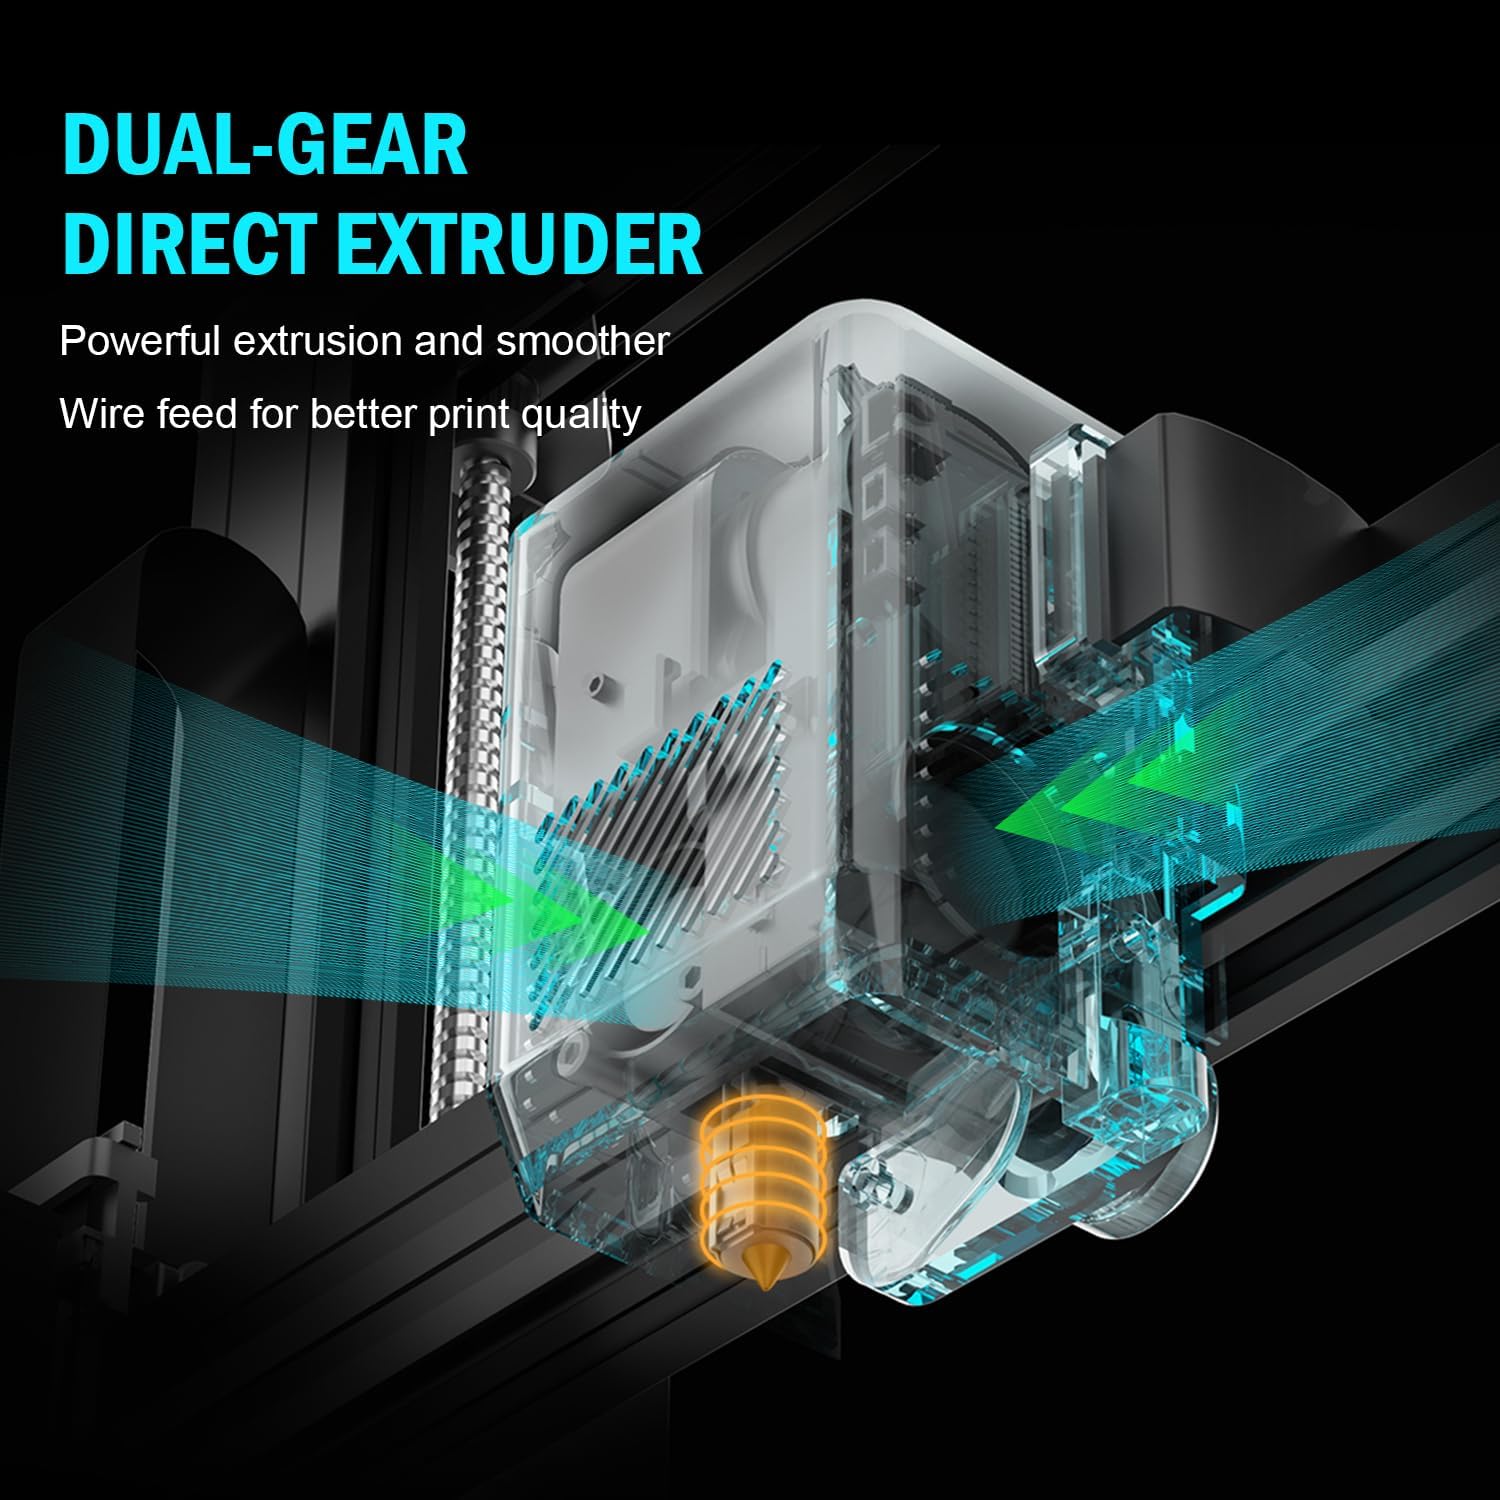
شکل 6: داخلي view of the dual-gear direct extruder, showing the gears that ensure consistent filament flow.

شکل 7: Depiction of the dual Z-axes and dual motors system, highlighting their role in enhancing print stability and precision.
د تنظیم کولو لارښود
The Artillery Sidewinder X3 Plus is designed for quick assembly. Follow these general steps for initial setup:
- بسته بندي کول: په احتیاط سره د بسته بندۍ څخه ټولې برخې لرې کړئ. ډاډ ترلاسه کړئ چې د بسته بندۍ په لیست کې لیست شوي ټولې برخې شتون لري.
- اساسی مجلس: Place the printer base on a stable, level surface.
- د ګانټري نصب کول: Attach the gantry (Z-axis frame) to the base. Ensure all screws are securely fastened.
- د تارونو نښلول: Connect all necessary cables, including power, motor, and sensor cables, according to the labels.
- فلامینټ لرونکی: Mount the filament holder.
- ابتدايي بریښنا فعاله: د بریښنا تار وصل کړئ او پرنټر چالان کړئ.
- په اتوماتيک ډول درجه بندي: Perform the 49-point auto bed leveling procedure as prompted by the printer's interface. This is crucial for successful first prints.

شکل 8: Visual guide showing the four main steps for assembling the Artillery Sidewinder X3 Plus, indicating a straightforward setup process.
عملیاتي لارښوونې
فلاینټ کښته کول
- Ensure the hotend is preheated to the appropriate temperature for your filament type (e.g., 200°C for PLA).
- فلامینټ د ایکسټروډر د ننوتلو سوري کې دننه کړئ.
- Push the filament until it is gripped by the extruder gears and begins to feed through the hotend.
- Confirm filament is extruding smoothly from the nozzle.
د چاپ پیل کول
- خپل درې بعدي ماډل د ټوټې کولو سافټویر (د مثال په توګه، Cura، PrusaSlicer) په کارولو سره چمتو کړئ او د G-code په توګه یې خوندي کړئ. file to a USB drive or SD card.
- Insert the USB drive/SD card into the printer's designated slot.
- Navigate the printer's touchscreen interface to select the desired G-code file.
- Confirm print settings and initiate the print. The printer will automatically preheat and begin printing.

شکل 9: Image showing the 4.3-inch touchscreen interface of the Sidewinder X3 Plus, demonstrating user interaction for print control.
Removing a Print
- Allow the print bed to cool down completely after the print finishes.
- Gently flex the PEI magnetic print platform to detach the printed object. Avoid using excessive force or sharp tools to prevent damage to the print surface.
ساتنه
Regular maintenance ensures optimal performance and longevity of your Artillery Sidewinder X3 Plus.
- د چاپ بستر پاک کړئ: د هر چاپ وروسته، د چاپ سطحه د ایزوپروپیل الکول سره پاکه کړئ ترڅو هر ډول پاتې شوني لرې کړئ او د راتلونکو چاپونو لپاره ښه چپکتیا ډاډمن کړئ.
- د نوزل پاکول: The printer features an automatic cleaning nozzle. However, inspect the nozzle periodically for clogs or wear. If necessary, perform a cold pull or replace the nozzle.
- Lubricate Z-axis Lead Screws: Apply a small amount of lithium grease or similar lubricant to the Z-axis lead screws every few weeks, depending on usage, to ensure smooth vertical movement.
- Check Belts and Pulleys: Periodically inspect the X and Y axis belts for proper tension and wear. Ensure pulleys are clean and move freely.
- د فرم ویئر تازه معلومات: رسمي توپخانه وګورئ webد شته فرم ویئر تازه معلوماتو لپاره سایټ وګورئ ترڅو ډاډ ترلاسه کړئ چې ستاسو پرنټر وروستي ځانګړتیاوې او د بګ اصلاحات لري.
د عامو ستونزو حل کول
| ستونزه | احتمالي لامل | د حل لاره |
|---|---|---|
| فلامنټ نه راوځي | بند شوی نوزل، پیچلی تار، ناسم تودوخه. | Clean the nozzle, check filament path, verify hotend temperature. |
| د بستر ضعیف چپکونکی | بې سطحه بستر، د چاپ سطحه چټله، د بستر ناسم تودوخه. | Perform auto-leveling, clean print bed with isopropyl alcohol, adjust bed temperature. |
| د پرت بدلون | خلاص کمربندونه، د موټرو ستونزې، د چاپ سرعت ډېر لوړ دی. | Check and tighten X/Y axis belts, inspect motor connections, reduce print speed. |
| Printer is excessively loud | Loose components, fan noise, worn bearings. | Inspect for loose screws, check fan operation, lubricate moving parts. |
| "Thermal runaway detected" error | Faulty thermistor, loose wiring to hotend/bed, heater cartridge issue. | Immediately power off the printer. Check all wiring connections to the hotend and heated bed. Contact support if issue persists. |
| "Error: home Y failed" or similar homing errors | Obstructed endstop switch, loose motor cable, faulty sensor. | Check for obstructions, ensure all motor and endstop cables are securely connected. Restart printer. |
تخنیکي مشخصات
| فیچر | تفصیل |
|---|---|
| د محصول ابعاد | 20 x 19.4 x 25.6 انچه (508 x 493 x 650 mm) |
| د توکي وزن | ۶ پونډه (۳ کیلو ګرامه) |
| د حجم جوړول | 300 x 300 x 400 mm (11.8 x 11.8 x 15.7 انچه) |
| د چاپ سرعت | تر 300 mm/s پورې |
| د نوزل د حرارت درجه | اعظمي 300 سانتي ګراد |
| د بستر سطحه | 49-پوائنټ اتومات بستر سطحه کول |
| د Extruder ډول | Dual-Gear Direct Extruder |
| ملاتړ شوي فلامینټونه | PLA، TPU، PETG، ABS، نایلان |
| ارتباط | USB، SD کارت |
| مواد | فلزي |
| رنګ | تور |
تضمین او ملاتړ
For warranty information and technical support, please refer to the official Artillery webسایټ ته مراجعه وکړئ یا مستقیم د دوی د پیرودونکو خدماتو سره اړیکه ونیسئ. د تضمین ادعاوو لپاره د پیرود ثبوت په توګه د پیرود رسید وساتئ.
جوړونکی: توپخانه
رسمي Webسایټ: www.artillery3d.com (یادونه: دا یو ځای ساتونکی دی URL, please refer to the actual manufacturer's webد ملاتړ لپاره سایټ.)


