1. پیژندنه
This manual provides detailed instructions for the installation, operation, and maintenance of your ASRock B860M Live Mixer WiFi motherboard. Designed for content creators, this motherboard offers robust connectivity and reliable performance for demanding tasks. Please read this manual thoroughly before proceeding with installation or operation.

شکل 1: مخکی view of the ASRock B860M Live Mixer WiFi motherboard. This image highlights the CPU socket, RAM slots, and various heatsinks.
2. کلیدي ځانګړتیاوې
The ASRock B860M Live Mixer WiFi motherboard is equipped with advanced features to support high-performance computing and content creation:
- Power Phase Design: Features a 10+1+1+1+1 power phase design with Dr.MOS for VCore+GT+SA, ensuring stable power delivery to the CPU.
- د DDR5 حافظې ملاتړ: Supports 4 x DDR5 DIMMs in dual channel configuration, with speeds up to 8666+ (OC) MHz.
- Graphics Output: Multiple display options including 1 HDMI, 1 DisplayPort, and 1 Thunderbolt 4 Type-C port.
- د آډیو کیفیت: Integrated Realtek ALC1220 7.1 CH HD Audio Codec with Nahimic Audio for immersive sound.
- Enhanced Capacitors: Utilizes exclusive 20K Capacitors with 1000uF capacitance for improved durability and stability.
- د لوړ سرعت ارتباط: Includes WiFi 6E and 2.5G LAN for fast and reliable network connections.
ویډیو ۱: پایview of ASRock Intel B860 Series Motherboards. This video highlights key features and design aspects of the B860 motherboard series, including power delivery and connectivity options.
3. ترتیب او نصب کول
د خپل مور بورډ او اجزاو د سم نصبولو لپاره دا ګامونه تعقیب کړئ.
۵.۲ د بکس خلاصول او تفتیش
Carefully remove the motherboard and all accessories from the packaging. Inspect for any visible damage.
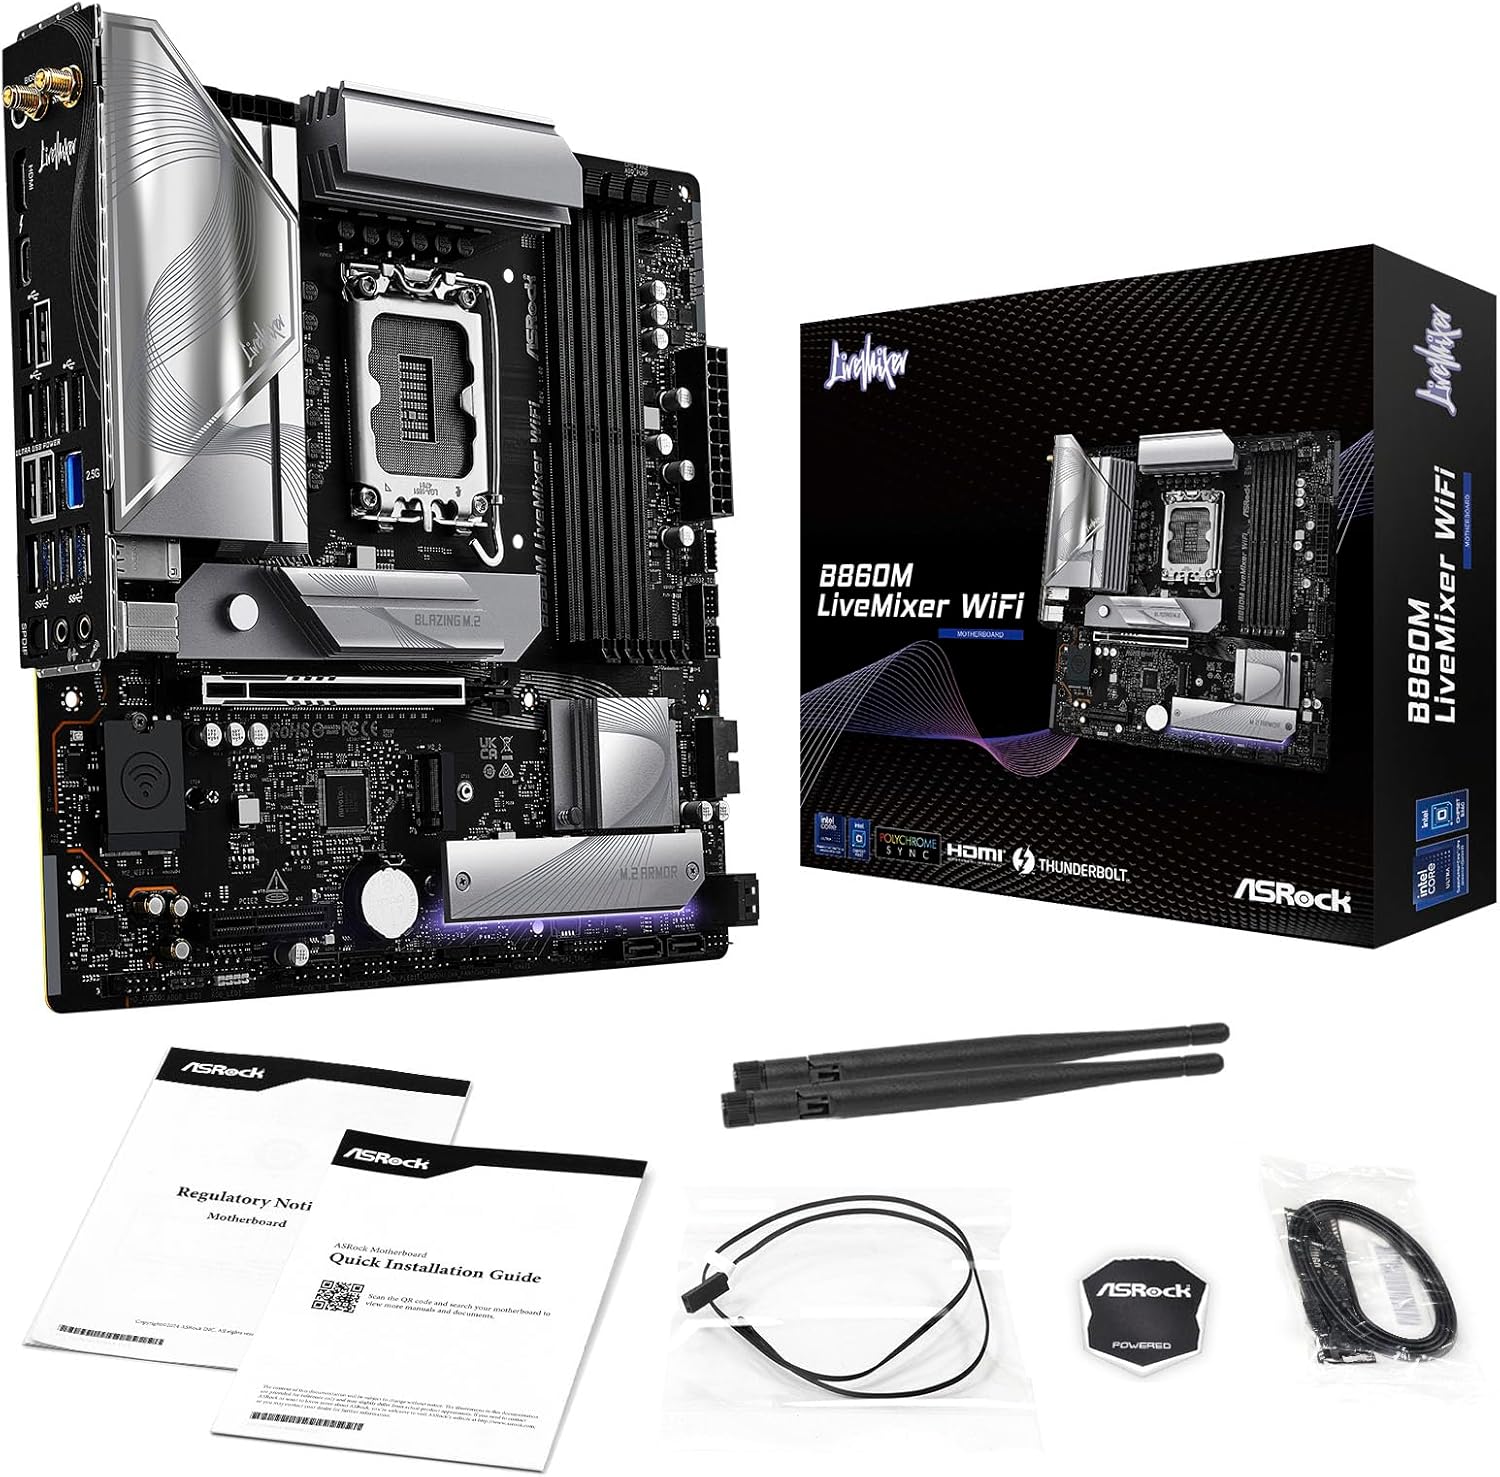
Figure 2: Contents of the ASRock B860M Live Mixer WiFi motherboard package. This image displays the motherboard, documentation, Wi-Fi antennas, and other accessories included.
۴.۲ د CPU نصب کول (LGA1851)
- د LGA1851 CPU ساکټ په مور بورډ کې ومومئ.
- د CPU ساکټ لیور خلاص کړئ او محافظتي پوښ لرې کړئ.
- Align your Intel Core Ultra processor with the socket, ensuring the notches on the CPU match the keys on the socket. Gently place the CPU into the socket without forcing it.
- د پروسیسر د خوندي کولو لپاره د CPU ساکټ لیور وتړئ.
۴.۳ د حافظې (DDR5) نصب کول
- د DDR5 DIMM څلور سلاټونه ومومئ.
- د DIMM سلاټ په دواړو سرونو کې کلپونه خلاص کړئ.
- د حافظې ماډل د سلاټ سره سم کړئ، ډاډ ترلاسه کړئ چې په ماډل کې نښه د سلاټ کې کیلي سره سمون لري.
- د حافظې ماډل په دواړو سرونو کې په کلکه فشار ورکړئ تر هغه چې کلپونه په خپل ځای کې راشي.
۴.۴ د ذخیره کولو نصب کول (M.2 او SATA)
The motherboard supports multiple M.2 slots and SATA3 6.0 Gb/s ports.
- M.2 SSD: Locate the M.2 slots (e.g., Blazing M.2, M.2 Armor). Insert the M.2 SSD into the slot at an angle, then push it down and secure it with the provided screw or tool-less mechanism.
- د SATA ډرایوونه: Connect SATA data cables from your storage drives (HDDs/SSDs) to the SATA3 6.0 Gb/s ports on the motherboard. Connect power cables from your power supply to the drives.

شکل ۳: زاویه لرونکی view of the ASRock B860M Live Mixer WiFi motherboard, highlighting the M.2 slots and their heatsinks for high-speed storage.
3.5 Expansion Cards (PCIe 5.0)
Insert your graphics card or other PCIe expansion cards into the appropriate PCIe 5.0 slot. Ensure it is seated firmly and secured with a screw to your chassis.
3.6 د بریښنا اتصال
د ۲۴ پن ATX بریښنا نښلونکی او ۸ پن (یا ۴+۴ پن) CPU بریښنا نښلونکی د خپل بریښنا رسولو څخه د مدر بورډ اړوندو پورټونو سره وصل کړئ.
3.7 Rear I/O Connections
Connect your peripherals to the rear I/O panel. This includes USB devices, display cables (HDMI, DisplayPort, Thunderbolt 4 Type-C), Ethernet cable, and audio devices.

شکل 4: مفصل view of the rear I/O panel on the ASRock B860M Live Mixer WiFi motherboard, showing various USB ports, display outputs, Ethernet, and audio jacks.
Video 2: Demonstrates the ultimate connectivity features for creators on ASRock motherboards, including Thunderbolt and high-speed networking.
4. عملیاتي لارښوونې
After successful installation, power on your system. The motherboard will perform a Power-On Self-Test (POST). You can access the BIOS/UEFI setup utility by pressing the ړنګول or F2 key during POST.
۵.۲ د BIOS/UEFI تنظیم کول
The BIOS/UEFI interface allows you to configure system settings, including boot order, memory profiles (XMP), fan speeds, and overclocking options. Refer to the on-screen instructions within the BIOS for navigation and adjustments.
4.2 BIOS Update Procedure
Updating your BIOS can improve system stability, compatibility, and performance. ASRock provides tools like USB BIOS Flashback and Instant Flash for this purpose.
Video 3: A detailed tutorial on how to update the motherboard BIOS using ASRock's USB BIOS Flashback and Instant Flash methods. This is crucial for maintaining system compatibility and performance.
For detailed steps on using USB BIOS Flashback or Instant Flash, please refer to the video tutorial above or the dedicated section in the full user manual available on the ASRock support webسایټ
5. ساتنه
منظم ساتنه ستاسو د مور بورډ اوږد عمر او غوره فعالیت تضمینوي.
- د دوړو لرې کول: په دوره یي ډول د خپل کمپیوټر د قضیې دننه دوړې پاکې کړئ، په ځانګړي توګه د هیټ سینکونو او فینونو څخه، د فشار شوي هوا په کارولو سره.
- د BIOS تازه معلومات: Keep your BIOS updated to the latest version to ensure compatibility with new hardware and software, and to benefit from performance improvements and bug fixes.
- د موټر چلوونکي تازه معلومات: Install the latest drivers for your motherboard chipset, audio, network, and other components from the ASRock webسایټ
- د کیبل مدیریت: Ensure proper cable management to maintain good airflow within the case, preventing overheating.
6. ستونزه حل کول
که تاسو له ستونزو سره مخ شئ، نو لاندې عام ستونزې حل کولو ګامونه په پام کې ونیسئ:
- ځواک نشته: Check all power connections (24-pin ATX, 8-pin CPU, GPU power). Ensure your power supply is switched on.
- نه ښودنه: Verify that your monitor is connected to the correct graphics output port (motherboard or discrete GPU). Reseat your graphics card and RAM modules.
- د سیسټم بې ثباتي/خرابی: Check RAM seating and try running with one stick of RAM at a time. Ensure CPU cooler is properly installed. Update BIOS and drivers.
- د بوټ ستونزې: Check boot order in BIOS/UEFI. Ensure your storage drive is detected.
- پردی نه دی موندل شوی: Try different USB ports. Install necessary drivers for the peripheral.
For more advanced troubleshooting, consult the full user manual or ASRock's online support resources.
7. مشخصات
| فیچر | تفصیل |
|---|---|
| برانډ | ASRock |
| د ماډل نوم | B860M LIVEMIXER WIFI |
| د CPU ساکټ | LGA 1851 |
| مطابقت لرونکي پروسیسرونه | د انټیل کور الټرا |
| د چپسیټ ډول | Intel B860 |
| د RAM حافظې ټیکنالوژي | DDR5 |
| د حافظې ساعت سرعت | ۸۲۰۰ میګاهرتز (او سي) |
| د حافظې د ذخیره کولو ظرفیت | تر 256 GB پورې |
| د ګرافیک محصول اختیارونه | 1 HDMI, 1 DisplayPort, 1 Thunderbolt 4 Type-C |
| د آډیو کوډیک | ریالټیک ALC1220 7.1 CH HD آډیو کوډیک، نهیمیک آډیو |
| LAN | 2.5G LAN |
| بې سیم ارتباط | وائی فای 6E |
| Power Phase | 10+1+1+1+1 Power Phase, Dr.MOS for VCore+GT+SA |
| Capacitors | Exclusive 20K Cap with 1000uF Capacitance |
| د فارم فکتور | مایکرو ATX |
| د کڅوړې ابعاد | 11.73 x 10.51 x 2.4 انچه |
| د توکي وزن | ۲.۴۵ پونډه |
8. تضمین او ملاتړ
For warranty information, technical support, and driver downloads, please visit the official ASRock webسایټ:
You can also find additional support and FAQs on the ASRock store page: ASRock America Store
Protection plans are available for purchase separately to extend coverage for your product.


