1. پیژندنه
This manual provides detailed instructions for the safe and effective use of your OLIGHT Oclip Series Headlamp Strap Bundle, featuring the Oclip Pro EDC Flashlight. Please read this manual thoroughly before operation and retain it for future reference.

Image 1.1: The OLIGHT Oclip Pro EDC Flashlight and its compatible Headlamp پټه.
2. محصول ختم شوview
2.1 Oclip Pro EDC Flashlight
The Oclip Pro is a versatile clip-on light designed for everyday carry. It features multiple lighting solutions to suit various needs.
- Three Lighting Solutions: Includes a floodlight with 500 lumens, a 120-meter range spotlight, and a 40/4 lumen red light.
- User-friendly UI Design: Modes are switched via a selector.
- د بیټرۍ شاخص: Located in the center of the switch, it displays the current battery level.

Image 2.1: Various angles of the OLIGHT Oclip Pro, highlighting its compact design and clip.
2.2 Oclip Headlamp پټه
The Oclip Headlamp Strap is designed to convert your Oclip series flashlight into a hands-free headlamp. It is compatible with Oclip, Oclip Pro, and Oclip Ultra models.
- Flexible Rotating Light Holder: سرلیکamp bracket allows for 160-degree rotation, ensuring optimal light direction. This mechanism is tested for over 5,000 flips.
- کیفیت لرونکي توکي: Constructed from premium nylon for durability, lightweight comfort, and a secure fit.

Image 2.2: The OLIGHT Headlamp Strap, designed for hands-free use of Oclip series flashlights.
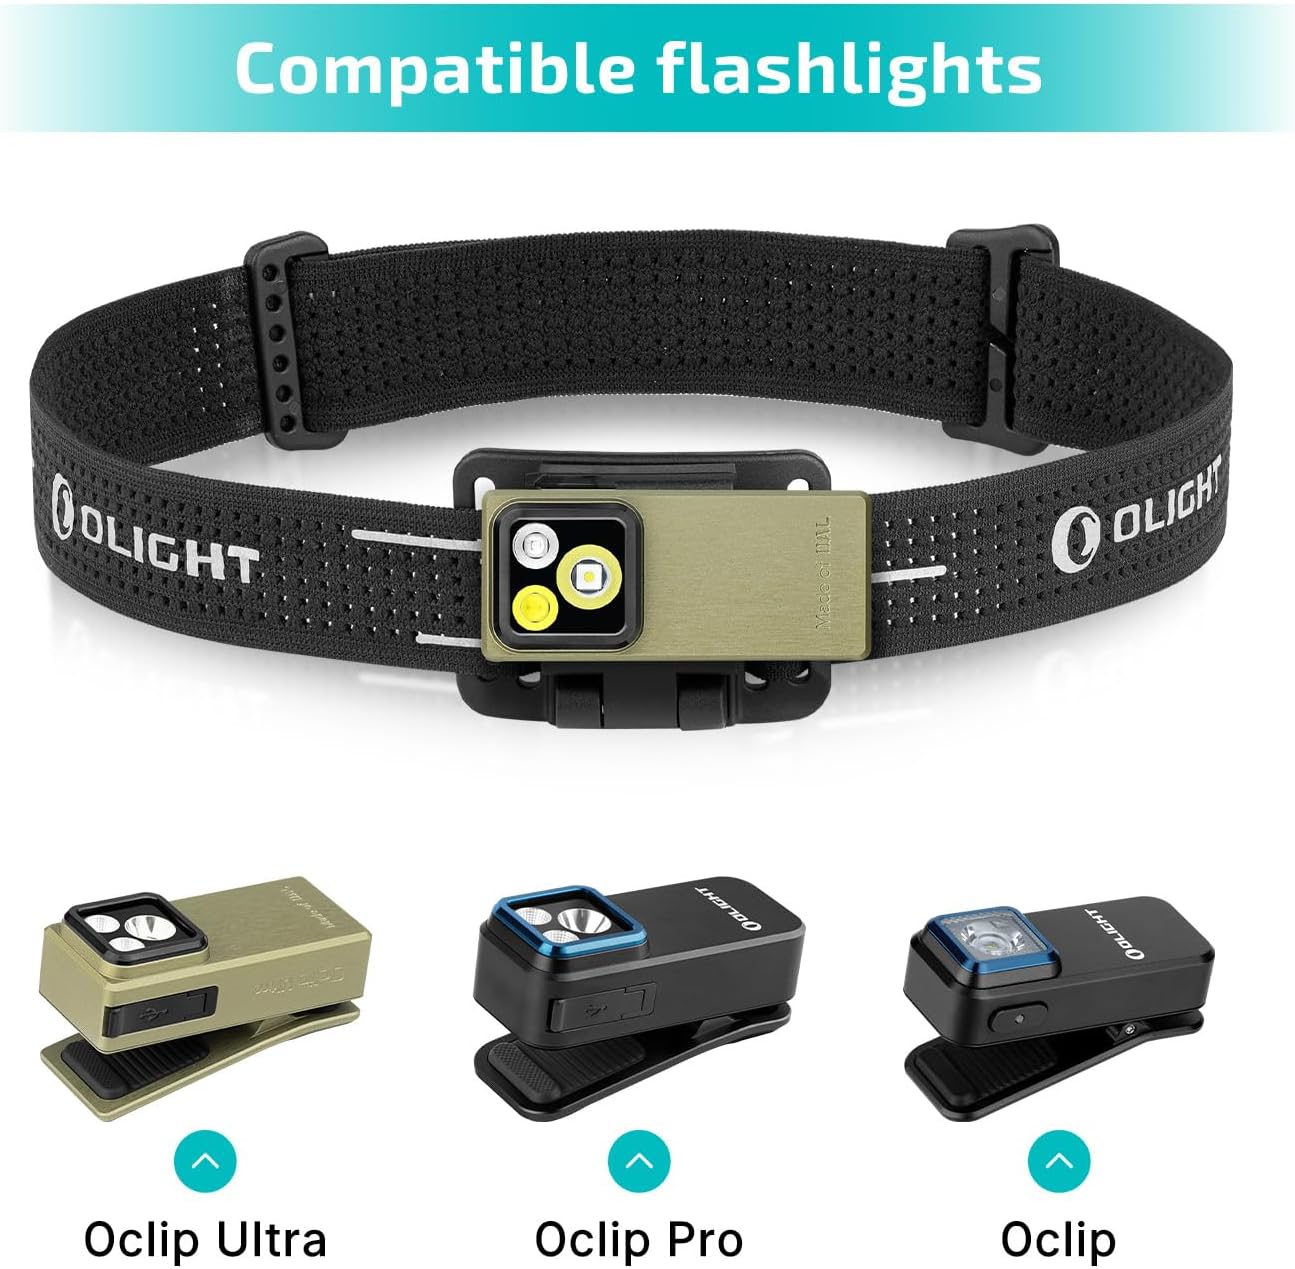
انځور ۳.۱: سرلیکamp strap shown with compatible Oclip Ultra, Oclip Pro, and Oclip flashlights.

Image 2.4: Size and feature comparison between the Oclip Pro and Oclip models.
3. ترتیب کول
3.1 Attaching the Oclip Pro to the Headlamp پټه
- Ensure the Oclip Pro flashlight is in the unlocked state (refer to Section 4.4 for lockout/unlock instructions).
- Align the clip of the Oclip Pro flashlight with the bracket on the headlamp پټه
- Gently push the flashlight into the bracket until it securely clips into place. You should hear a distinct click.
- Adjust the angle of the flashlight within the bracket to your desired position. The bracket allows for 160-degree rotation.
- سر ځای پرځای کړئamp strap on your head and adjust for a comfortable and secure fit.

Image 3.1: The Oclip Pro attached to the headlamp strap, providing hands-free illumination.
3.2 Alternative Mounting Options for Oclip Pro
The Oclip Pro can also be clipped onto various surfaces or attached to metal objects due to its magnetic base, offering versatile hands-free lighting without the headlamp پټه

انځور ۶: پخوانیamples of the Oclip Pro being used by clipping it to a shirt, belt, or attaching it magnetically to a metal surface.
4. عملیاتي لارښوونې
۸ پاور آن/بند
To turn the Oclip Pro on or off, press the main switch button located on the side of the flashlight.
4.2 د حالت بدلول
The Oclip Pro features a selector for switching between different lighting modes (floodlight, spotlight, red light). Rotate the selector to choose your desired mode.
4.3 د روښانتیا تنظیم کول
While the flashlight is on, press and hold the main switch button to cycle through the brightness levels. The typical order of brightness is Low, Medium, then High. Moonlight mode and Turbo mode may be accessed with specific button presses (refer to the diagram below).

Image 4.1: Visual guide for adjusting brightness levels, including Moonlight, Low, Medium, High, and Turbo modes.
4.4 Lockout & Unlock
For first-time use or to prevent accidental activation, the Oclip Pro may be in a locked state. To unlock, press and hold the main switch button for approximately 1 second. To engage lockout mode, press and hold the button for more than 2 seconds while the light is off.

Image 4.2: Instructions for locking and unlocking the Oclip Pro flashlight.
د بیټرۍ شاخص
The battery indicator in the center of the switch provides real-time information about the remaining battery level. Refer to the product's specific indicator guide for detailed interpretations (e.g., green for high, yellow for medium, red for low).
5. ساتنه
To ensure the longevity and optimal performance of your OLIGHT Oclip Pro and Headlamp Strap, follow these maintenance guidelines:
- پاکول: Wipe the flashlight and strap with a soft, damp ټوکر. د سختو کیمیاوي موادو یا خړوبونکو موادو څخه ډډه وکړئ.
- چارج کول: Recharge the Oclip Pro using the provided charging cable when the battery indicator shows low power.
- ذخیره کول: محصول په یخ ، وچ ځای کې د مستقیم لمر وړانګو او خورا تودوخې څخه لرې وساتئ.
- معاینه: په دوره توګه د سر سر وګورئamp strap for any signs of wear or damage.
6. ستونزه حل کول
If you encounter issues with your OLIGHT Oclip Pro, refer to the following common problems and solutions:
- څراغ نه خلاصیږي:
- Check if the flashlight is in lockout mode (refer to Section 4.4).
- ډاډ ترلاسه کړئ چې بیټرۍ چارج شوې ده.
- د رڼا تولید کم دی:
- The battery might be low; recharge the device.
- ډاډ ترلاسه کړئ چې لینز پاک دی.
- Flashlight not securely attaching to strap:
- Verify that the flashlight is correctly aligned with the bracket and pushed in until it clicks.
- Inspect the strap bracket and flashlight clip for any damage.
د نورو مرستو لپاره، مهرباني وکړئ د OLIGHT پیرودونکو ملاتړ سره اړیکه ونیسئ.
7. مشخصات
| فیچر | مشخصات |
|---|---|
| د محصول ډول | EDC Flashlight with Headlamp پټه |
| برانډ | اول |
| ماډل | اوکلیپ پرو |
| ځانګړی ځانګړنه | د چارج وړ |
| رنګ | شین |
| د بریښنا سرچینه | د بیټرۍ چلول (لیتیم ایون) |
| د رڼا سرچینې ډول | LED |
| Material (Strap) | نایلان |
| سپینه روښانتیا | 500 Lumens (زیاته) |
| د اوبو د مقاومت کچه | د اوبو مقاومت نلري |
| د نصب کولو ډول | Head Mount, Clip-on Mount |
| د څراغونو شمیر | 2 (Floodlight, Spotlight, plus Red Light) |
| د بلب ب Featuresې | Multi-mode, Red Light Feature |
8. تضمین او ملاتړ
OLIGHT products are manufactured to high-quality standards. For information regarding warranty coverage, product registration, or technical support, please visit the official OLIGHT webسایټ ته مراجعه وکړئ یا د دوی د پیرودونکو خدماتو څانګې سره اړیکه ونیسئ. د تضمین ادعاوو لپاره د پیرود ثبوت په توګه د پیرود رسید وساتئ.
OLIGHT Official Webسایټ: www.olightstore.com


