1. پیژندنه
This manual provides essential information for the safe and effective operation, setup, and maintenance of your ComMarker X 6W UV Engraving Machine Omni X. Please read this manual thoroughly before using the device to ensure optimal performance and safety.
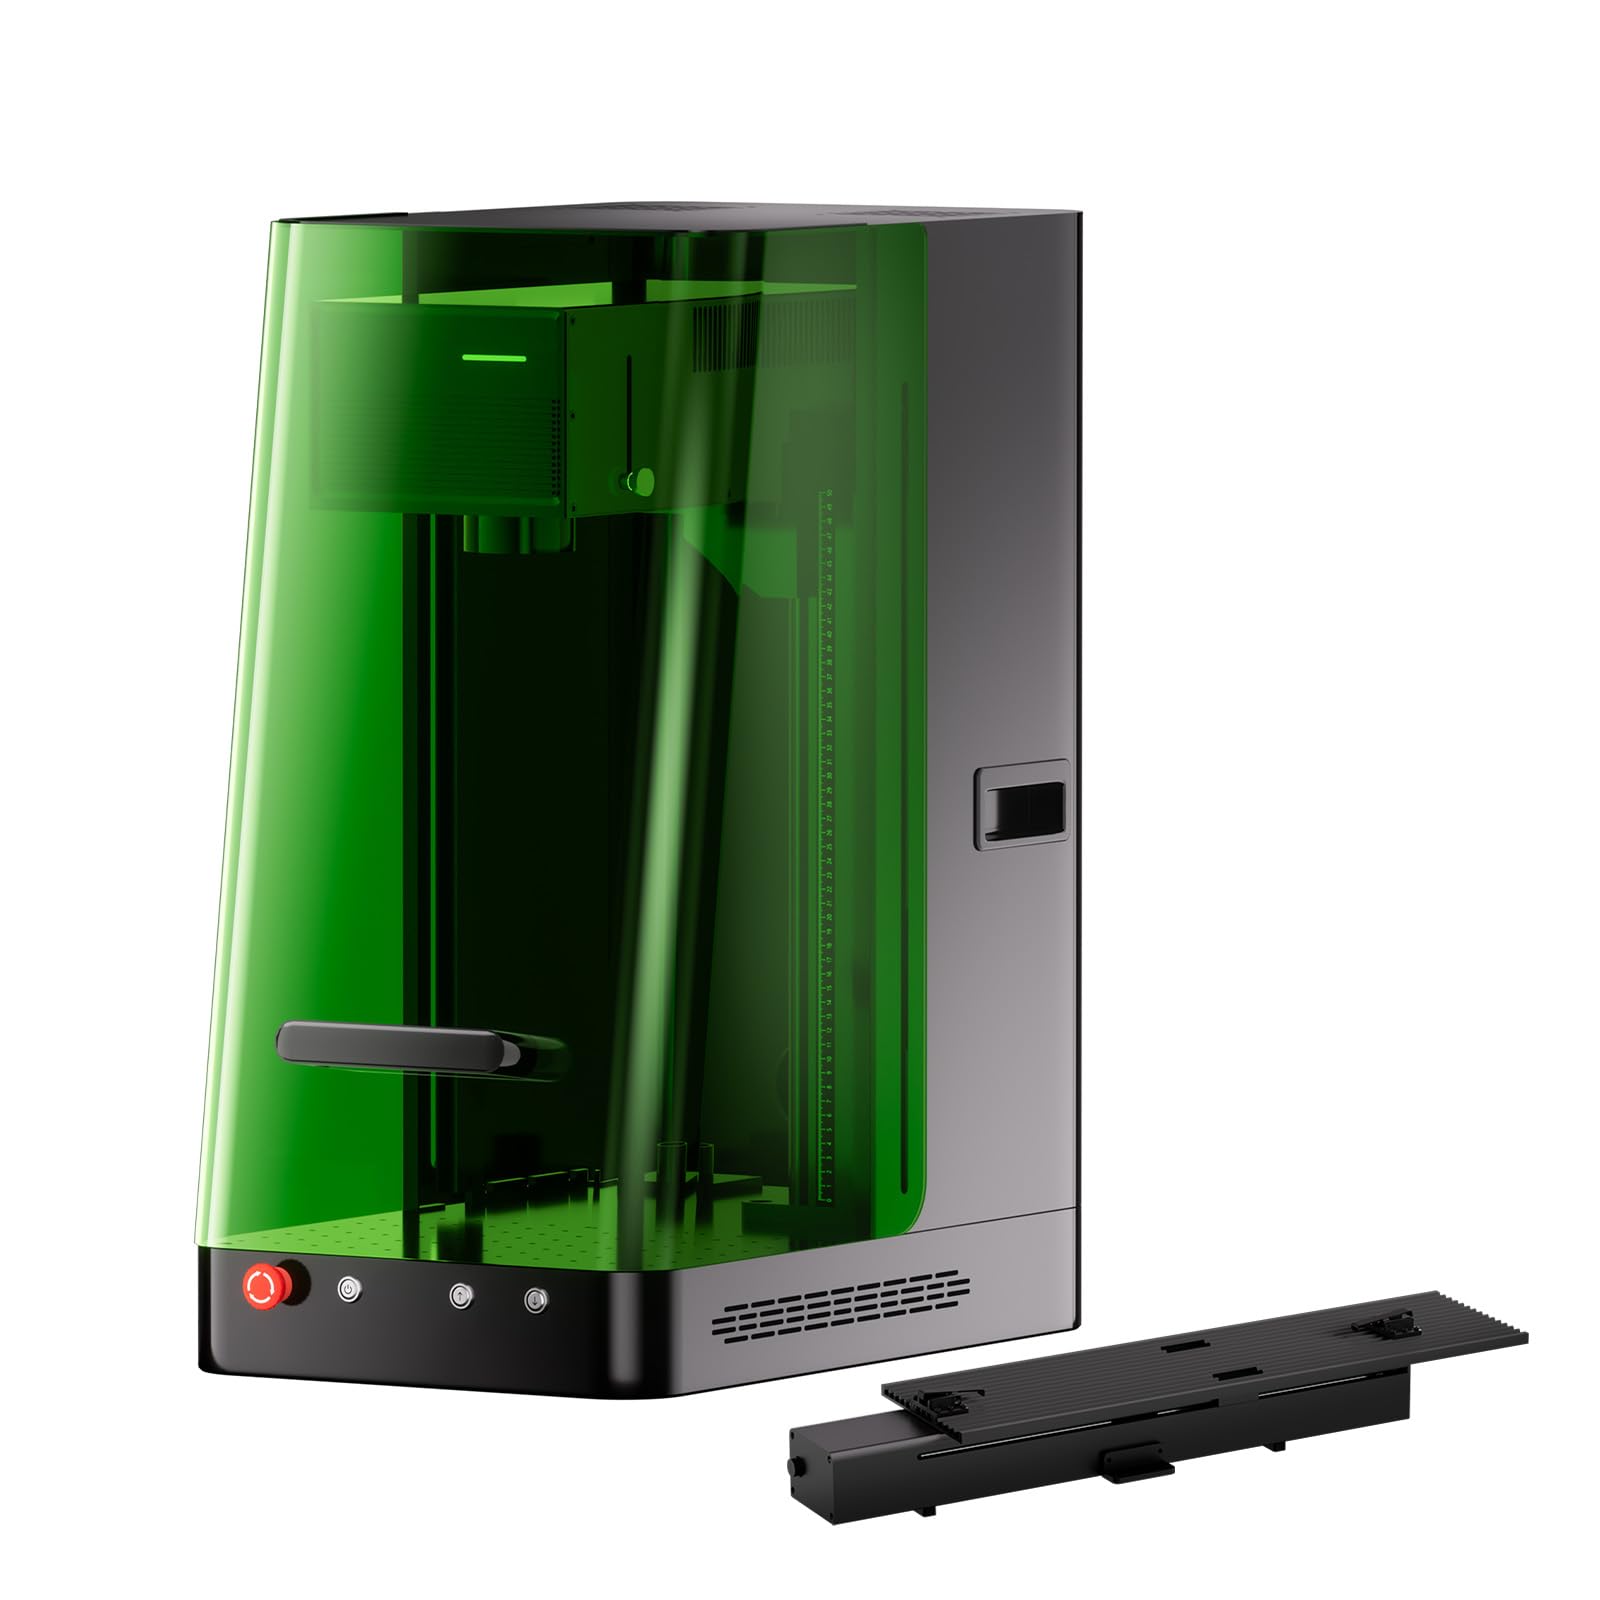
Figure 1: ComMarker X 6W UV Engraving Machine Omni X with included slider bundle components.
2. د خوندیتوب معلومات
The ComMarker X 6W UV Engraving Machine is a Class 1 Laser Product. Adherence to safety guidelines is paramount to prevent injury and ensure proper operation.
2.1 عمومي خوندیتوب احتیاطونه
- Always wear appropriate laser safety goggles when operating the machine.
- ډاډ ترلاسه کړئ چې ماشین په مستحکم، سطحه سطحه کېښودل شوی.
- د کار ساحه پاکه او د اور اخیستونکو موادو څخه پاکه وساتئ.
- Do not attempt to bypass safety features such as the smart cover sensor or emergency stop button.
- Operate the machine in a well-ventilated area to dissipate any fumes produced during engraving.
2.2 Laser Classification and Output
دا وسیله د الف په توګه طبقه بندي شوې ده د لومړي ټولګي لیزر محصول according to IEC 60825-1 (Report Number: 2501Q25848E-SFA1, FDA Accession No.: 2521455-000). The maximum power output is 1.95mW.

Figure 2: Safety features of the ComMarker Omni X, including the OD 5+ laser light proof enclosure, smart cover with sensor, and emergency stop button.
2.3 بیړنی بند
In case of any malfunction or emergency, immediately press the red emergency stop button located on the front of the machine. This will cut power to the laser and stop all operations.
3. محصول ختم شوview او اجزا
The ComMarker X 6W UV Engraving Machine Omni X comes with several components to facilitate various engraving tasks.

Figure 3: All included components for the ComMarker X UV Engraving Machine.
۲.۲ شاملې برخې
- ComMarker X Laser Engraver Unit
- فوټ سویچ
- د معلوماتو کیبل
- د بریښنا اډاپټر
- Lift Motor Cable
- رڼا
- حاکم
- فلج
- 70x70mm Field Lens
- 150x150mm Field Lens
- د OTG اډاپټر
- USB ډرایو
- Placing Helper
- د ایلن رنچ سیټ
- Goggles (Laser Safety Glasses)
- مخکېview مرسته کوونکی
- د پورته کولو پلیټ فارم
- مختلف پیچونه
۴. د تنظیم لارښوونې
Follow these steps for the initial setup of your ComMarker X UV Engraving Machine.
4.1 پاکول او ځای پرځای کول
- په احتیاط سره د بسته بندۍ څخه ټولې برخې لرې کړئ. د راتلونکي لیږد یا ذخیره کولو لپاره بسته بندي وساتئ.
- Place the main engraver unit on a sturdy, flat, and level surface in a well-ventilated area.
- Ensure there is adequate space around the machine for operation and heat dissipation.
۶.۲ د بریښنا او معلوماتو نښلول
- Connect the Power Adaptor to the machine and then to a suitable power outlet (110V).
- Connect the Data Cable from the engraver to your computer or control device.
- If using the Foot Switch, connect it to the designated port on the machine.
- Attach the Lift Motor Cable if using the electric lifting column.
4.3 د سافټویر نصب کول
Install the ComMarker software (ComMarker App or ComMarker Studio) from the provided USB Drive or download it from the official ComMarker website. The machine is also Lightburn compatible.
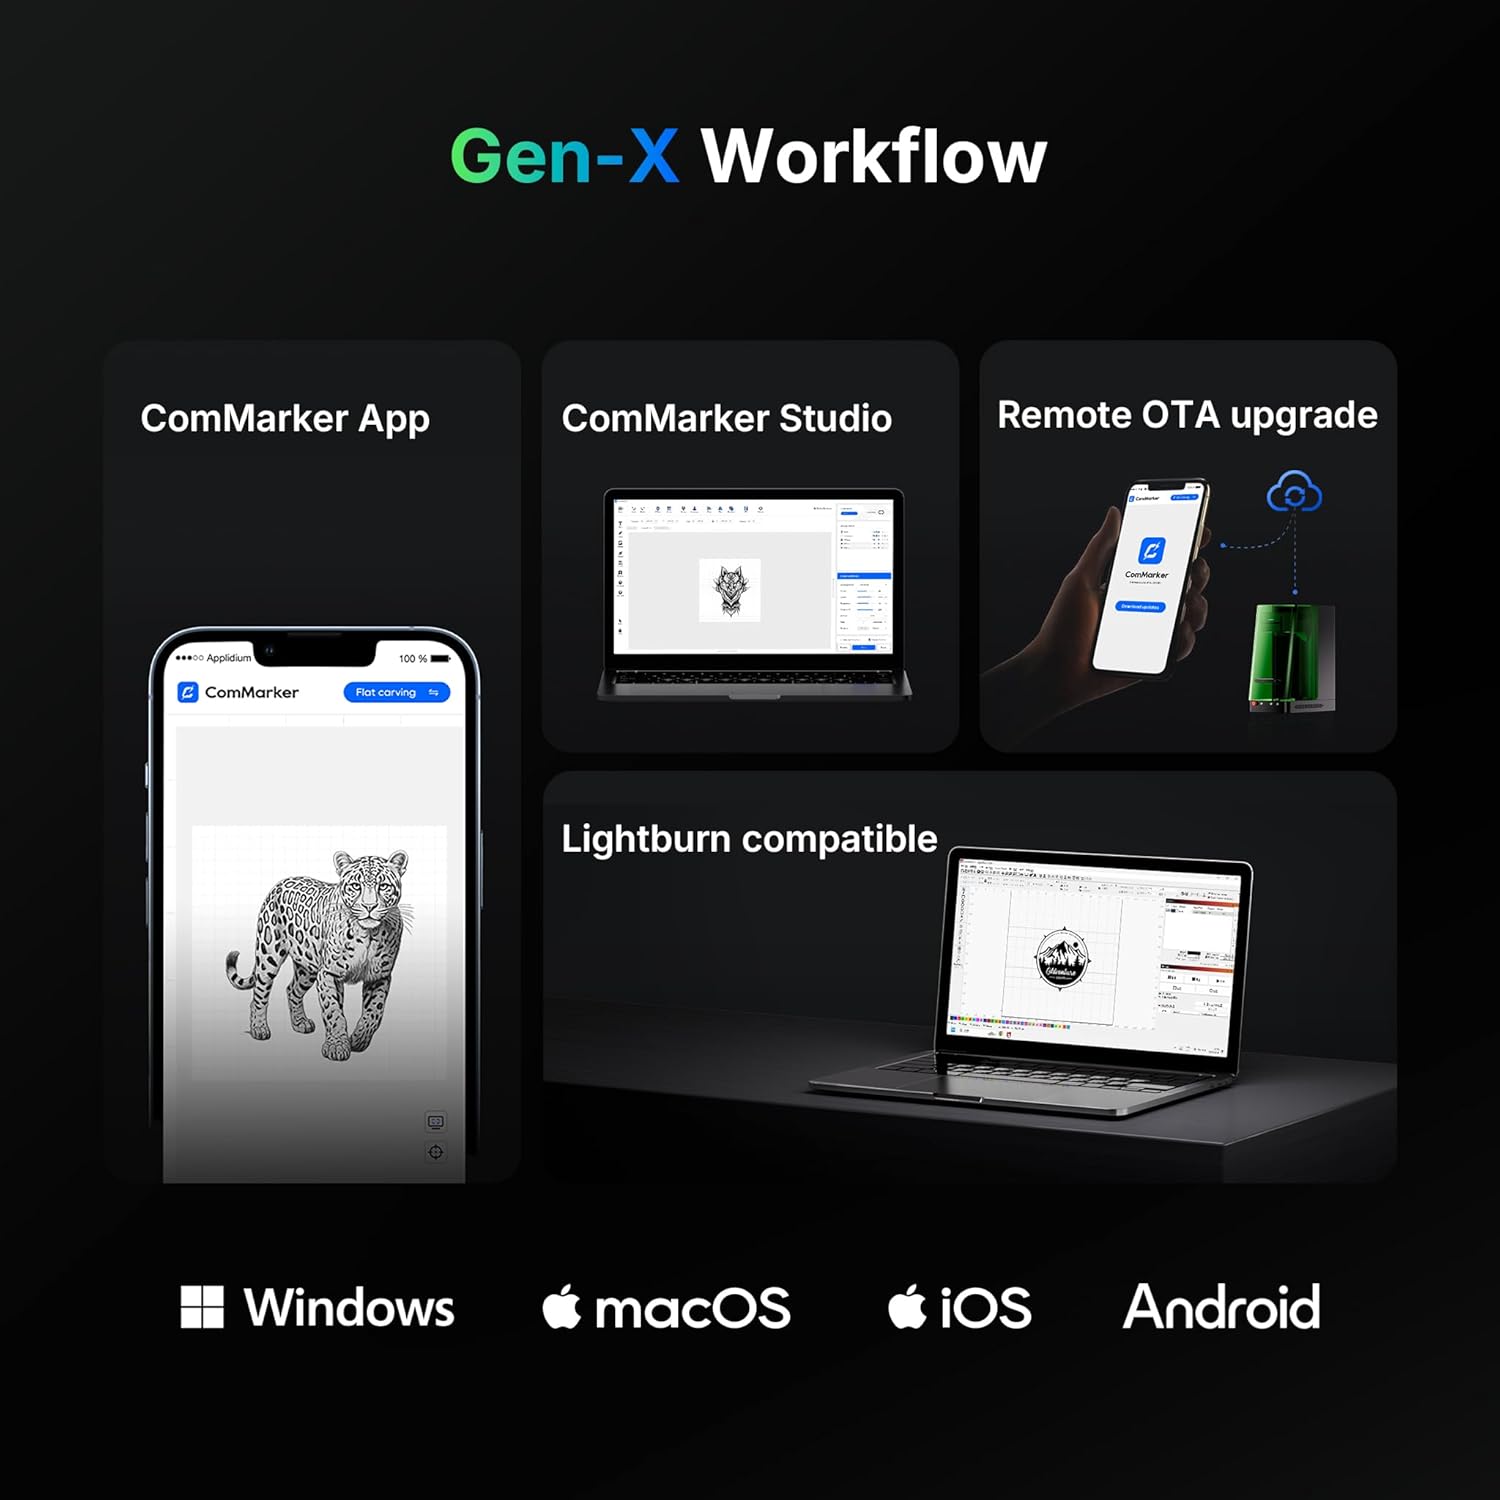
Figure 4: ComMarker Gen-X Workflow, illustrating software compatibility across Windows, macOS, iOS, and Android platforms.
5. عملیاتي لارښوونې
This section outlines the basic steps for operating your ComMarker X UV Engraving Machine.
۲.۱ بریښنا فعالول او پیل کول
- ډاډ ترلاسه کړئ چې ټولې اړیکې خوندي دي.
- Press the power button on the machine.
- Launch the ComMarker software on your computer or mobile device.
5.2 Material Placement and Auto-Focus
- Place the material to be engraved on the work platform. For precise positioning, use the Placing Helper.
- The ComMarker X features an auto-focus system with LiDAR ranging. Activate the auto-focus function via the software or the one-button control on the electric lifting column. The machine will automatically adjust the laser height for optimal focus (0.0019mm accuracy).
- Utilize the dual red light positioning for accurate alignment of your engraving design.

Figure 5: The ComMarker X UV Engraving Machine in operation, demonstrating precise laser marking on a metal surface.
5.3 Design and Engraving Process
- Import or create your design within the ComMarker software.
- Select the appropriate material settings and engraving parameters (e.g., speed, power). The UV laser supports a wide range of materials including PE, PVC, PP, PS, PLA, PC, PMMA, polyoxymethylene (POM), nylon, ABS, aluminum, gold, platinum, silver, titanium, brass, stainless steel, wood, cloth, glass, and cardboard.
- پری وکاروئview Helper to visualize the engraving area before starting.
- Initiate the engraving process. The machine's smart cover sensor will ensure operation only when the cover is closed.
- For 3D internal engraving, follow specific software instructions for depth and layer settings.
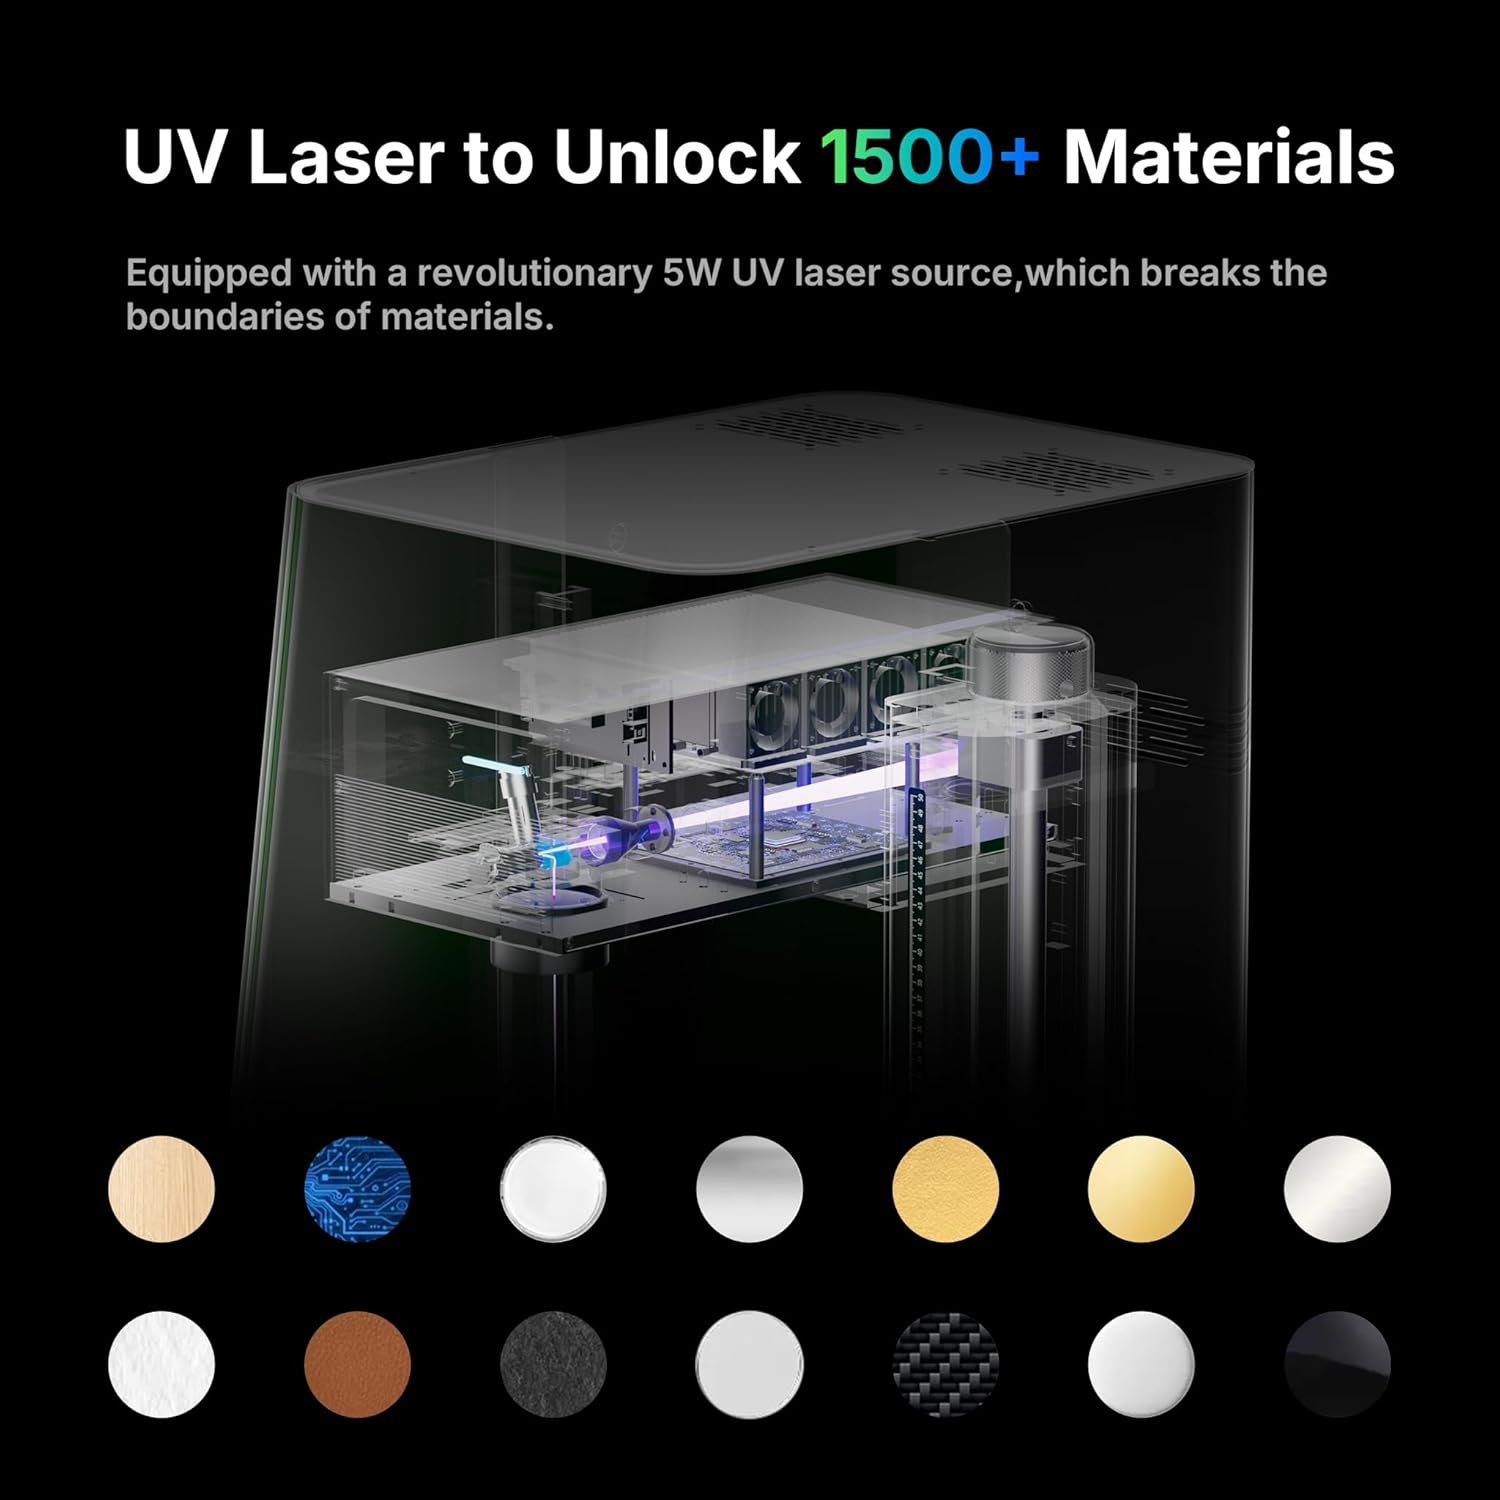
Figure 6: The versatility of the UV laser, capable of engraving over 1500 types of materials.
5.4 پرمختللی ځانګړتیاوې
- 3D Internal Engraving: The Omni X supports 3D internal engraving, allowing for intricate designs within transparent materials.
- Batch Marking: The machine can automatically generate and mark QR codes/barcodes in sequence without manual input, ideal for small-batch production.
- Slider Extension: The 150x400mm working area with slider extension allows for engraving larger items or multiple items in a batch.
6. ساتنه
Regular maintenance ensures the longevity and optimal performance of your ComMarker X UV Engraving Machine.
6.1 پاکول
- ډاډ ترلاسه کړئ چې ماشین د پاکولو دمخه بند او پلګ شوی دی.
- په نرمۍ سره بهرنۍ سطحې د نرم، وچ ټوکر سره پاک کړئ.
- Periodically clean the work platform and lens with a lint-free cloth and appropriate lens cleaning solution to remove dust and debris.
- The machine offers 99.72% dust isolation, but regular cleaning of the internal components (if accessible and safe) is recommended by a qualified technician.
6.2 د سافټویر تازه معلومات
Regularly check for and install remote OTA (Over-The-Air) software updates to ensure you have the latest features and performance enhancements.
7. ستونزه حل کول
دا برخه هغه عامې ستونزې په ګوته کوي چې تاسو ورسره مخ کیدی شئ او د هغوی احتمالي حلونه.
7.1 عام مسایل او حلونه
- ماشین نه چلیږي:
- Check if the power cable is securely connected to both the machine and the power outlet.
- ډاډ ترلاسه کړئ چې د بریښنا رسۍ فعاله ده. - لیزر نه ډزې کوي:
- Verify that the smart cover is fully closed. The machine will not operate if the cover is open.
- Check software settings to ensure the laser power is not set to zero.
- Ensure the emergency stop button is not engaged. - Engraving quality is poor or inconsistent:
- Re-run the auto-focus procedure to ensure correct focal distance.
- Clean the laser lens for any dust or debris.
- Adjust engraving parameters (speed, power) for the specific material being used.
- Ensure the material is flat and securely placed on the work platform. - Software not connecting to machine:
- Check the data cable connection between the machine and your computer.
- Restart both the machine and the software.
- Ensure the correct drivers are installed (if applicable). - د ډیر تودوخې ساتنه: The machine features overheat protection. If the temperature reaches a warning value, the device automatically stops working to prevent damage. Allow the machine to cool down before resuming operation.
If you encounter issues not listed here or cannot resolve a problem, please contact ComMarker customer support.
8. مشخصات
| فیچر | مشخصات |
|---|---|
| جوړونکی | Commarker |
| د ماډل شمیره | Omni X |
| د لیزر ډول | UV Laser |
| د لیزر ځواک | 6 واټ |
| طول موج | 355nm |
| د یخولو طریقه | د هوا یخ کول |
| د نښه کولو سرعت | 0 - 10000mm/s |
| د نقاشۍ دقت | 0.0019mm |
| د تمرکز سیسټم | Auto-Focus with LiDAR Ranging System |
| کاري ساحه | 150 x 400mm (with slide extension) |
| والیtage | 110V |
| د توکي وزن | ۲.۴۵ پونډه |
| د محصول ابعاد | 19 x 13 x 27 انچه |
| لیزر ټولګي | د لومړي ټولګي لیزر محصول |
| د عملیاتو حالت | اتوماتیک |
9. تضمین او ملاتړ
9.1 د تضمین معلومات
The ComMarker X 6W UV Engraving Machine Omni X comes with a د تولید کونکي دوه کلن تضمین. دا تضمین د عادي استعمال لاندې موادو او کاریګرۍ نیمګړتیاوې پوښي. مهرباني وکړئ د تضمین ادعاوو لپاره د پیرود ثبوت وساتئ.
9.2 د پیرودونکي ملاتړ
For technical assistance, troubleshooting, or warranty inquiries, please contact ComMarker customer support through their official webسایټ یا ستاسو د محصول سره چمتو شوي د اړیکو معلومات. تاسو کولی شئ هم لیدنه وکړئ ComMarker Store on Amazon د اضافي سرچینو لپاره.


