1. پیژندنه
This manual provides detailed instructions for the installation, configuration, and operation of your ASRock X870 Taichi Creator Motherboard. This high-performance ATX motherboard is designed to support AMD Ryzen 9000, 8000, and 7000 Series Processors with an AM5 socket, offering advanced features for creators and enthusiasts.
2. د خوندیتوب معلومات
Please read the following safety guidelines carefully before installing or operating your motherboard to prevent damage to the product or injury to yourself.
- Always disconnect the power cord from the wall outlet before touching any components.
- Wear an anti-static wrist strap to prevent electrostatic discharge (ESD) when handling components.
- د ډیر تودوخې مخنیوي لپاره د خپل کمپیوټر په کیس کې مناسب هوا ورکول ډاډمن کړئ.
- مور بورډ د رطوبت او سختې تودوخې څخه لرې وساتئ.
- Refer to the CPU and other component manuals for specific installation instructions.
3. د بسته محتويات
ډاډ ترلاسه کړئ چې لاندې ټول توکي ستاسو د مور بورډ په کڅوړه کې شتون لري. که کوم توکي ورک یا خراب وي، نو خپل پرچون پلورونکي سره اړیکه ونیسئ.
- د ASRock X870 تایچي جوړونکي مور بورډ
- د چټک نصبولو لارښود
- تنظیمي خبرتیا
- د SATA ډیټا کیبلونه
- د وای فای انتن
- د M.2 پیچونه او خنډونه
- ASRock Graphics Card Holder
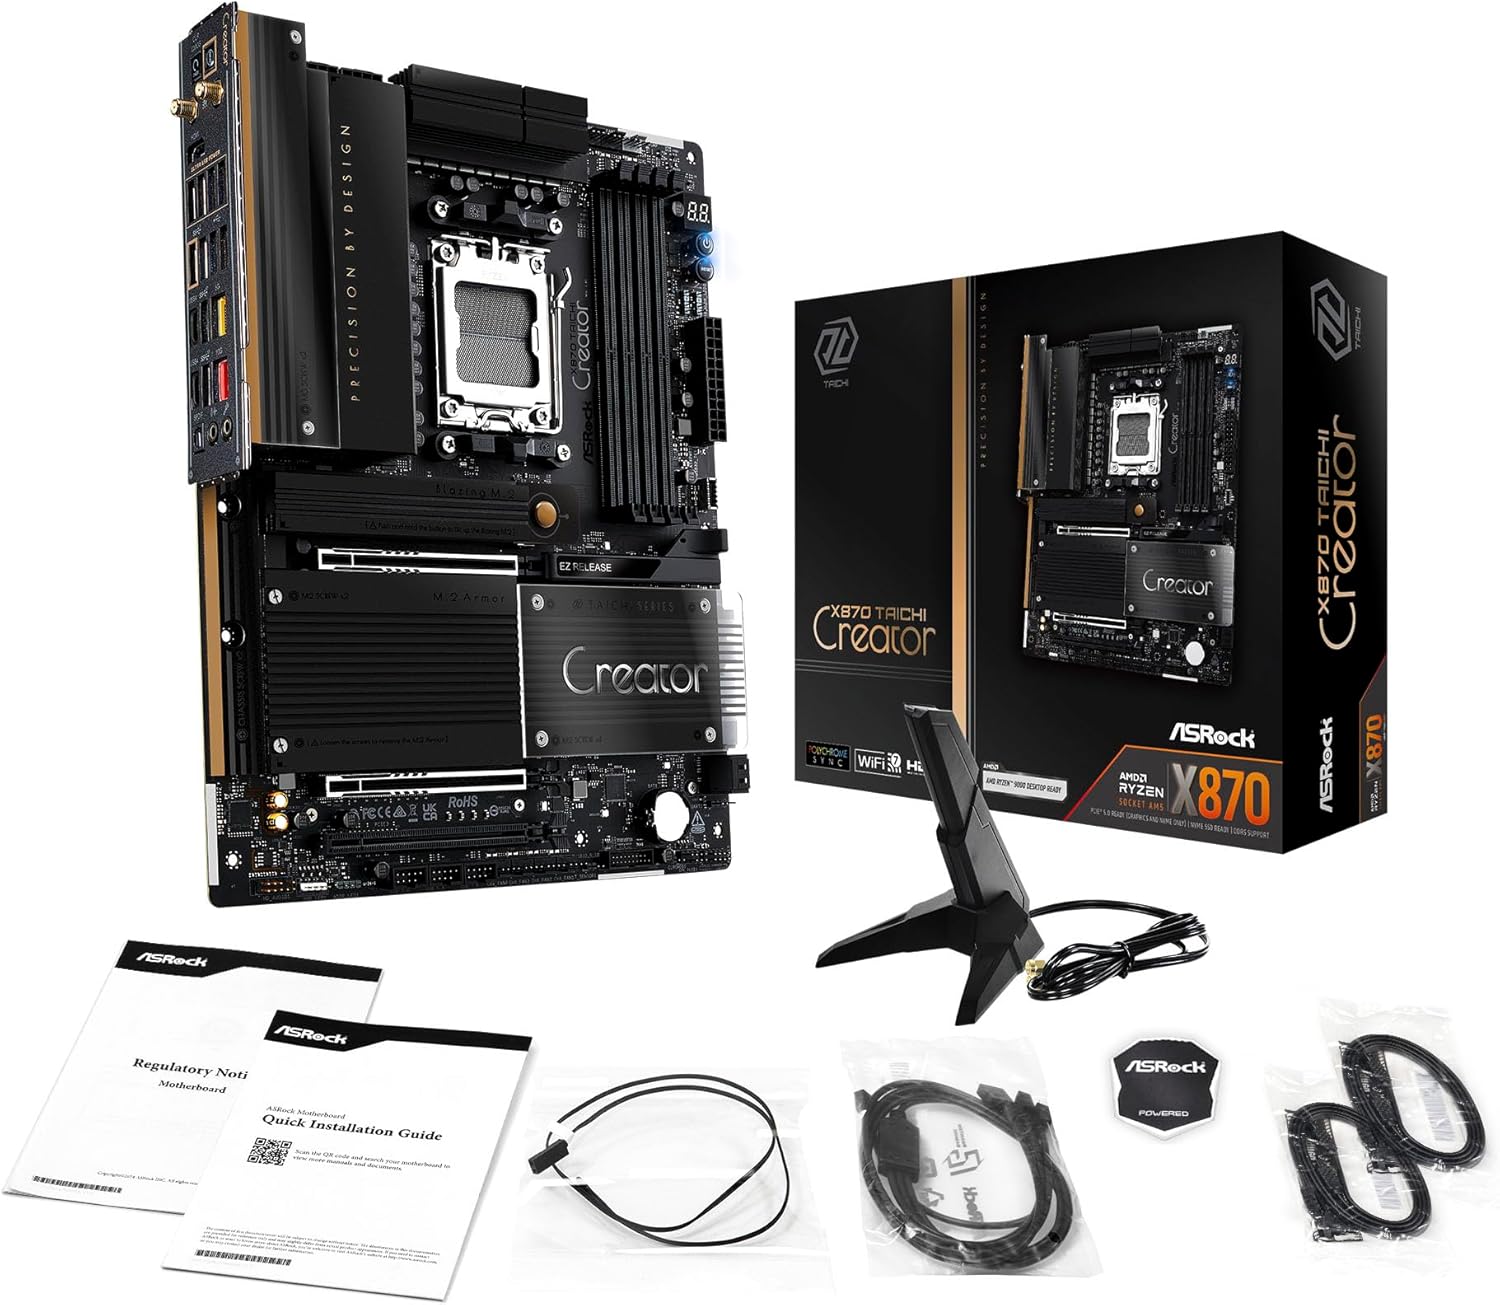
Image: The ASRock X870 Taichi Creator Motherboard shown alongside its retail packaging and various accessories, including cables, documentation, and a graphics card holder.
4. ترتیب او نصب کول
د خپل مور بورډ او د هغې د برخو د سم نصبولو لپاره دا ګامونه تعقیب کړئ.
4.1. CPU Installation (Socket AM5)
- په مور بورډ کې د AM5 CPU ساکټ ومومئ.
- Gently lift the CPU retention lever.
- Align the triangular mark on your AMD Ryzen processor with the corresponding mark on the socket.
- Carefully place the CPU into the socket without applying force.
- Lower the retention lever until it clicks into place, securing the CPU.

انځور: له پورته څخه ښکته view of the ASRock X870 Taichi Creator Motherboard, highlighting the central AM5 CPU socket and surrounding components like VRMs and RAM slots.
۳.۴. د حافظې (RAM) نصبول
The motherboard supports 4 x DDR5 DIMM slots for dual-channel memory technology.
- د DIMM سلاټ په دواړو سرونو کې کلپونه خلاص کړئ.
- د DDR5 حافظې ماډل کې نوچ د DIMM سلاټ کې کیلي سره سم کړئ.
- د حافظې ماډل په کلکه په سلاټ کې دننه کړئ تر هغه چې کلپونه په خپل ځای کې راشي.
- For dual-channel configuration, refer to your motherboard manual for recommended slot pairing.
۲.۴. د ذخیره کولو وسایلو نصبول
The motherboard features M.2 slots and SATA3 ports for storage.
۳.۲.۱. د M.2 SSD نصبول
The board includes 1 Ultra M.2 (PCIe Gen3x4), 1 Hyper M.2 (PCIe Gen4x4), and 2 Blazing M.2 (PCIe Gen5x4) slots.
- Locate the desired M.2 slot and remove the M.2 heatsink if present.
- د M.2 SSD په سلاټ کې د 30 درجې زاویه کې دننه کړئ.
- Gently push down the SSD and secure it with the provided M.2 screw or standoff.
- د غوره حرارتي فعالیت لپاره M.2 هیټسینک بیا وصل کړئ.
4.3.2. SATA Device Installation
Connect SATA storage devices (HDDs/SSDs) to the 4 SATA3 ports using SATA data cables.
۲.۲.۴. د PCIe کارت نصبول
The motherboard provides 2 PCIe 5.0 x16 (x8/x8) slots and 1 PCIe 3.0 x16 slot.
- Select an available PCIe slot.
- د خپل کمپیوټر کیس څخه د اړونده توسیع سلاټ پوښ لرې کړئ.
- Align your PCIe card with the slot and press down firmly until it is seated correctly.
- کارت د کمپیوټر کیس سره د سکرو سره وتړئ.
4.5. د بریښنا پيوستون
Connect the 24-pin ATX power connector and the 8-pin (or 4+4-pin) CPU power connector from your power supply unit (PSU) to the corresponding ports on the motherboard.
۷. د مخکینۍ پینل او شاته I/O اتصالونه
Connect your PC case's front panel connectors (power button, reset button, USB ports, audio jacks) to the appropriate headers on the motherboard. Connect peripherals to the rear I/O panel.

انځور: نږدې انځور view of the rear I/O panel of the ASRock X870 Taichi Creator Motherboard, showing various ports including USB, HDMI, Ethernet, and audio jacks.
5. عملیاتي لارښوونې
۴.۱. ابتدايي بوټ او د BIOS/UEFI تنظیم کول
- د خپل کمپیوټر د راټولولو وروسته، یو مانیټر، کیبورډ او موږک سره وصل کړئ.
- Power on your system. During startup, repeatedly press the ډیل or F2 د BIOS/UEFI تنظیم کولو اسانتیا ته د ننوتلو لپاره کیلي.
- Configure boot order, enable XMP/EXPO for memory, and adjust other settings as needed.
- بدلونونه خوندي کړئ او د BIOS/UEFI څخه ووځئ. سیسټم به بیا پیل شي.
5.2. د ډرایور نصب کول
After installing your operating system, install the necessary drivers for the motherboard components. These can typically be found on the ASRock support website or the included driver CD/USB drive.
- د چپسیټ چلوونکي
- LAN Drivers (10Gbps, 5Gbps)
- Wi-Fi 7 + Bluetooth Drivers
- د آډیو ډرایورونه (ریالټیک ALC4082)
- د USB چلوونکي
6. ساتنه
6.1. پاکول
Regularly clean your PC to prevent dust buildup, which can lead to overheating. Use compressed air to remove dust from fans, heatsinks, and other components. Ensure the system is powered off and unplugged before cleaning.
۱۲. د BIOS تازه معلومات
په دوره یي ډول ASRock وګورئ website for BIOS/UEFI updates. Updates can improve system stability, add support for new CPUs, or fix bugs. Follow the instructions provided by ASRock carefully when performing a BIOS update.
7. ستونزه حل کول
که تاسو له ستونزو سره مخ شئ، نو لاندې عام د ستونزو حل کولو مرحلو ته مراجعه وکړئ:
- ځواک نشته: Ensure all power cables (24-pin ATX, 8-pin CPU) are securely connected. Check your PSU and wall outlet.
- نه ښودنه: Verify that your monitor is connected to the correct graphics output (dedicated GPU or integrated graphics). Reseat your graphics card and RAM modules.
- د سیسټم بې ثباتي: Check CPU and GPU temperatures. Ensure RAM is properly seated and configured (XMP/EXPO settings). Update drivers and BIOS.
- د BIOS فلش بیک: The motherboard features a BIOS Flashback button on the rear I/O panel. This allows you to update the BIOS without a CPU or RAM installed. Refer to the ASRock website for detailed instructions on using this feature.
- CMOS پاک کړئ: If your system fails to boot after changing BIOS settings, you can clear the CMOS to reset BIOS settings to default. Locate the 'CLR CMOS' button or jumper on the motherboard (often near the rear I/O).
8. مشخصات
| فیچر | مشخصات |
|---|---|
| برانډ | ASRock |
| د ماډل نوم | X870 |
| د توکي ماډل شمیره | 90-MXBTE0-A0UAYZ |
| د CPU ساکټ | ساکټ AM5 |
| مطابقت لرونکي پروسیسرونه | د AMD Ryzen 9000، AMD Ryzen 8000، AMD Ryzen 7000 لړۍ |
| د چپسیټ ډول | AMD X870 |
| د RAM حافظې ټیکنالوژي | DDR5 |
| د یادونې سلاټونه | 4 x DDR5 DIMM Slots (Dual Channel, up to 8000+(OC), 256GB max) |
| د ګرافیک محصول | 2 x USB4 Type-C (up to 8K 30Hz), 1 x HDMI 2.1 (up to 4K 120Hz) |
| د PCIe سلاټونه | 2 x PCIe 5.0 x16 (x8/x8), 1 x PCIe 3.0 x16 |
| ذخیره کول | 4 x SATA3, 1 x Ultra M.2 (PCIe Gen3x4), 1 x Hyper M.2 (PCIe Gen4x4), 2 x Blazing M.2 (PCIe Gen5x4) |
| LAN | 10Gbps LAN, 5Gbps LAN |
| بې سیم LAN | 802.11be Wi-Fi 7 + Bluetooth |
| آډیو | ریالټیک ALC4082 7.1 CH HD آډیو کوډیک، نهیمیک آډیو |
| د USB پورټونه (شاته) | 2 x USB 2.0, 6 x USB 3.2 Gen1, 2 x USB 3.2 Gen2, 2 x USB4 Type-C |
| د USB پورټونه (مخکې) | 6 x USB 2.0, 4 x USB 3.2 Gen1, 1 x USB 3.2 Gen2x2 Type-C |
| د فارم فکتور | ATX |
| Power Phase Design | 18+2+1 Power Phase, 80A SPS |
9. د تضمین معلومات
ASRock motherboards typically come with a limited manufacturer's warranty. The duration and terms of the warranty may vary by region and retailer. Please retain your proof of purchase for warranty claims. For detailed warranty information, refer to the official ASRock webسایټ یا د خپل پیرود ځای سره اړیکه ونیسئ.
10. تخنیکي ملاتړ
For technical assistance, driver downloads, BIOS updates, and further product information, please visit the official ASRock support webسایټ:
تاسو کولی شئ د ASRock پیرودونکي خدماتو سره مستقیم د دوی له لارې اړیکه ونیسئ webد شخصي ملاتړ لپاره سایټ.